
Results 7,151 to 7,160 of 20600
 91543Likes
Thread: What are you working on?
 LinkBack URL
 About LinkBacks
-
01-29-2017, 06:58 PM #7151Senior Member


- Join Date
- Dec 2010
- Location
- South Florida
- Posts
- 13,530
Thanked: 3530
At first glance, I thought it was a bear trap.
outback likes this.
-
01-29-2017, 08:36 PM #7152Senior Member

- Join Date
- Aug 2016
- Location
- Earth
- Posts
- 358
Thanked: 98
At least I can date the newspaper to August of 1933.
1933 Yankees roster (pitchers) Lefty Gomez, Wilcy Moore, Herb Pennock
08-27-1933 Yankees at Tigers 3-4 & 12-2Last edited by Panama60; 01-29-2017 at 08:44 PM.
Rog
-
-
01-29-2017, 08:52 PM #7153Senior Member
- Join Date
- Dec 2015
- Location
- North Dakota
- Posts
- 1,455
Thanked: 250
Mike that's like an old double barrel shotgun I bought years ago. I took the butt plate off and behind it found an old hunting license from the 1920's in a through bolt hole. After the gun was fully restored I put the old license back inside plus my license from the previous year........just a little something for the next guy to find after I'm dead. Originally Posted by outback


-
-
01-30-2017, 12:18 AM #7154Senior Member

- Join Date
- Jun 2016
- Location
- NH
- Posts
- 1,924
Thanked: 1363
Mike that's pretty neat finding that behind the mirror, makes a connection to the original owner. Benz, I like your idea of putting your license and the other owner's back in there for the next guy down the road to find some day.
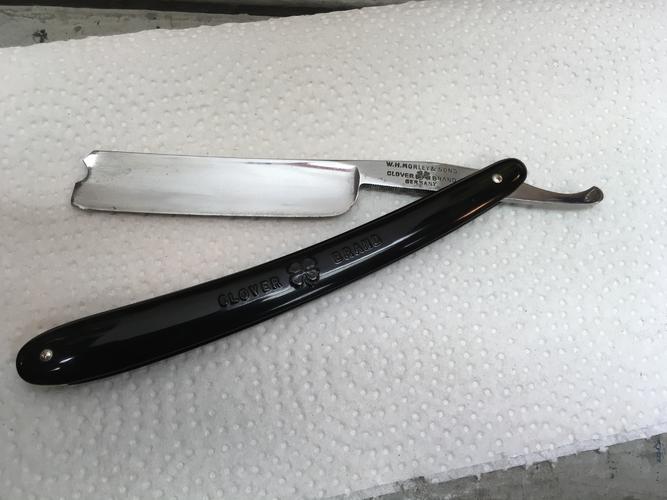
Today I got the Morley put together with the scales off the one with the beat up blade. The fix I did on the chip in the scales filling with epoxy mixed with black scales dust came out ok but next time I will use CA for the mix. Now I just need to hone 'er up.
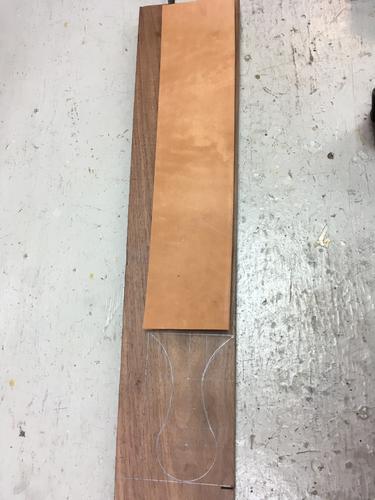
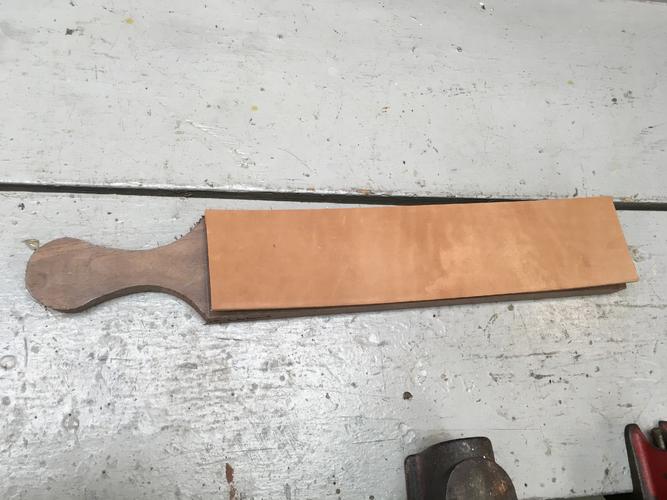
Also, I cut the rest of my horsehide and was able to get a piece for a 20 x 2.5 inch hanging strop and this piece for a paddle strop which measures 3 x 12.5. Got the base rough cut from black walnut and will go ahead and work on smoothing the handle and getting a hole in there to hang it. I have some contact adhesive left over from a countertop I did so I'm thinking that will stick it to the wood alright.
 "Go easy"
-
01-30-2017, 12:29 AM #7155Senior Member


- Join Date
- Mar 2015
- Location
- Akron, Ohio
- Posts
- 12,116
Thanked: 4315
Nice day, Tuzi.
The paddle is sweet.!
Did the epoxy not shine up.?
Happens to me all the time, that's why I sand a slight dish into the epoxy, and fill with CA.
The CA will polish and blend the repair better, while the repair is stronger, being epoxy.Mike
-
-
01-30-2017, 12:44 AM #7156Senior Member
- Join Date
- Mar 2015
- Location
- Akron, Ohio
- Posts
- 12,116
Thanked: 4315
After sanding and painting the shave stand, I took the time to do a couple other projects, that required to be done in the outside shop as well.
Bored out a couple Magna Badger handles for the magnets.

And finally got around to making a magnetic blade holder.

The mirror stand was dry, so back together. May still do something different with the border on the mirror.
Thinking...
 Mike
Mike
-
-
01-30-2017, 12:47 AM #7157Senior Member
- Join Date
- Jun 2016
- Location
- NH
- Posts
- 1,924
Thanked: 1363
Yeah, not as shiny as I hoped but it was small so I left it. Great idea about epoxy first then CA, I'll use that method in the future. Do you leave it clear like a top coat or do you mix the CA with dust too? Originally Posted by outback
I'm also blueing the tang on the Hess, I went ahead and got the little bottle of Super Blue. I did two coats so far and getting a grey color, not as dark as I wanted but not too bad either. I got a third coat on it now. Cleaned with denatured alcohol, when that dried put blue on there, when that dried coated with oil and left it for a day. Wiped away the oil and repeated. After the second coat I wiped the oil, and cleaned with denatured alcohol. It was pretty black but like a layer of soot on there. Cleaned that off with 0000 steel wool and found it to be not as dark as I thought it would be."Go easy"
-
01-30-2017, 12:51 AM #7158Giveaway Guy

- Join Date
- Nov 2016
- Location
- Reading MI
- Posts
- 4,784
Thanked: 1586
Awesome on the strop tuzi and way to go on the razor as well. I like you guys doing this so I can pick up on what to do and not do.
Mike was way cool to see what you found behind the mirror and it looks good all out back together. Great idea on the magnet holder too
Benz dig the idea of how you added your license back in with the past owners after the restorationLook sharp and smell nice for the ladies.~~~Benz
Imperfection is beauty, madness is genius and it's better to be absolutely ridiculous than absolutely boring ― Marilyn Monroe
-
01-30-2017, 01:11 AM #7159Senior Member
- Join Date
- Mar 2015
- Location
- Akron, Ohio
- Posts
- 12,116
Thanked: 4315
I do the repair with the epoxy mix, then sand to desired shape, as you did. But then sand a veeery slight dished out area, a bit larger than the repair area, apply a sufficient amount of CA to fill the dish, let cure, then sand it smooth, and polish. Originally Posted by xiaotuzi
Like clear coating over the repair.!!
A TIP..!!
Sand the area larger than where you'll apply the CA, with your finishing grit sandpaper, then sand the dish into the epoxy. This will ensure proper blending of the CA to the scales, and no repair line once polished.
This could get lengthy, and technical..
But after many years of gel coat repairs, I know a thing or two on blending repairs.
Hope this helps
If you need in depth info, shoot me a PMLast edited by outback; 01-30-2017 at 01:14 AM.
Mike
-
The Following 4 Users Say Thank You to outback For This Useful Post:
Dieseld (01-30-2017), ejmolitor37 (01-30-2017), Geezer (01-30-2017), xiaotuzi (01-30-2017)
-
01-30-2017, 01:18 AM #7160Senior Member
- Join Date
- Jun 2016
- Location
- NH
- Posts
- 1,924
Thanked: 1363
Thanks Mike! Sometimes I screen shot useful tips like that and save them to a labeled folder like "scales repair", a bit easier for me to find a month or so from now when I need it again and have to go back searching through miles of "what are you working on" thread. Anybody know is there a way to bookmark posts within threads?
"Go easy"


 Reply With Quote