Results 3,091 to 3,100 of 4688
Thread: The Butchered Blade
-
12-08-2015, 02:44 AM #3091

Do some research on Glens articles he did mention some where. From all the reading I did it will remove the 600 marks it just takes some time.
You also mentioned need to use pressure to get into the hollows. That just means you wheels are too big. 4 inch wheels should solve that.
I did a 6/8 the other night. 2 actually and went from 600 to emery without issue. I got everything from casswells from 80 greaseless right through to the blue compound.My wife calls me......... Can you just use Ed
-
12-08-2015, 02:58 AM #3092
-
12-08-2015, 03:42 AM #3093Senior Member


- Join Date
- Dec 2013
- Location
- Virginia
- Posts
- 1,516
Thanked: 237
I'm using 4 inch wheels. The 5/8 blade doesn't fit into the 4 inch wheel without pressure. Using light pressure only contacts near the spine and edge, not in the middle. I had a lot better luck with it today. I found that letting the 600 grit wear off helps to make the scratches not as deep going into the emery. I need to place another order with caswell soon, right now I'm only using 600. Limits my ability to take out puts and deep staining.
-
12-08-2015, 03:46 AM #3094

A way to quickly burn some buffing wheels down to three, 2 inch and increments, Please!
Have a need to know! Rub them on the sidewalk?
Last edited by sharptonn; 12-08-2015 at 03:48 AM.
"Don't be stubborn. You are missing out."
I rest my case.
-
12-08-2015, 08:55 AM #3095

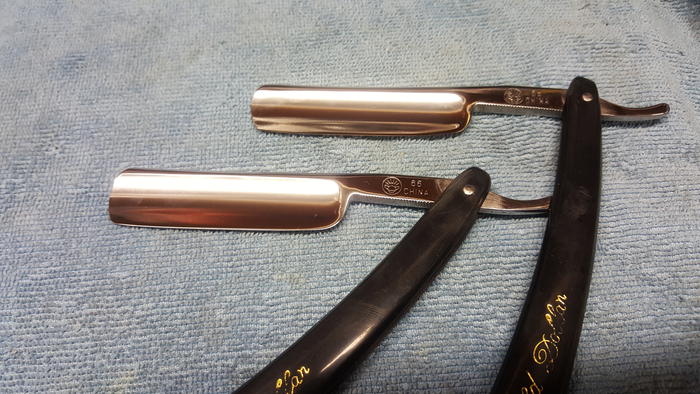
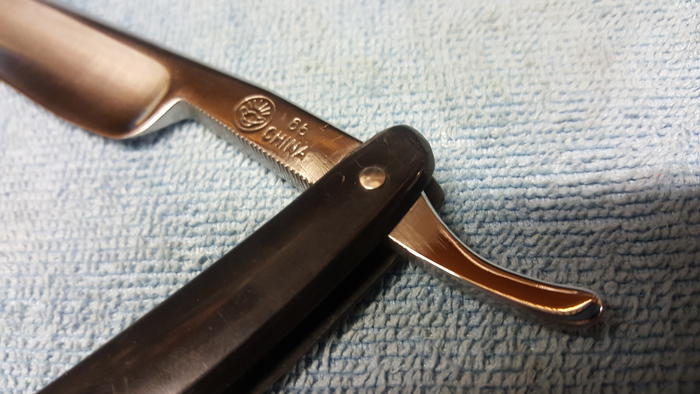
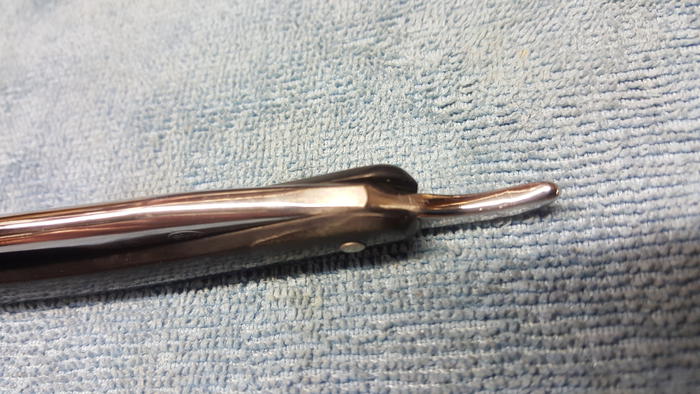
Were a couple gds as still learning and dont care if I stuff a 5 dollar razor. Sat on the 80 a while softening the crappie grinding. Left the scales on though so they are a little chewed up around the pin. Still very shiny gds with shoulder corrected looking better than when I got them. Will post some pics from you later although will only phone pics.
My wife calls me......... Can you just use Ed
-
12-08-2015, 12:02 PM #3096


Here you go. You can see the original finish around the scales and pin area on the 2nd pic and on the third how badly shaped and angular the spine was. Spend a while blending it all in the spine toe and shoulder areas while trying not to remove all the grind marks and nice line along the edge of the blade and spine. Took a while but I'm happy with the results and not as tedious as with the dremel.
Will probably use a blend of techniques depending on the razor but want to know each aspect from start to finish by itself as well. These had both dremel and buffer work(although dremel was only for the shoulder and heel correction ). Now I just need more time and more razors.My wife calls me......... Can you just use Ed
-
12-08-2015, 04:38 PM #3097

Once you move off the grease less you need to consider what type of mop you use - for the first grade of compound you are best with a sisal mop - this may help with polishing out the 600 marks quicker. However beware because you can still build up heat pretty quickly .
By the way I didn't try and reference to colours of compounds because they can differ by manufacturer. Over here I use a product called Mazerna where grey is the most aggressive then green, buff, pink etc.My service is good, fast and cheap. Select any two and discount the third.
-
12-08-2015, 07:27 PM #3098
-
12-08-2015, 07:28 PM #3099
 Framebacks
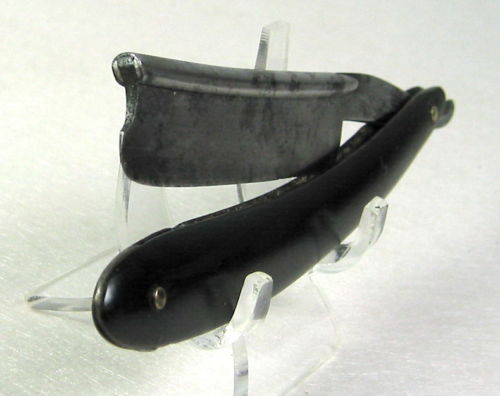
I cant stop looking at this razor. It kills me ,the fact that its all there hone ware free but so pitted.
I have one that has excessive hone ware, they feel amazing to hold in the hand.
If I could live with pitting I'd buy this one.. ahhhh ..life is cruel
![Name: $_57[5].jpg
Views: 145
Size: 22.7 KB](https://sharprazorpalace.com/attachments/workshop/221174d1449602903-butchered-blade-_57-5-.jpg)
![Name: $_57[6].jpg
Views: 135
Size: 23.6 KB](https://sharprazorpalace.com/attachments/workshop/221175d1449602904-butchered-blade-_57-6-.jpg)
![Name: $_57[9].jpg
Views: 135
Size: 11.7 KB](https://sharprazorpalace.com/attachments/workshop/221176d1449602905-butchered-blade-_57-9-.jpg)

-
12-08-2015, 07:37 PM #3100

[QUOTE=JOB15;1574707]I cant stop looking at this razor. It kills me ,the fact that its all there hone ware free but so pitted.
I have one that has excessive hone ware, they feel amazing to hold in the hand.
If I could live with pitting I'd buy this one.. ahhhh ..life is cruel
JOB15, I've seen worst. With a little TLC, that one could be looking pretty nice!
-
The Following User Says Thank You to engine46 For This Useful Post:
JOB15 (12-08-2015)


 13682Likes
 LinkBack URL
 About LinkBacks


 Reply With Quote


