
Results 3,371 to 3,380 of 4688
 13682Likes
Thread: The Butchered Blade
 LinkBack URL
 About LinkBacks
-
01-02-2016, 01:59 AM #3371Senior Member


- Join Date
- Mar 2015
- Location
- Akron, Ohio
- Posts
- 11,995
Thanked: 4306
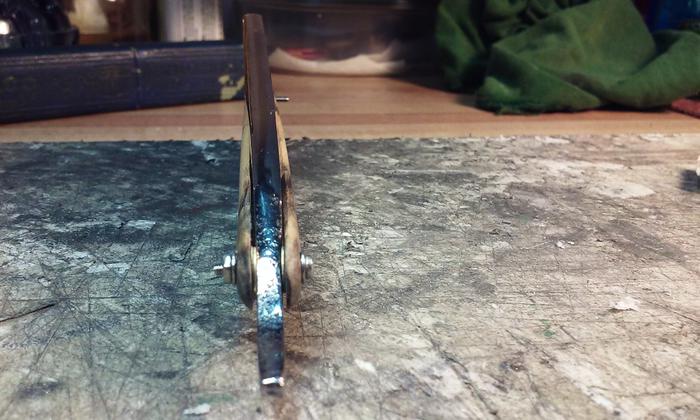
The scales are sanded , wedge rough shaped , and blade shimed for a perfect fit. I just need to shape the wedge to the scales, and apply a finish. I'll put the blade in a set of plastic scales and hone out the chips and set bevel, while the finish dries.
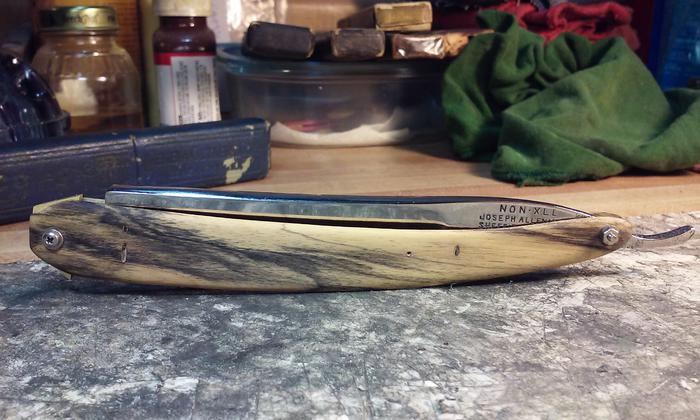
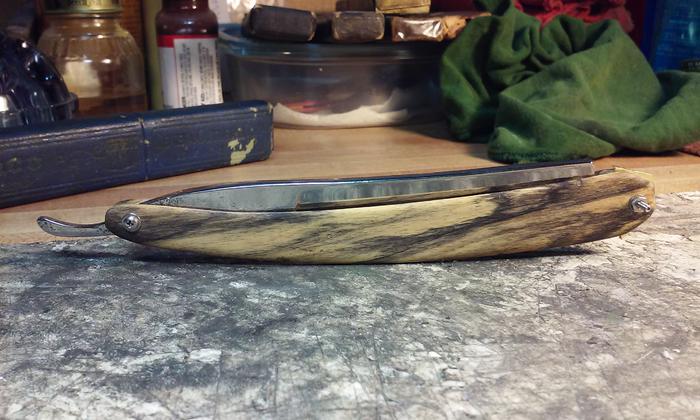
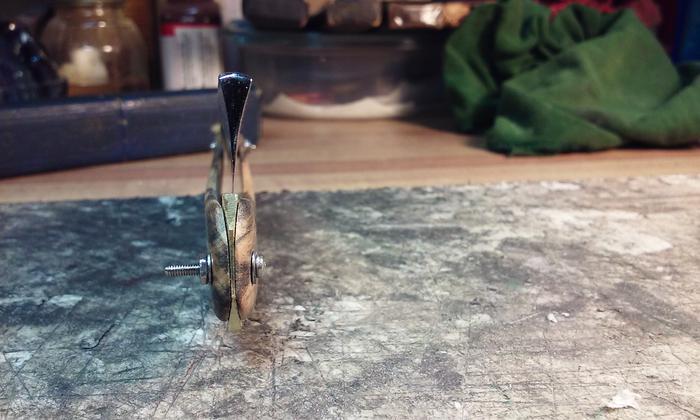
In this pic, you can see how crazy (bent,twisted) the blade is.
 Mike
Mike
-
The Following User Says Thank You to outback For This Useful Post:
Geezer (01-02-2016)
-
01-02-2016, 02:25 AM #3372
 Originally Posted by outback

Looks good Mike!
-
The Following User Says Thank You to engine46 For This Useful Post:
outback (01-02-2016)
-
01-02-2016, 11:26 AM #3373www.edge-dynamics.com


- Join Date
- Feb 2013
- Location
- London
- Posts
- 3,066
Thanked: 512
[QUOTE=outback;1583566]The scales are sanded , wedge rough shaped , and blade shimed for a perfect fit. I just need to shape the wedge to the scales, and apply a finish. I'll put the blade in a set of plastic scales and hone out the chips and set bevel, while the finish dries.
In this pic, you can see how crazy (bent,twisted) the blade is.
Looks like its gonna be a nice shaver . v nice.
-
The Following User Says Thank You to JOB15 For This Useful Post:
outback (01-02-2016)
-
01-02-2016, 11:43 AM #3374Senior Member

- Join Date
- Apr 2014
- Location
- Goiânia, Brasil
- Posts
- 530
Thanked: 159
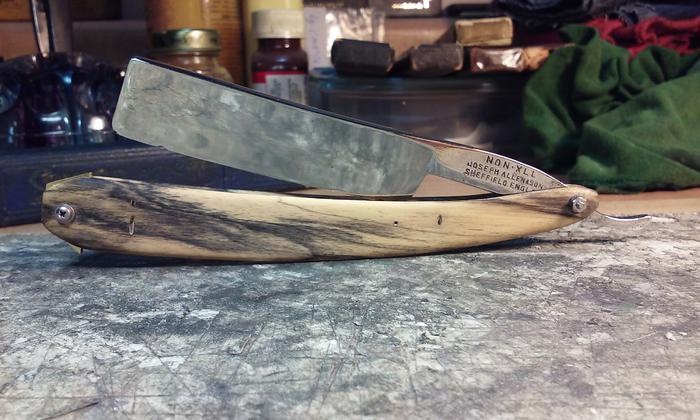
Mike, seems to me your scales have tiny bug holes on it (I'm on my lousy phone). You plano fill them with something? Originally Posted by outback
I "lathe" some brass little pins some time ago on the dremel and glued them on the bug holes of an old wood box, sanded to make them flush and applied the lacquer. I really loved the effect of the tiny golden pins on the box, instead of the holes.RezDog likes this.
-
01-02-2016, 11:44 AM #3375Senior Member
- Join Date
- Apr 2014
- Location
- Goiânia, Brasil
- Posts
- 530
Thanked: 159
Lovely wood, btw.
-
The Following User Says Thank You to Matheus For This Useful Post:
outback (01-02-2016)
-
01-02-2016, 01:41 PM #3376Senior Member
- Join Date
- Mar 2015
- Location
- Akron, Ohio
- Posts
- 11,995
Thanked: 4306
Yep...worm holes , filled them with CA, sanded them smooth, then apply the finish. The wood is black n white ebony. [emoji6] Originally Posted by Matheus
-
01-02-2016, 02:13 PM #3377Str8Faced Gent.


- Join Date
- Aug 2013
- Location
- Orangeville, Ontario
- Posts
- 8,396
- Blog Entries
- 1
Thanked: 4200
Great job on the skins Mike!
Going to be a pretty restore, and a fine shaver."Depression is just anger,, without the enthusiasm."
Steven Wright
https://mobro.co/michaelbolton65?mc=5
-
The Following User Says Thank You to MikeB52 For This Useful Post:
outback (01-02-2016)
-
01-02-2016, 02:23 PM #3378Str8Faced Gent.
- Join Date
- Aug 2013
- Location
- Orangeville, Ontario
- Posts
- 8,396
- Blog Entries
- 1
Thanked: 4200
Great stuff for bluing touch ups. A fair number of write ups on use as well. Originally Posted by JOB15
Keys are clean, degreased completely blade. Warm the blade some to improve etching strength pre application. Nail polish to mask the non blued areas, (thanks for the tip Richard). And some 000 steel wool to polish post app.
Repeat as required.
Good luck and enjoy!sharptonn likes this."Depression is just anger,, without the enthusiasm."
Steven Wright
https://mobro.co/michaelbolton65?mc=5
-
01-02-2016, 03:29 PM #3379Senior Member
- Join Date
- Mar 2015
- Location
- Akron, Ohio
- Posts
- 11,995
Thanked: 4306
Biggest thing for me and blueing. Originally Posted by MikeB52
If you want it black... Coat with oil and let it sit after application, no rubbing for awhile. I also like to see a bit of light rust coming thru before I oil it down. YMMVMike
-
The Following User Says Thank You to outback For This Useful Post:
sharptonn (01-03-2016)
-
01-02-2016, 03:55 PM #3380Razor Vulture

- Join Date
- Oct 2010
- Location
- Lone Star State
- Posts
- 25,897
Thanked: 8591
Yes. I steel-wooled the tang and spine, wipe good with alcohol, really good, laid it on a warm radiator for a bit.
Apply the blue well with a q-tip, holding it by the taped blade. I can do a close job without tape or any masking.
Let it dry and work for a minute, rinse well with water to kill the reaction and dry it off with a clean paper towel and buff
with a bit of dry 000 steel wool. I then repeat 3 more times.
Then slather the blade with WD40 and a bit more steel wool, wipe again, reoil, and let it sit for a day.
Outback is right that letting it sit will make for a darker job.
I will be headed to the shop after a bit and will post a pic before I attempt the silver rubnbuff in the stamps.
The backside stamp is super-shallow. It may not work back there, but should in the front stamp which is deeper."Don't be stubborn. You are missing out."
I rest my case.


 Reply With Quote

