
Results 12,461 to 12,470 of 20573
 91473Likes
Thread: What are you working on?
 LinkBack URL
 About LinkBacks
-
03-02-2018, 11:54 AM #12461Senior Member


- Join Date
- Mar 2015
- Location
- Akron, Ohio
- Posts
- 12,095
Thanked: 4312 I too like the bubbinga, it really came to life when the Tru oil went on.
 Originally Posted by Gasman

 Mike
Mike
-
03-02-2018, 12:19 PM #12462Senior Member

- Join Date
- Aug 2015
- Location
- Montreal
- Posts
- 853
Thanked: 128
That is an increadible transformation!
-
03-02-2018, 12:21 PM #12463Senior Member
- Join Date
- Dec 2016
- Location
- Iasi RO
- Posts
- 105
Thanked: 23
Very nice.
sharptonn likes this.
-
03-02-2018, 01:17 PM #12464Skeptical Member


- Join Date
- Nov 2016
- Location
- Colorado Springs
- Posts
- 10,548
Thanked: 2194
Oh yeah! Love the look of those. Nice Mike.
It's just Sharpening, right?
Jerry...
-
03-03-2018, 05:09 AM #12465Senior Member

- Join Date
- Feb 2016
- Location
- San Antonio, TX
- Posts
- 1,839
Thanked: 428
Very nice Mike! You always get such great results! Originally Posted by outback
Semper Fi !
John
-
The Following User Says Thank You to Johntoad57 For This Useful Post:
outback (03-03-2018)
-
03-04-2018, 12:34 AM #12466Senior Member
- Join Date
- Mar 2015
- Location
- Akron, Ohio
- Posts
- 12,095
Thanked: 4312
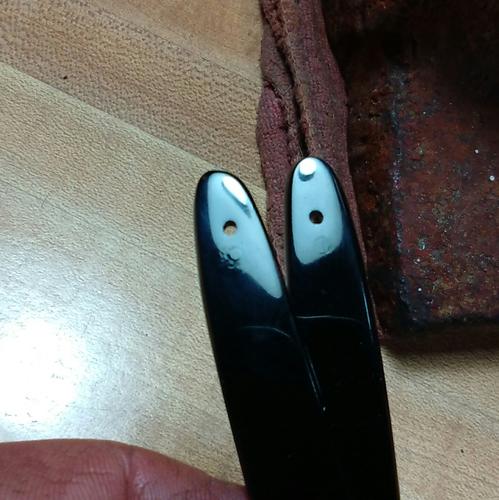
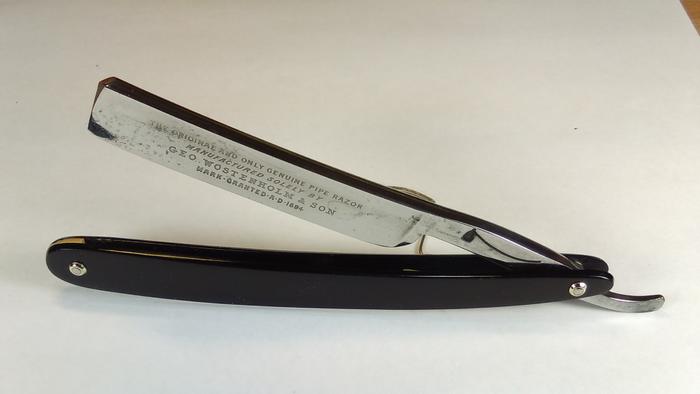
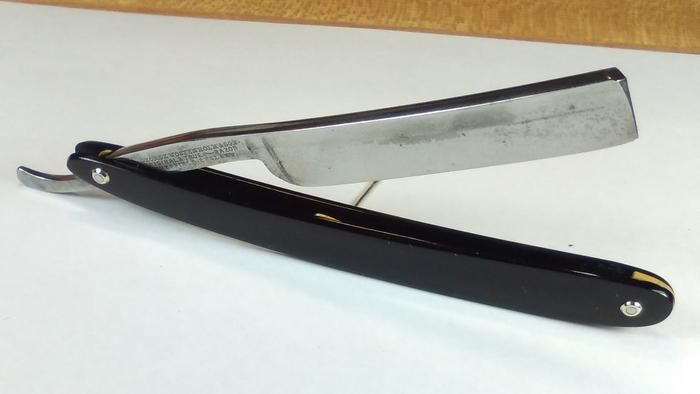
Started this one Friday evening. Sorry, no before pics, blade was all but clean, just needed the tang stamps, and blade etch blued again, and a bit of polish and a set of scales.
The scales are celluloid, from a junk razor. I filled the original pivot pin holes with sanding dust and CA, from removing some deep scratches in the scales. Then redrilled them to accommodate the blade, and polished them to a high shine. Pinned up with some of ejKemney's collars, that a member sent me (Sharpton), and some silver nickle rod, from another member. (Engine46)
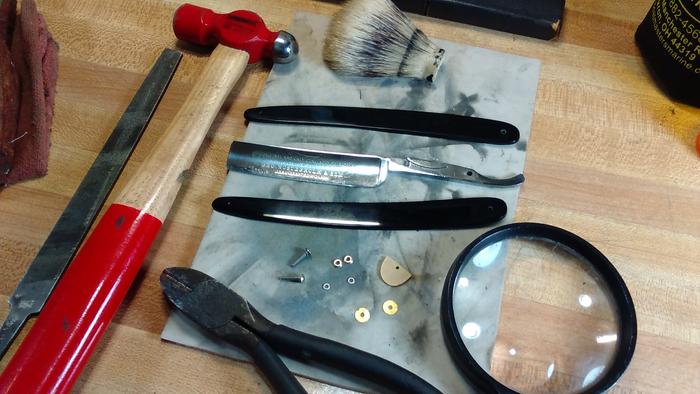
This wwas the first time I've used the new mock up screws, and their the sheeet.!!! They work great with a troubled tang.
This blade hit the backside scale, while closing. So I opened up the pin holes a bit more, so I could shift the scales for a better fit of the blade. I then installed the wedge, new pin and collars, and lightly pinned it. Then installed the blade and thrust bearings with the mock up screws, shifted the scales till the blade was lined up, and tightened the mock up screws so nothing could move, and fully tightened the wedge pin. Then applied Toms taping of the scales, and removed the mock up screw from the pivot hole and slid a pin in, and peened er down.
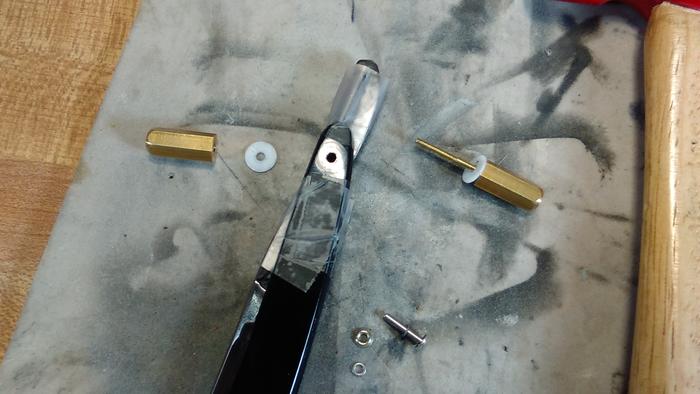
Works beautifully, swimmingly good, a perfect pinning.!!Mike
-
-
03-04-2018, 12:40 AM #12467'with that said'

- Join Date
- Aug 2010
- Location
- Walla Walla in WA State USA
- Posts
- 11,247
Thanked: 4237
Looks Great Mike! That superglue trick really has come into it's own.
Now if Sharptonn will post were to get those cool mock up screws so everyone can have some
 Our house is as Neil left it- an Aladdins cave of 'stuff'.
Kim X
-
03-04-2018, 12:46 AM #12468
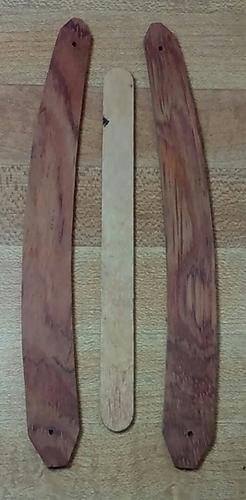
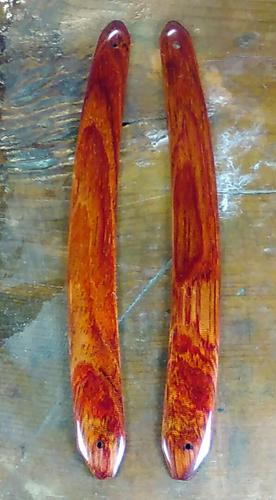
Otter/ Gunstock scaled fuller'd Torrey's
As I get older things take a while longer
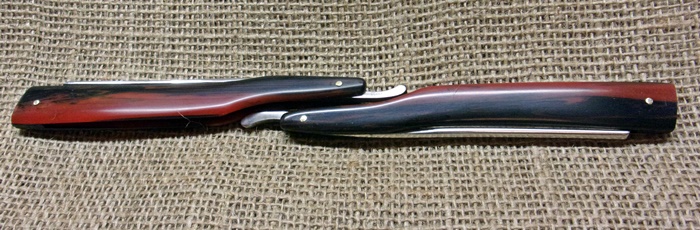
Here are a couple that I finally completed. To the hones next!
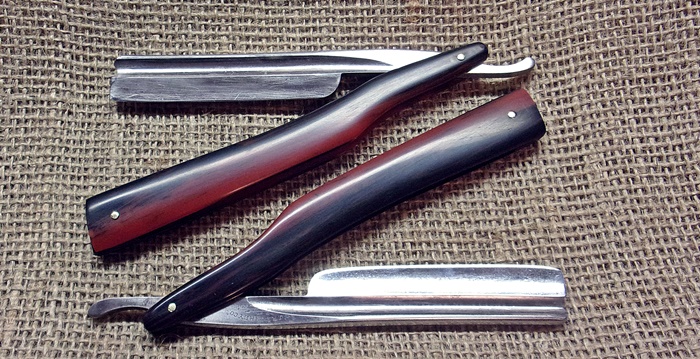
FFFF Pumice hand polish finish, Final rubbing after honing. I like the "luster" of that finish since youth doing furniture repair/Refinishing with my Dad. It improves slowly with skin oils and use!The blades will also get a further evened pumice or emery finish.
Thanks for looking!
~Richard
Be yourself; everyone else is already taken.
- Oscar WildeBe yourself; everyone else is already taken.
- Oscar Wilde
-
-
03-04-2018, 01:00 AM #12469Razor Vulture

- Join Date
- Oct 2010
- Location
- Lone Star State
- Posts
- 26,144
Thanked: 8616
Here go, Roy! https://www.ebay.com/itm/Miniature-s...cAAOSwsI9aEd3~ Originally Posted by cudarunner
This gent has some cool collars and really nice, thin spacers as well.
Yep. In Romania. Cheap shipping and the stuff comes!
Nice to deal with.
-
-
03-04-2018, 02:30 AM #12470Razor Vulture
- Join Date
- Oct 2010
- Location
- Lone Star State
- Posts
- 26,144
Thanked: 8616
Those razors look awesome, Geezer!
 Otter? Tell me about that!


 Reply With Quote