
Results 13,921 to 13,930 of 20602
 91550Likes
Thread: What are you working on?
 LinkBack URL
 About LinkBacks
-
08-27-2018, 12:13 AM #13921Senior Member


- Join Date
- Feb 2013
- Location
- Haida Gwaii, British Columbia, Canada
- Posts
- 14,457
Thanked: 4830
MikeT
Your band saw blad has a lot to do with drift as well.
Every blade has some drift, and that is part of what causes the waver in the cut. If you take a board of similar thickness as to what you want to rip, and draw a straight line down the board, then start to forehand rip it. As you move the tail back and forth to get the blade to rip either straight down the line or parallel to it, it will begin to rip straight at some angle to the blade. Stop and stop the saw. Once the saw has stopped mark the edge of the board on the table top. This reference line is the angle your fence needs to be set at in order to get a nice true cut. It is why bandsaw rip fences have an adjustment for angle. Once you have your angle and width set on your fence, test cut a scrap or two to make sure it is adjusted correctly. I’m sure there are YouTube videos demonstrating this, and likely easier to follow. I will check it out and if I find anything that is just that I will edit and post a link.It's not what you know, it's who you take fishing!
-
-
08-27-2018, 12:15 AM #13922Senior Member

- Join Date
- Jun 2015
- Location
- South Carolina
- Posts
- 1,838
Thanked: 516
Oh man! Nice work!
Weekend set?!
 outback likes this.You must unlearn what you have learned.
Yoda
-
The Following User Says Thank You to MikeT For This Useful Post:
outback (08-27-2018)
-
08-27-2018, 12:17 AM #13923Senior Member
- Join Date
- Feb 2013
- Location
- Haida Gwaii, British Columbia, Canada
- Posts
- 14,457
Thanked: 4830
Nice work MGM.
outback likes this.It's not what you know, it's who you take fishing!
-
The Following User Says Thank You to RezDog For This Useful Post:
outback (08-27-2018)
-
08-27-2018, 12:26 AM #13924Senior Member
- Join Date
- Jun 2015
- Location
- South Carolina
- Posts
- 1,838
Thanked: 516
Thank you for the tips, much appreciated! Originally Posted by RezDog

It will take a while to get all of the power tools.
The workshop is coming along slowly but steady. So far I have a drill press and tablesaw.
But have not really built out the space as family distracts.. hehe You must unlearn what you have learned.
Yoda
-
08-27-2018, 07:58 AM #13925Senior Member
- Join Date
- Apr 2018
- Location
- Vienna Austria
- Posts
- 337
Thanked: 98
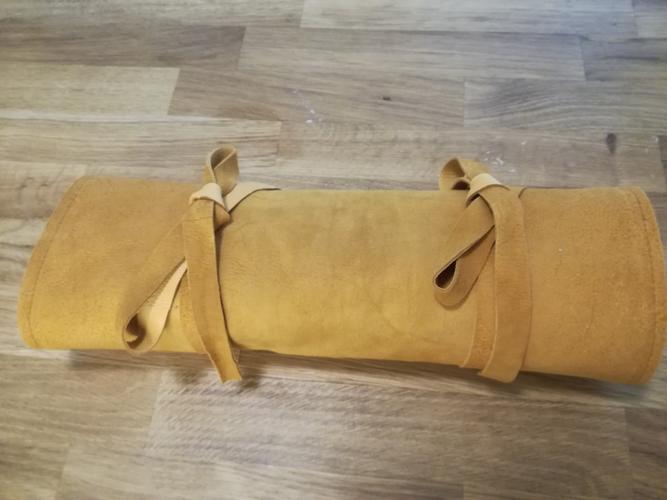
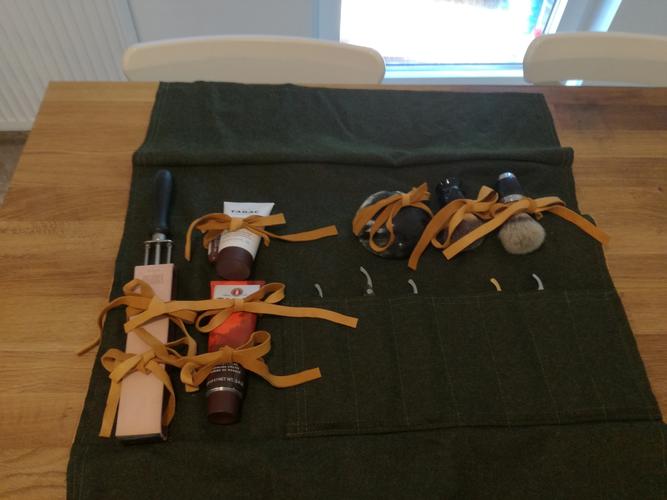
Well, the new razor roll is completed. The leather turned out to yield more than its apparent size would show. Lined it with a overly nice wool that Ill be using the rest of for a quick roll set for a friend getting into straight shaving. Over-all I wanted the design to in general to be fairly modular. So it can hold seven razors, a paddle strop, cream, brush, bowl, balm or A/S, and other stuff. Tried to show a set up with really simple travel stuff: brush, paddle, and can cream; then more extensive (for like my coming six-week trip): Paddle, Cream, AS, Styptic pencil, Horn Bowl, Two brushes. The set up of the ties really makes any combination of equipment possible. Thanks for looking.
Rolled Up:
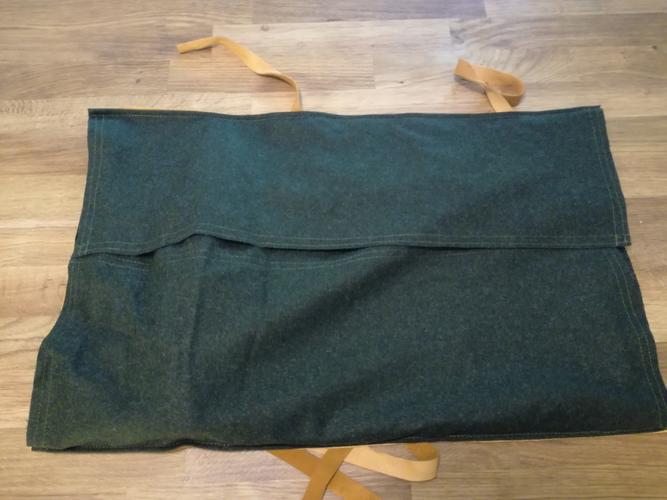
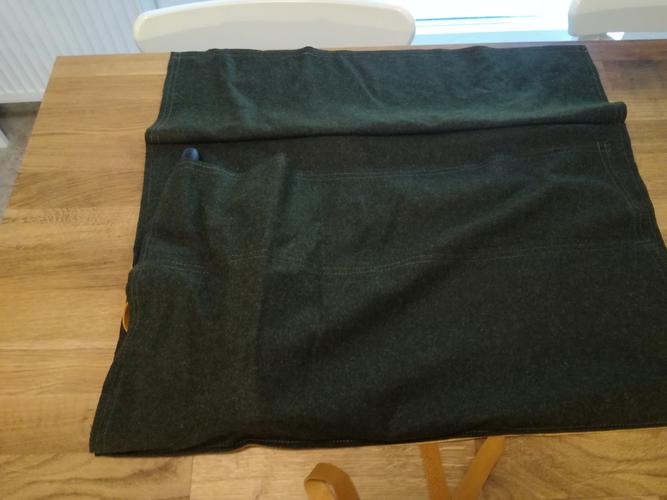
Did a double flap piece so there was plenty of material for laying out items while on road:
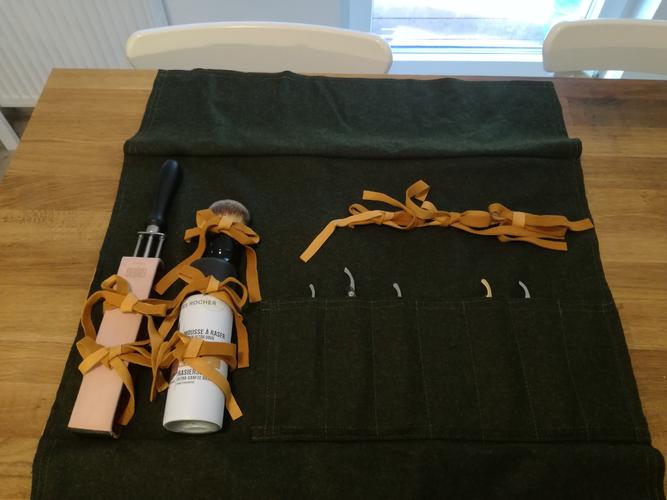
And finally fully open with a "Simple" set-up and a "More Complex" set-up:
-
-
08-27-2018, 10:37 AM #13926Senior Member
- Join Date
- Jun 2015
- Location
- South Carolina
- Posts
- 1,838
Thanked: 516
Thanks for sharing!
I like how it's larger to hold plenty of gear. Did the stitching take a long time?
Did you sew it by hand or machine? Very cool to see it from skin to product
You must unlearn what you have learned.
Yoda
-
08-27-2018, 10:47 AM #13927Senior Member
- Join Date
- Apr 2018
- Location
- Vienna Austria
- Posts
- 337
Thanked: 98
Once the pattern had been decided it was about a day of work from raw material to finished product. The wool was stitched and sewn by machine and then it was attached to the skin by machine with a heavy needle and double bobbin sow the thread matched on both sides, again by machine. Attaching to the skin was a real bear and took forever. All the tie straps were done by hand as the machine couldn’t get through multiple layers of skin and wool. Most likely a talented sewer could do the whole project in a couple hours I am not terribly good at sewing. Originally Posted by MikeT
-
08-27-2018, 11:20 AM #13928Senior Member
- Join Date
- Jun 2015
- Location
- South Carolina
- Posts
- 1,838
Thanked: 516
Sewing machines are not so easy
I like to dabble in many different things, learned how to use a sewing machine and realized that there are levels of challenges for every hobby.
Looks great!You must unlearn what you have learned.
Yoda
-
08-27-2018, 04:37 PM #13929Skeptical Member


- Join Date
- Nov 2016
- Location
- Colorado Springs
- Posts
- 10,559
Thanked: 2197
I found the sewing machine an easy tool to use. Just me i guess. But they have limits. When trying to sew thru leather it takes a strong machine and needle. The one i got for the wife is made for heavy materials, but i still found its limit quickly. Two layers of leather is do-able, but three? Forget about it!
Nice job on the roll-up. A great way to keep all the shaving gear/bathroom gear together.It's just Sharpening, right?
Jerry...
-
08-31-2018, 05:51 AM #13930Skeptical Member
- Join Date
- Nov 2016
- Location
- Colorado Springs
- Posts
- 10,559
Thanked: 2197
My project for tonight. The Bench Strop made out of stuff I have laying around...
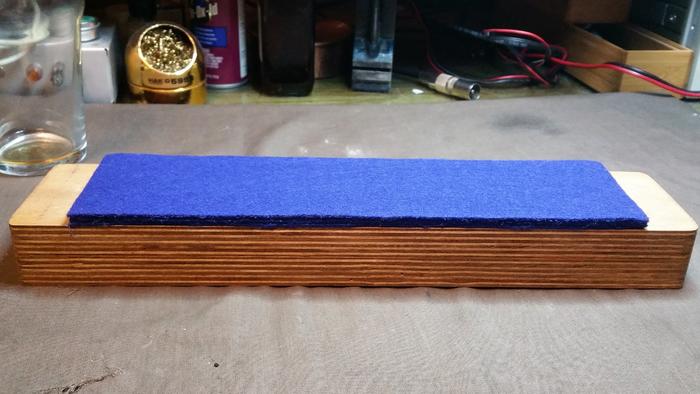
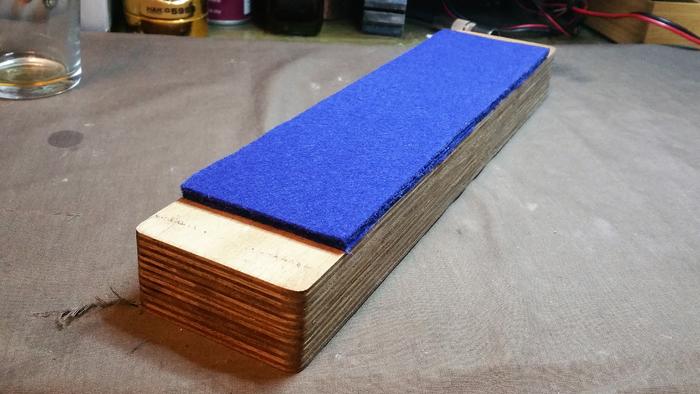
I plan on attaching this piece of Red Latigo to it somehow. Not to clear on that part yet.
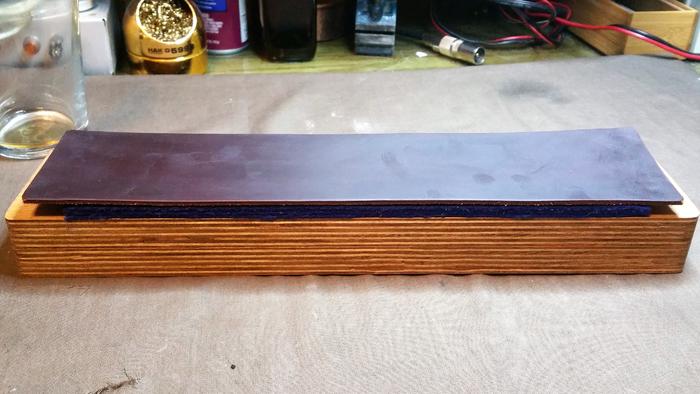
Blue Felt for a backer for the leather to give it a little give. I have some strop hardware/screws so thinking I might put those all the way thru the wood and pull the leather down just a bit on each end but not a lot. Also cleaned up one razor, but it didn't come out very nice. Might be a bit beyond my steel wool. The blade face is stamped so I don't want to sand it very much. Guess we will see in the future.
Another thing is I'm putting the first coats of Tru-oil on the 5 sets of scales I recently made. The Bocatewood is oily so it's arguing with me. But I will win in the end. It might just need to go on slower and lighter.
BTW, The four layers of felt you see are glued on with spray glue. Leaves it flexible with no hard spots.Last edited by Gasman; 08-31-2018 at 05:53 AM.
It's just Sharpening, right?
Jerry...
-


 Reply With Quote