
Results 16,551 to 16,560 of 20602
 91550Likes
Thread: What are you working on?
 LinkBack URL
 About LinkBacks
-
06-28-2019, 12:49 PM #16551Senior Member


- Join Date
- May 2010
- Location
- Upstate South Carolina
- Posts
- 3,308
Thanked: 987 What Shaun said-If there's rust on the tail, there's definitely rust around the pivot. And the buffer is also called a missile launcher in my shop. I have several of them-all it takes is one careless move, especially on the 3500 rpm jobs!
 Originally Posted by RezDog
 There are many roads to sharp.
-
06-28-2019, 01:52 PM #16552Senior Member

- Join Date
- Dec 2018
- Location
- Gainesville, FL
- Posts
- 6,872
Thanked: 683
Yes it can be. That's good advice. Nothing like something sharp enough to shave with flying through the air. Oh, fortunately, or unfortunately however you want to look at it, I'm already hip to that little tidbitt of information but the other thing that wasn't mentioned is the fact that it can warp a blade if you lean too hard and too long against one spot. Originally Posted by ScoutHikerDad
ScoutHikerDad and jfk742 like this.Iron by iron is sharpened, And a man sharpens the face of his friend. PR 27:17
-
06-28-2019, 02:06 PM #16553Senior Member

- Join Date
- Jun 2015
- Location
- South Carolina
- Posts
- 1,838
Thanked: 516
Just saw this one, been busy but try to skim through. Originally Posted by ScoutHikerDad
Ouch! That's a tough break, you took it well.
With regard to woods that snap easy, I apply some of the tricks I've learned in carpentry.
So there are a few things.. You can soak the wood, then clamp it to a block with the correct curve. Then let it dry thoroughly. After that you laminate it to your backer (whichever you use), and let the adhesive dry after clamping it again to the curved block.
It also helps to put in some pins at key points, BUT make sure to strengthen the holes you drill with thin CA, drill again the same hole, and pin it (or glue a snug fitting pin).
This helps prevent lateral movement.
It's not perfect, as the opening and closing of the scale will flex the scales away from the resting position that you have "created" with this technique.
Just a suggestion. This may be necessary as the wavy grain of various woods make pin to pin alignment less than perfect.
Good luck!Last edited by MikeT; 06-28-2019 at 02:09 PM.
You must unlearn what you have learned.
Yoda
-
The Following User Says Thank You to MikeT For This Useful Post:
ScoutHikerDad (06-28-2019)
-
06-30-2019, 06:59 PM #16554Senior Member


- Join Date
- Feb 2013
- Location
- Haida Gwaii, British Columbia, Canada
- Posts
- 14,457
Thanked: 4830

I got the wade and butcher all sanded out, now for a trip through the vibrating polisher to take the sheen down to a nice semigloss. I will likely reuse the original scales that are honey horn with integral wedge.It's not what you know, it's who you take fishing!
-
06-30-2019, 11:33 PM #16555Senior Member

- Join Date
- Mar 2011
- Location
- Ohio
- Posts
- 2,786
Thanked: 421
Had one of those "learning experiences" today. Haven't had one in a while, so I was probably due. Was working on cleaning up this Geneva Cutlery. Nothing big, just a quick clean and light sanding to get rid of some of the light pitting and tarnish.
Unfortunately I got a little heavy handed when repinning the scales.

Now to figure out what kind of new scales to put on it.
-
07-01-2019, 01:15 AM #16556Senior Member
- Join Date
- May 2010
- Location
- Upstate South Carolina
- Posts
- 3,308
Thanked: 987
I'm glad someone else on here is doing some "learning" for a change. I'm sure that will come out great, Theseus. And Shaun, that WB is showing promise-I look forward to the finished product. Originally Posted by Theseus
There are many roads to sharp.
-
07-01-2019, 03:18 AM #16557Senior Member
- Join Date
- Feb 2013
- Location
- Haida Gwaii, British Columbia, Canada
- Posts
- 14,457
Thanked: 4830
That’s how I started making scales. I was just tightening up a few pivots and you know the rest of the story.
It's not what you know, it's who you take fishing!
-
07-01-2019, 06:52 PM #16558Senior Member

- Join Date
- Feb 2019
- Location
- Salida, CA
- Posts
- 600
Thanked: 94
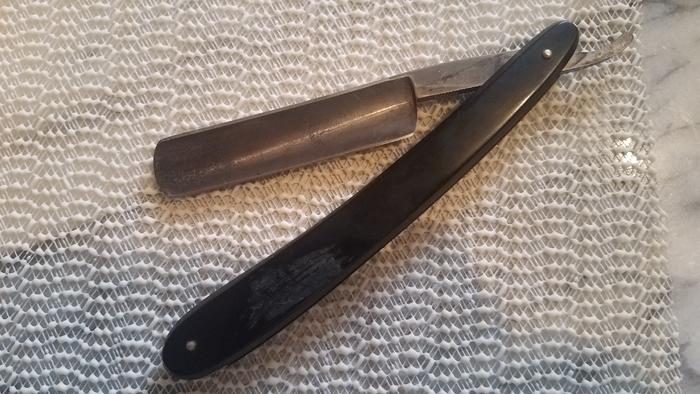
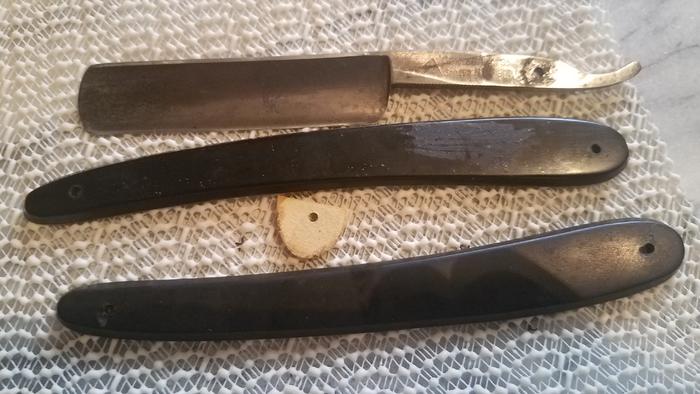
Got back to my J. Cockhill British military razor and got two back scales finished for the two fronts I made (the plan was one front and one back, but you know
 )
)
I'm planning on using the set with the least brown streaks (the ones closest to the blade). I'll use the other set for a future project. Got them soaking in some oil for a couple of days and will be pinning them up soon.

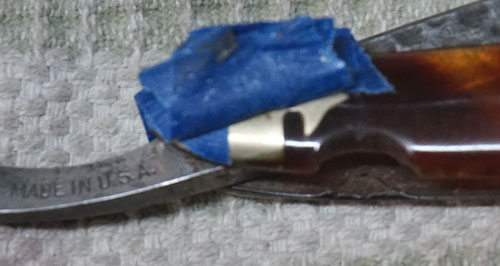
While I'm waiting I'm going to start on a Robson ShurEdge 36-M-400 "the blade that fits your face" I picked up a while ago. Couple of questions before I take it apart (all I've done currently is file the pins flat for drilling).
1. I haven't messed with bolsters before. Would polishing them in place before disassembly be the best approach?
2. The scales have a melted spot just below the pivot bolster. I think an epoxy fill would work, but won't match the color(s) in the scales. I'm considering leaving it the way it is as it looks to still be structurally sound. Any thoughts?
3. I think the tang and possibly the blade were blued at some point. Am I mistaken? Re-bluing is not a problem, just want to know if that's what was original to the razor.
4. The scales have a slight warp and pinch into the blade at the wedge end. They actually close centered and don't rub. Should I try and straighten them a bit or leave it alone?
The front

The melted spot
Closer view of tang
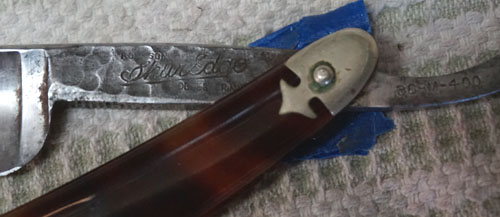
Scale warp

Last edited by JellyJar; 07-02-2019 at 05:08 PM. Reason: Correct model/manufacture - bifocals and poor lighting
O'Toole's commentary on Murphy's Law: Murphy was an optimist.
-
07-01-2019, 07:17 PM #16559Senior Member
- Join Date
- Feb 2013
- Location
- Haida Gwaii, British Columbia, Canada
- Posts
- 14,457
Thanked: 4830
Straightening those scales will avoid the future problem of your razor not closing properly. I would polish the bolsters before reassembly. When you take it apart it should answer the bluing question, because if it was glued before you should see some of it left here or there. You can try an epoxy or polyester patch on the melted spot or make them evenly notched.
ScoutHikerDad and JellyJar like this.It's not what you know, it's who you take fishing!
-
The Following User Says Thank You to RezDog For This Useful Post:
JellyJar (07-01-2019)
-
07-01-2019, 07:45 PM #16560Senior Member

- Join Date
- Jan 2015
- Location
- Pinole, ca
- Posts
- 1,526
Thanked: 339
I like walnut media with flitz polish. What do you use? Originally Posted by RezDog


 Reply With Quote