
Results 16,961 to 16,970 of 20602
 91550Likes
Thread: What are you working on?
 LinkBack URL
 About LinkBacks
-
08-18-2019, 12:47 AM #16961Senior Member


- Join Date
- Sep 2011
- Location
- Rhode Island
- Posts
- 134
Thanked: 62
Exactly, it took a few tried to get the spacers angled just right to get lower edge of the scales to meet just right.
sloanwinters and Gasman like this.
-
The Following User Says Thank You to Doc226 For This Useful Post:
Gasman (08-18-2019)
-
08-21-2019, 01:41 AM #16962Senior Member


- Join Date
- Dec 2018
- Location
- Gainesville, FL
- Posts
- 6,875
Thanked: 683
So I'm back to this W&B wedge You Lather Well I'll Shave Well. [A
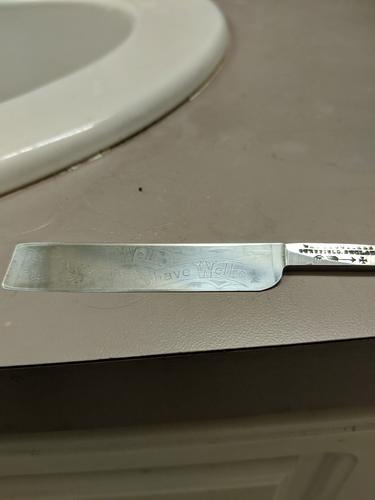
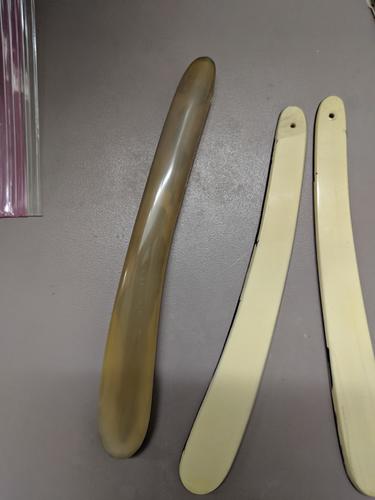
Finally got some horn I think will be authentic for the scales.
this is the only one like it I've ever seen that was not in horn and this is obviously a rescale. I don't know if they changed their mind in the process or if someone later down the road filed the end of the scale at the pivot pin and ruined the ones that were on it. The gouge on the top is too deep to sand out. It will be too thin if I do. More to come.Last edited by PaulFLUS; 08-21-2019 at 01:44 AM.
Iron by iron is sharpened, And a man sharpens the face of his friend. PR 27:17
-
08-21-2019, 03:34 AM #16963Senior Member
- Join Date
- Dec 2018
- Location
- Gainesville, FL
- Posts
- 6,875
Thanked: 683
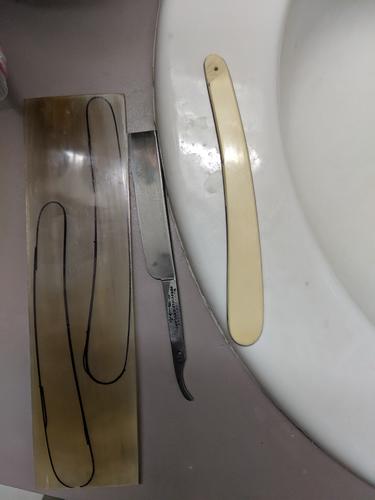
After cutting, shaping, sanding and polishing. They are still glued together so the cloudiness you see is hot glue and horn dust that made it into the crack. There was some mottling in the horn but once I started sanding it all disappeared and they turned out this beautiful honey color
I noticed most of the other ones I saw were sort of square on the pivot end instead of bullnosed like the wedge end so I left it that way.
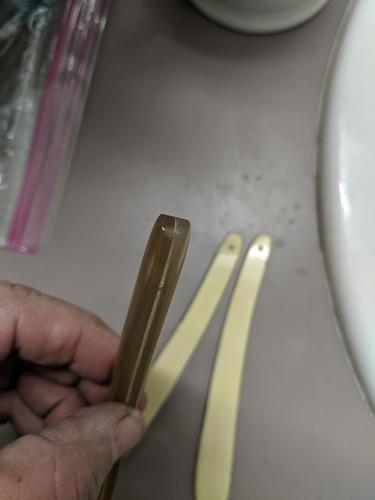
My goal is for it to look as authentic as possibleIron by iron is sharpened, And a man sharpens the face of his friend. PR 27:17
-
08-21-2019, 05:46 PM #16964Senior Member
- Join Date
- Dec 2018
- Location
- Gainesville, FL
- Posts
- 6,875
Thanked: 683
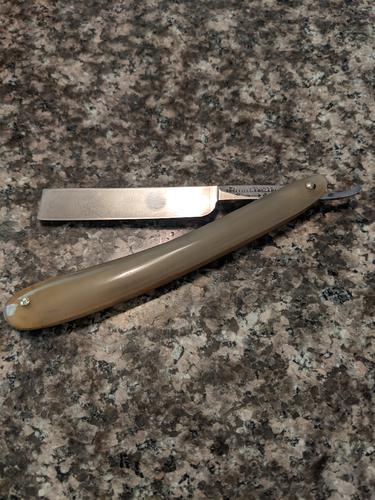
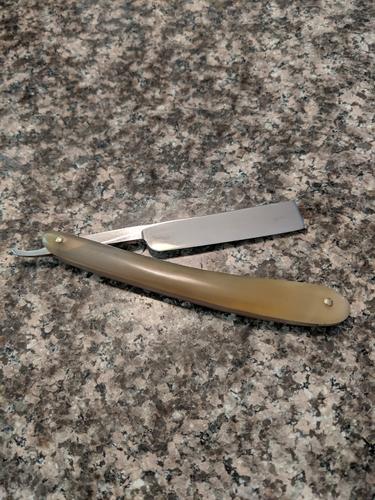

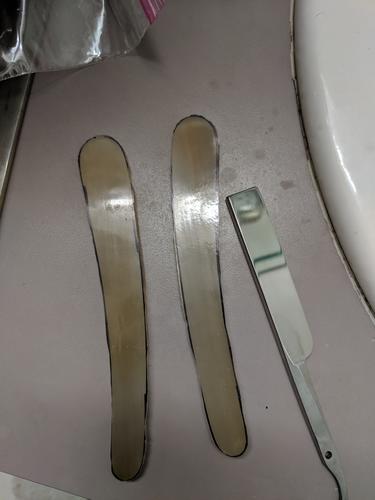
Only problem is now it won't fit in the box. I guess I need to take the scales back off and thin them out. I really don't want to do that though and it's no thicker than the other ones I've seen like it. At least it doesn't seem to be.
It's hard to see the etching now that I've cleaned it up. I need to look into darkening that some. Although I suppose with time and use it will naturally darken.Last edited by PaulFLUS; 08-22-2019 at 01:52 AM. Reason: Typo
Iron by iron is sharpened, And a man sharpens the face of his friend. PR 27:17
-
08-22-2019, 01:36 AM #16965Senior Member

- Join Date
- Feb 2019
- Location
- Salida, CA
- Posts
- 600
Thanked: 94
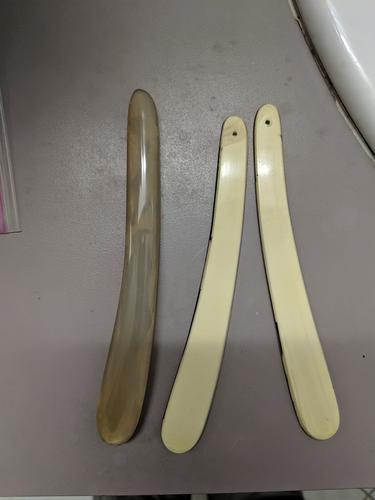
Not sure it this will help, but originals I've pulled off have been running 0.120 - 0.125" at the pivot and 0130 - 0.135" at the wedge. I like to take them to 0.110 and 0.120, just feels a bit more comfortable to me. Originally Posted by PaulFLUS
 O'Toole's commentary on Murphy's Law: Murphy was an optimist.
-
The Following 2 Users Say Thank You to JellyJar For This Useful Post:
PaulFLUS (08-22-2019), ScoutHikerDad (08-24-2019)
-
08-24-2019, 06:31 PM #16966Senior Member


- Join Date
- May 2010
- Location
- Upstate South Carolina
- Posts
- 3,308
Thanked: 987
So though I'm back wide open in school (and love it!), my bin of blades and scale blanks has been calling out to me. It's a great stress reliever on a rainy Saturday when I don't feel like doing any real work.
Anyway, somehow I ended up with a couple of nearly identical DublDuck Satin Edge blades in various restoration lots I've bought, and I got a couple of colors of really cool-looking Incudo Pearloid acrylic over the summer, and I got an idea:
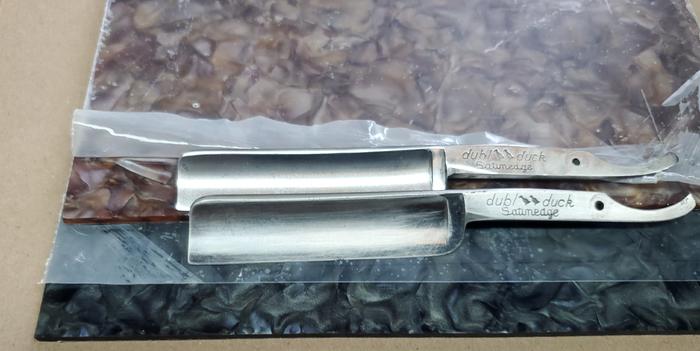 There are many roads to sharp.
-
08-24-2019, 06:35 PM #16967Senior Member
- Join Date
- May 2010
- Location
- Upstate South Carolina
- Posts
- 3,308
Thanked: 987
Though both blades are structurally sound, they both show some deep scratches, water spots and general wear. As they are full hollow, sanding is out. On to Plan B. After 1 round of gentle buffing with 3M Metal Polish on my 1750 rpm buffer, I really did a great job of polishing the still visible spots, pitting and scratches lol!
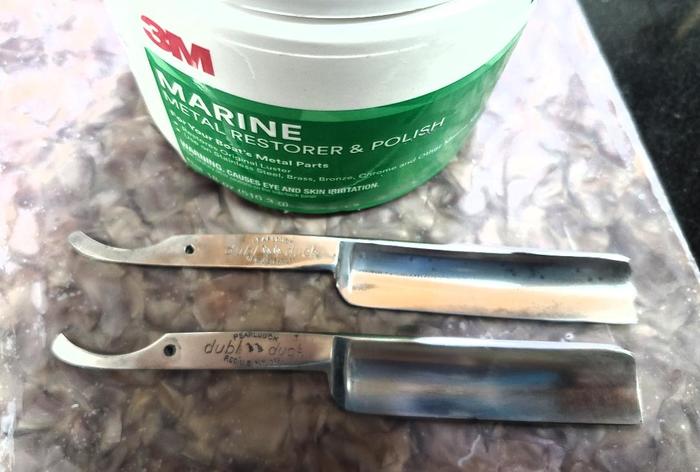
 There are many roads to sharp.
-
08-24-2019, 06:48 PM #16968Senior Member
- Join Date
- May 2010
- Location
- Upstate South Carolina
- Posts
- 3,308
Thanked: 987
I'm not shooting for perfection on these hollow blades, so I will probably do a little more polishing and leave well enough alone-character marks. I rough cut some scales for them; no worries, these will go on a serious slimming diet on the belts. I have learned the hard way to cut a little large and shape them down with some room to work.
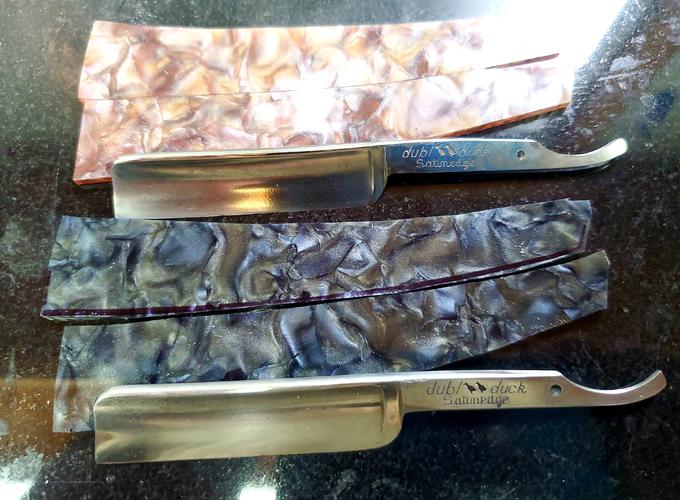
I'm thinking a thin brass wedge, pin and collars for the tortoise-shell colored, and aluminum wedge with nickel silver and stainless for the charcoal/grayish black set. As I'm going for a matching set, I am considering just gluing each set together, and then gluing the two sets together in the middle if that makes sense for a stack of 4.
Let 'em ride in a stack of 4 together to get exactly the edge shapes I want identical on each pair, then split them down the middle for contouring each set-do you think that might work? (I know that I will have to keep this 12mm stack of 3mm sheets dead square on the wheel and platen for this plan to work). I'm pretty steady on my belt sander, generally.
More later-I've got these and a handful of other razor projects that I'm just sort of piddling on when I get a rare window these days.There are many roads to sharp.
-
08-24-2019, 07:03 PM #16969Skeptical Member


- Join Date
- Nov 2016
- Location
- Colorado Springs
- Posts
- 10,559
Thanked: 2197
I too make them larger and sand down to shape. Easier to sneak up on the shape.
ScoutHikerDad and Geezer like this.It's just Sharpening, right?
Jerry...
-
08-24-2019, 07:14 PM #16970Senior Member

- Join Date
- Jan 2013
- Location
- Communist State of California
- Posts
- 1,461
Thanked: 463
Looking good!
ScoutHikerDad likes this.B.J.


 Reply With Quote