
Results 16,951 to 16,960 of 20602
 91550Likes
Thread: What are you working on?
 LinkBack URL
 About LinkBacks
-
08-16-2019, 04:41 PM #16951Skeptical Member


- Join Date
- Nov 2016
- Location
- Colorado Springs
- Posts
- 10,559
Thanked: 2197
The magnet scares me. Id hate to have the blade pull to one side and click against the magnet. Might dull the edge. Or at least ding it. If I had made a perfect shape in the edge holder that fit the grinds at least closely... Right now its just like a set of scales inside. No angles.
Latest idea is a ring of flat leather about 1/2" wide. Would slip on easy. Might change my mind by next week. LolIt's just Sharpening, right?
Jerry...
-
08-16-2019, 05:20 PM #16952Senior Member


- Join Date
- Jul 2014
- Location
- Denver CO
- Posts
- 4,660
Thanked: 811
It certainly won't be any less stable than cutting it out, though leaving it does risk the crack spreading. Originally Posted by PaulFLUS

-
08-16-2019, 08:22 PM #16953Senior Member

- Join Date
- Feb 2019
- Location
- Salida, CA
- Posts
- 600
Thanked: 94
Got some time in the shop this morning before it got to hot. Been having a few triple digit temp days and evening in the garage is not pleasant.
Started surgery on my Fredrick. A little bit of shaky hands at the start, but it came out well.
Ready for surgery
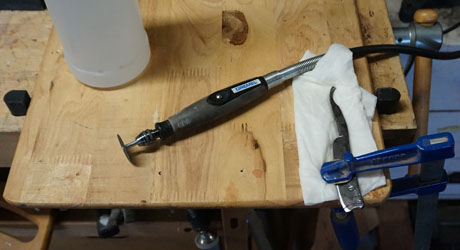
Don't worry I didn't cut with the tip hanging off the end, I realized that was not the best setup and didn't retake the photo.
Getting there

Almost done
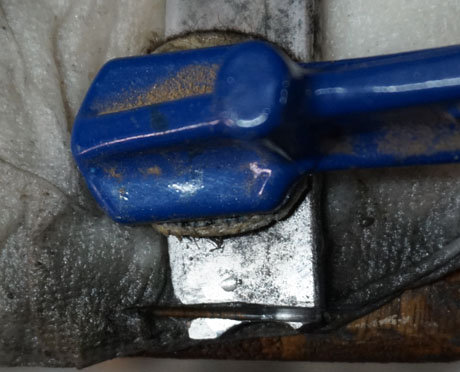
No more crack and time for a little wet grinding

Finished profile and a little blending
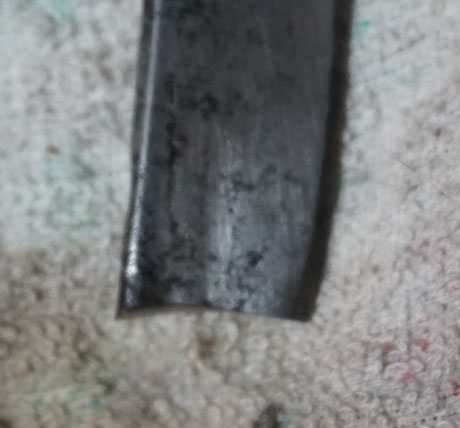
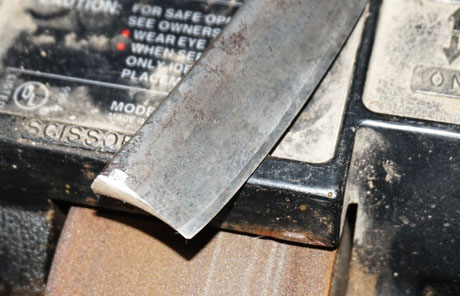
Cutting the tip off actually took quite a bit longer than I thought it would. I've never run a cut off wheel at that low of a speed. I was also being super careful about heat build up and was checking and spritzing water every few seconds. The blade never got past a mild warm, so the temper should still be good. I decided to let the diameter of the grinding stone set the radius for the spanish point. Seemed simpler and I didn't want to over complicate my first try. I still have a little sandpaper/file work left to blend the edges, but I can do that in the comfort of the AC.
Up next is dealing with the rust, pick out some nice horn, might try making collars again, and of course I need to get my wedge making improved. I really thought this blade was done for, so it's all bonus from here.Last edited by JellyJar; 08-16-2019 at 08:23 PM. Reason: Typo
O'Toole's commentary on Murphy's Law: Murphy was an optimist.
-
The Following 2 Users Say Thank You to JellyJar For This Useful Post:
BobH (08-16-2019), ScoutHikerDad (08-16-2019)
-
08-16-2019, 10:59 PM #16954Senior Member


- Join Date
- May 2010
- Location
- Upstate South Carolina
- Posts
- 3,308
Thanked: 987
Beautiful job JJ-you solved the issue and now have a nice Spanish point to boot!
I haven't posted much in the Workshop lately because I've been busier than the proverbial one-legged man in an ass-kicking contest getting my department moved into our new building (which is spectacular if anyone cares-I'll post a couple of pics of my space-age classroom at some point).
Anyhoo, I stopped by my knife-maker friend's house to drop off his hand trucks that saved my life this week, and he gave me a crazy tip for you Tru-Oil guys. On your final coat, rub in a drop of Armor All with a rag, and according to him (and an unknown custom rifle stock-maker friend of his), it dries and shines Tru Oil almost immediately.
I just heard about it, and won't have the time to test it for awhile -anybody in the mood to experiment on a spare piece of wood? (I may try it on some walnut just to satisfy my curiosity). Let us know if anyone tries it!There are many roads to sharp.
-
The Following 5 Users Say Thank You to ScoutHikerDad For This Useful Post:
32t (08-17-2019), BobH (08-17-2019), Gasman (08-16-2019), Johntoad57 (08-17-2019), outback (08-17-2019)
-
08-16-2019, 11:06 PM #16955Senior Member

- Join Date
- Dec 2018
- Location
- Gainesville, FL
- Posts
- 6,827
Thanked: 680
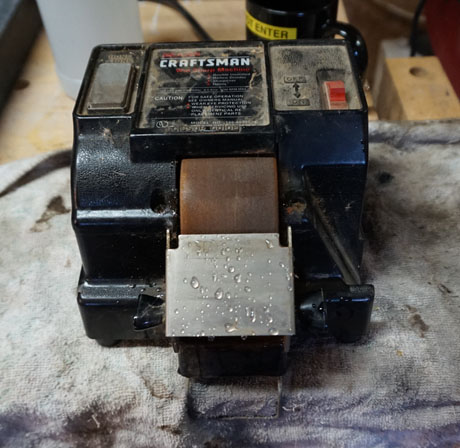
I have that same Craftsman wet grinder that was my dad's. They call it a hollow grinder but I think that is a.bit of a stretch. It will hollow grind but I've found it to be limited in what it can do. It is really good for things like chisels
JellyJar likes this.Iron by iron is sharpened, And a man sharpens the face of his friend. PR 27:17
-
08-16-2019, 11:30 PM #16956Senior Member
- Join Date
- Feb 2019
- Location
- Salida, CA
- Posts
- 600
Thanked: 94
It puts a hollow ground bevel on the edge. You can get pocket knives, chisels, and scissors crazy sharp, but the edge is a lot more fragile. I've had mine for a couple of decades, haven't used it in quite some time. It was perfect for this, almost no heat generated.
O'Toole's commentary on Murphy's Law: Murphy was an optimist.
-
08-16-2019, 11:41 PM #16957Senior Member
- Join Date
- Dec 2018
- Location
- Gainesville, FL
- Posts
- 6,827
Thanked: 680
I'm sure it was great for that. I never thought of using it for that. I use it for my kitchen knives and you can get a good knife sharp enough to shave cut a roast
ScoutHikerDad and JellyJar like this.Iron by iron is sharpened, And a man sharpens the face of his friend. PR 27:17
-
08-17-2019, 01:41 AM #16958Senior Member

- Join Date
- Sep 2011
- Location
- Rhode Island
- Posts
- 134
Thanked: 62
Here is one I did a while back. Originally Posted by Gasman


-
The Following 4 Users Say Thank You to Doc226 For This Useful Post:
32t (08-17-2019), Gasman (08-17-2019), randydance062449 (08-17-2019), ScoutHikerDad (08-17-2019)
-
08-17-2019, 02:11 AM #16959Skeptical Member
- Join Date
- Nov 2016
- Location
- Colorado Springs
- Posts
- 10,559
Thanked: 2197
Good to hear from ya Alfredo!
Looks as if you just used spacers around the pins on yours and angled them to get the bottom end closed. Looks very nice. I'm thinking now about getting more angle on the insides so to hold the blade still more. And now seeing yours this really helps. No spacer all the way around like mine. KISS Method! I like it. Still kicking around the magnet idea too.It's just Sharpening, right?
Jerry...
-
08-17-2019, 02:15 AM #16960Senior Member

- Join Date
- Mar 2015
- Location
- Akron, Ohio
- Posts
- 12,117
Thanked: 4316
Thanks for the tip, Aaron.
Sounds crazy, but if it truly works, how wonderful it'd be.
Quick touchups, should u go through while finishing off the wedge.....oh my!. Test will happen for sure.Mike


 Reply With Quote