Page 852 of 2057 FirstFirst ... 35275280284284884985085185285385485585686290295213521852 ... LastLast
Results 8,511 to 8,520 of 20565
Like Tree91447Likes

Thread: What are you working on?

  1. #8511
    Senior Member
    Join Date
    Jul 2016
    Location
    Addison Michigan
    Posts
    627
    Thanked: 115

    Default

    Super,, You,ve Come Along Ways,, Been A Great Journey To Follow,,Put It In A Frame When No Longer In Rotation And Say I Did That,, Keep Up The Great Work My Friend,, Ty
    sharptonn and outback like this.

  2. #8512
    I love Burls....... and Acrylic HARRYWALLY's Avatar
    Join Date
    Mar 2012
    Location
    Baden, Ontario
    Posts
    5,475
    Thanked: 2284

    Default

    Quote Originally Posted by xiaotuzi View Post
    Nice work all around gents. Nice looking scales and razors. Outback, it's great to see one of the boats you work on, yeah I can see that's a lot of work and I'm sure I don't even know the half of it!

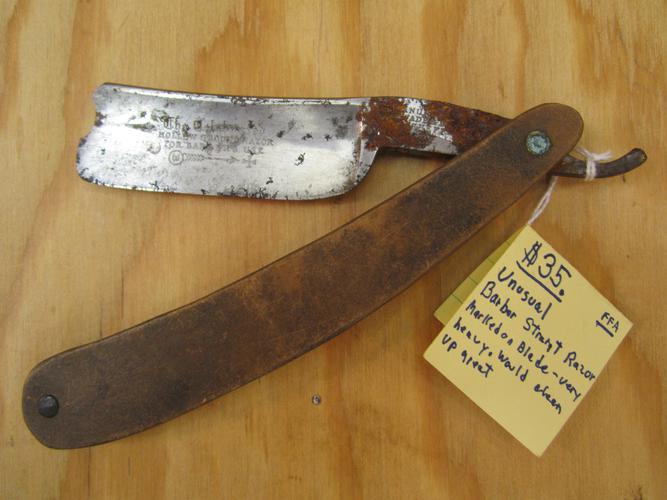
    I've been working on cleaning up a Wade & Butcher FBU I found in an antiques store in NH last summer. Someone had rescaled it at some point using hard pressed leather and copper rivets. The result was a lot of trapped moisture next to the blade, especially the tang. The tang stamp is half gone because of it. Here's a picture from the day I found it, I was able to talk them down off the price a little due to the condition. The tag said "would clean up great!" but I wasn't so sure at the time.
    Attachment 259603
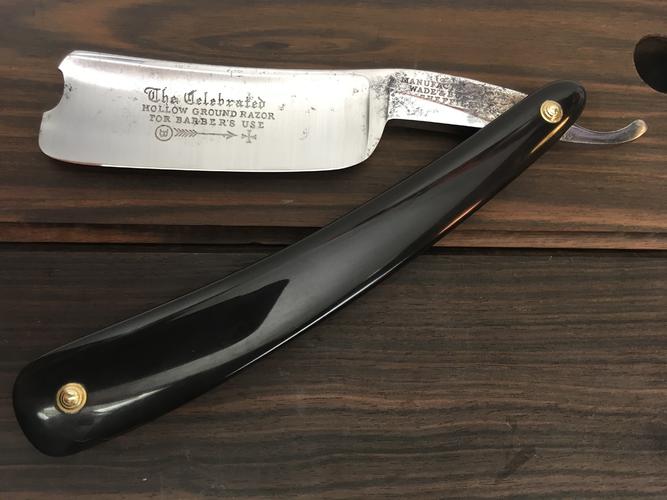
    I cleaned it up by hand only, no power tools. I was limited in how much I could do because I didn't want the grind to get too thin, I didn't want to lose the etch, and I didn't want to lose much width. The edge had some pitting so I did lose a little width but it still measures 17/16 or so. After working the blade clean, the blade face was finished with 800 grit wet/dry with a dab of Mother's then 2000 wet/dry with a dab of Mother's going spine to edge with a small leather backer. I have some horn, a hunk of lead, and some washers ready for the next steps.
    Attachment 259604Attachment 259605Attachment 259606
    I set a "test bevel" and it looked good under magnification. I'm pleased that I will be able to save this one. These are always way, way out of my money range so I feel really fortunate to have found one in the wild for a good price, even if it has some condition issues. Next is making scales.
    I'll quote this and hopefully the pics will tag along with it. If they don't, check out page 835, post number 8346 to see what Tuzi was dealing with from the beginning. Like I've said in the past Tuzi, everything you touch seems to turn to gold. Excellent, excellent work my friend!!
    Burls, Girls, and all things that Swirl....

  3. The Following 2 Users Say Thank You to HARRYWALLY For This Useful Post:

    sharptonn (03-27-2017), xiaotuzi (03-27-2017)

  4. #8513
    I love Burls....... and Acrylic HARRYWALLY's Avatar
    Join Date
    Mar 2012
    Location
    Baden, Ontario
    Posts
    5,475
    Thanked: 2284

    Default

    Am I seeing brown in those horn scales??
    Burls, Girls, and all things that Swirl....

  5. #8514
    Senior Member xiaotuzi's Avatar
    Join Date
    Jun 2016
    Location
    NH
    Posts
    1,924
    Thanked: 1363

    Default

    Thanks for the compliments and all the support given here guys! Keeps ya going when things get challenging.

    @Harrywally, the horn is black, I think there may be some reflection of something in the workshop showing up in the polished surface.
    HARRYWALLY, Srdjan and outback like this.
    "Go easy"

  6. #8515
    Senior Member blabbermouth ejmolitor37's Avatar
    Join Date
    Oct 2015
    Location
    Knoxville,IA
    Posts
    2,368
    Thanked: 762

    Default

    Quote Originally Posted by xiaotuzi View Post
    Finally got a chance to finish this Wade & Butcher today. It was in pretty rough shape to begin with, and she's still not all that pretty, but she's got a nice shape. It had deep rust on the tang and some on the blade as well. It did all I could with it to bring it back into service. Here it is in a test fitting, the lead wedge still needs to be trimmed down.
    Attachment 260399
    Then I got the scales smoothed and polished and put it together...
    Attachment 260400Attachment 260401Attachment 260402
    It wasn't too hard to get a good edge on it, finished with one of my best coticules. Couldn't wait until morning to try it so I just had a shave with it tonight. It was my first time shaving with anything over 8/8 and it had my full attention for sure. Used a little Wool Fat and what a wonderful shave! One of the smoothest, closest and most comfortable I've had. Plus, you can fit a lot of lather on that blade before needing to clear it, that's for sure.
    Knocked it out of the park tuzi! Great work.
    xiaotuzi likes this.
    Nothing is fool proof, to a sufficiently talented fool...

  7. The Following 2 Users Say Thank You to ejmolitor37 For This Useful Post:

    sharptonn (03-27-2017), xiaotuzi (03-27-2017)

  8. #8516
    All proper tea is good. nightcap's Avatar
    Join Date
    Jan 2017
    Location
    Colorado
    Posts
    39
    Thanked: 38

    Default

    Quote Originally Posted by Martin103 View Post
    A row or two of correct size holes for bench dogs and holdfast will make this workbench very user friendly. Nice work, from personal experience the bottom row of storage on the wall will eventually get in the way.
    Thanks, luckily the shelves are easy to move. Holdfasts are handy, I just prefer not to use them. I generally use Paul Sellers' method of a bar clamp in my bench vise, but to each his own.
    -Michael

  9. #8517
    Historically Inquisitive Martin103's Avatar
    Join Date
    Aug 2011
    Location
    Upstate New York
    Posts
    5,782
    Thanked: 4249
    Blog Entries
    1

    Default

    I see you use Paul sharpening system as well, me to.

  10. #8518
    Senior Member jmabuse's Avatar
    Join Date
    Nov 2016
    Posts
    250
    Thanked: 122

    Default Greaves Sheaf-Works

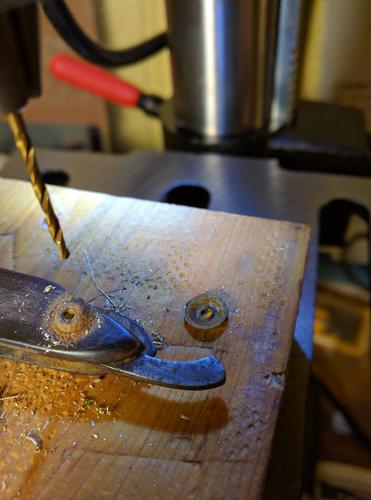
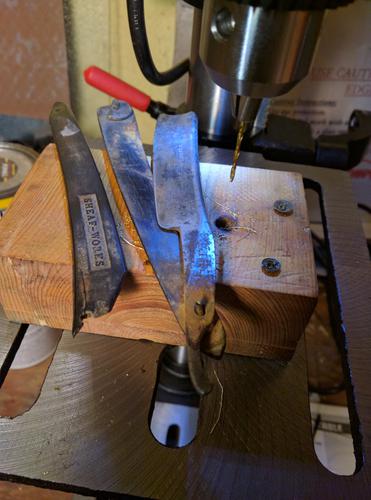
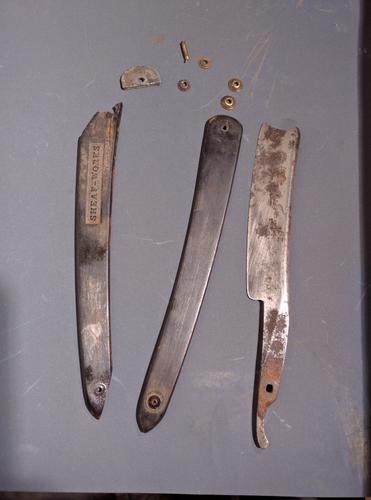
    I finally got the horn I ordered from England last week, so I took the Greaves apart.
    Name:  IMG_20170326_185046.jpg
Views: 170
Size:  29.2 KB

    Name:  IMG_20170326_185241.jpg
Views: 172
Size:  33.0 KB

    It only had one set of washers on it but I managed to save them. Looks like the inner ones might be steel? There's what looks like rust on them, though the pin is very definitely brass and so are the outside washers.

    Name:  IMG_20170326_190449.jpg
Views: 161
Size:  20.8 KB

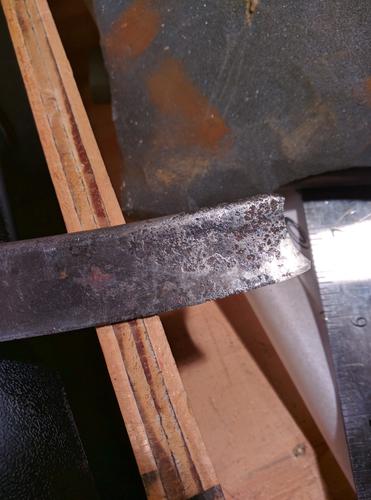
    Heavens to Betsy, after a little sanding looks like the pitting turns out to be really, really deep especially on the back side.

    Name:  IMG_20170326_191859.jpg
Views: 170
Size:  30.6 KB

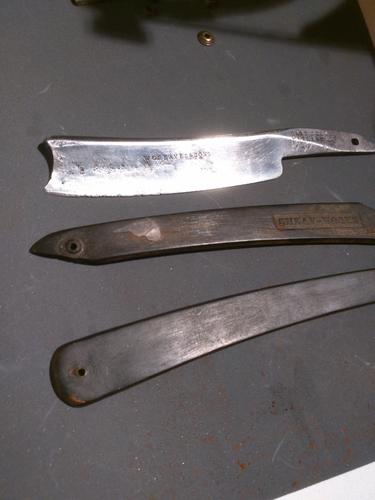
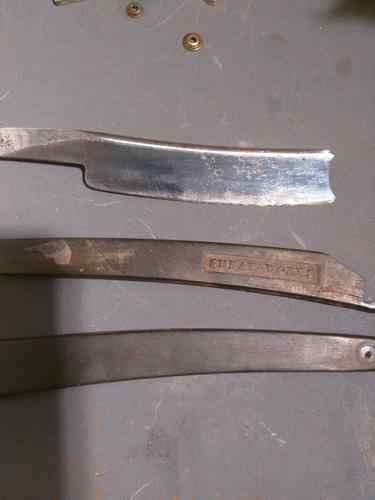
    Here is as cleaned up as I am likely to get this blade. The pits go down to the bevel, but it's a true wedge so I'm not worried.

    Name:  IMG_20170326_220845.jpg
Views: 171
Size:  20.8 KB

    Name:  IMG_20170326_220943.jpg
Views: 165
Size:  21.1 KB

    Got to make me some scales. Tuned up my bandsaw.

  11. #8519
    Razor Vulture sharptonn's Avatar
    Join Date
    Oct 2010
    Location
    Lone Star State
    Posts
    26,104
    Thanked: 8612

    Default

    Quote Originally Posted by HARRYWALLY View Post
    I'll quote this and hopefully the pics will tag along with it. If they don't, check out page 835, post number 8346 to see what Tuzi was dealing with from the beginning. Like I've said in the past Tuzi, everything you touch seems to turn to gold. Excellent, excellent work my friend!!
    Excellent observation, Andrew!

    I wish we could copy and paste a pic like we used to be able to do as the remove format button worked!

    Anyhoo...a fairly dramatic before and after! If I may?


    Name:  tuzi.jpg
Views: 165
Size:  43.3 KBName:  tuzi1.jpg
Views: 159
Size:  41.5 KB

  12. The Following 5 Users Say Thank You to sharptonn For This Useful Post:

    Dieseld (03-27-2017), dinnermint (03-29-2017), gabrielcr78 (11-20-2017), Hirlau (03-27-2017), xiaotuzi (03-27-2017)

  13. #8520
    Historically Inquisitive Martin103's Avatar
    Join Date
    Aug 2011
    Location
    Upstate New York
    Posts
    5,782
    Thanked: 4249
    Blog Entries
    1

    Default

    Quote Originally Posted by jmabuse View Post
    I finally got the horn I ordered from England last week, so I took the Greaves apart.
    Name:  IMG_20170326_185046.jpg
Views: 170
Size:  29.2 KB

    Name:  IMG_20170326_185241.jpg
Views: 172
Size:  33.0 KB

    It only had one set of washers on it but I managed to save them. Looks like the inner ones might be steel? There's what looks like rust on them, though the pin is very definitely brass and so are the outside washers.
    Name:  IMG_20170326_190449.jpg
Views: 161
Size:  20.8 KB

    Heavens to Betsy, after a little sanding looks like the pitting turns out to be really, really deep especially on the back side.
    Name:  IMG_20170326_191859.jpg
Views: 170
Size:  30.6 KB

    Here is as cleaned up as I am likely to get this blade. The pits go down to the bevel, but it's a true wedge so I'm not worried.
    Name:  IMG_20170326_220845.jpg
Views: 171
Size:  20.8 KB

    Name:  IMG_20170326_220943.jpg
Views: 165
Size:  21.1 KB

    Got to make me some scales. Tuned up my bandsaw.
    True wedge? I would try to get a good uniform bevel first, pitting all the way to the edge smells trouble to me.

  14. The Following User Says Thank You to Martin103 For This Useful Post:

    sharptonn (03-27-2017)

Posting Permissions

  • You may not post new threads
  • You may not post replies
  • You may not post attachments
  • You may not edit your posts
  •