
Results 11,481 to 11,490 of 20573
 91474Likes
Thread: What are you working on?
 LinkBack URL
 About LinkBacks
-
11-06-2017, 04:30 AM #11481Senior Member


- Join Date
- Oct 2015
- Location
- Knoxville,IA
- Posts
- 2,368
Thanked: 762
Jerry that is much like the Cattagarus I have. The idea behind it is, as you home the spine wears the same as the edge so you should always have a nice even bevel. IIRC
Nothing is fool proof, to a sufficiently talented fool...
-
11-06-2017, 01:23 PM #11482Skeptical Member


- Join Date
- Nov 2016
- Location
- Colorado Springs
- Posts
- 10,545
Thanked: 2194
I've seen his up close and personal and know his are done that way, But just didn't know these Imperials were like this. Learn something new all the time. Originally Posted by 32t

BTW, I had to order the white and grey on-line at Homedepot.com Had it delivered to the store so the cost was minimal but they dont have it in stock.Last edited by Gasman; 11-06-2017 at 01:25 PM.
It's just Sharpening, right?
Jerry...
-
11-06-2017, 03:17 PM #11483Skeptical Member
- Join Date
- Nov 2016
- Location
- Colorado Springs
- Posts
- 10,545
Thanked: 2194
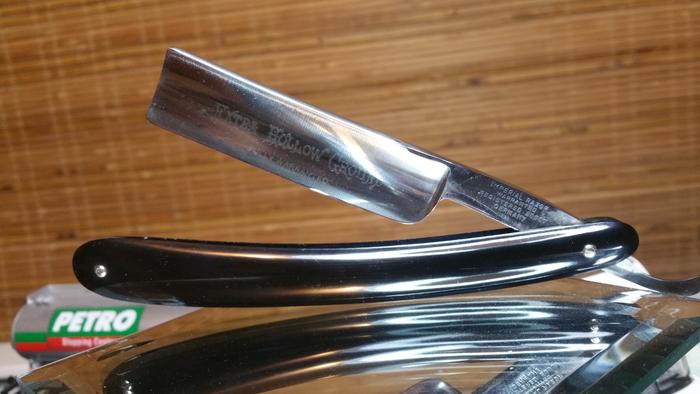
Just had a wonderful smooth shave with this Bellied Imperial.
Not sure the belly made any difference in my shave but this razor took one fine edge. Finished on the 12K and tried the progressive stropping. Not sure how much difference that made ether but wanted to give it a try. I could tell that after a lot more stropping than I normally do it sure felt sharper per the TPT. Almost like it jumped up and grabbed hold of the thumb pad.
This one will be one of my favorites. I'm really starting to enjoy these Imperial razors. Up to 3 of them now days.
 It's just Sharpening, right?
Jerry...
-
11-07-2017, 04:04 AM #11484Senior Member
- Join Date
- Oct 2015
- Location
- Knoxville,IA
- Posts
- 2,368
Thanked: 762
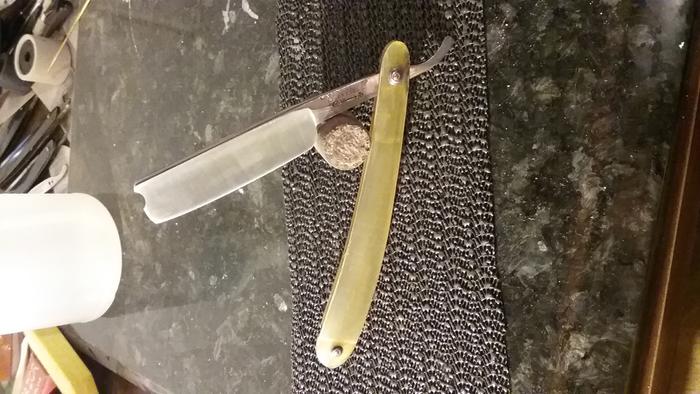
Well she is pinned up. Got the bevel dang close to set. It's not perfect but a damn sight better than it was. Was at 4 layers of tape now down to 2 and the bevel is the same in both sides. All in all, I call this a win. I could have spent more time sanding but my neck couldn't take any more.
Also, this was a great to pin, I have not pinned one with collars and what a pain! I'm sure there is a trick and I'll learn in time but dang that kinda sucked.Nothing is fool proof, to a sufficiently talented fool...
-
-
11-07-2017, 04:05 AM #11485Senior Member
- Join Date
- Oct 2015
- Location
- Knoxville,IA
- Posts
- 2,368
Thanked: 762
Looks great Jerry, glad you got another saved!
Nothing is fool proof, to a sufficiently talented fool...
-
11-07-2017, 04:09 AM #11486Senior Member

- Join Date
- Feb 2013
- Location
- Haida Gwaii, British Columbia, Canada
- Posts
- 14,443
Thanked: 4828
I pin by using a drill chuck, sliding the pin in to the correct heist and cinching it downthen the collars and for the one side almost completely. Put the pin in the scale and do the other side. There is always the trimming it down it the scale and getting the length right part, but you get the general idea. I got the idea from Tom who oddly does not pin this way anymore. I like it a lot though. I believe Richard also using the same system. I find it easier than taping it all together and peeling.
It's not what you know, it's who you take fishing!
-
The Following User Says Thank You to RezDog For This Useful Post:
ejmolitor37 (11-07-2017)
-
11-07-2017, 04:11 AM #11487Razor Vulture

- Join Date
- Oct 2010
- Location
- Lone Star State
- Posts
- 26,121
Thanked: 8612
Good work, Men! Astounding successes! Let's see those puppies on SOTD!

-
11-07-2017, 04:17 AM #11488Senior Member
- Join Date
- Oct 2015
- Location
- Knoxville,IA
- Posts
- 2,368
Thanked: 762
Soon as I get this one honed I'll share it
 possibly tomorrow after work I can get that done.
Nothing is fool proof, to a sufficiently talented fool...
possibly tomorrow after work I can get that done.
Nothing is fool proof, to a sufficiently talented fool...
-
11-07-2017, 04:35 AM #11489Senior Member
- Join Date
- Oct 2015
- Location
- Knoxville,IA
- Posts
- 2,368
Thanked: 762
Thanks for the idea Shaun I'm gonna try that drill Chuck idea way better than my vice grips
Nothing is fool proof, to a sufficiently talented fool...
-
11-07-2017, 03:53 PM #11490Senior Member

- Join Date
- Sep 2011
- Location
- Tillsonburg, Ont
- Posts
- 1,511
Thanked: 423
Has anyone tried to use a drill press to spin the pins like I've seen done on pocket knives?
It looks interesting, I may try it.
He uses this method for the scales at about the 13 min mark.
mwfick on instagram


 Reply With Quote