Results 15,301 to 15,310 of 20602
Thread: What are you working on?
-
01-25-2019, 12:57 PM #15301

Hey, Jerry. Once u have finished soaking the scales in peroxide, make sure u put a coat of mineral oil on them for a couple days, to rehydrate the bone. Their on the brittle side after that stuff.
A tip from our own bone man, Rezdog.!!
Typical soak in regular peroxide...week or more.
But like Tom said, check um now n then.
Depending on the rust, and cracks, they can be repaired with some scraping/ sanding, and CA n soda. Sometimes.Mike
-
-
01-25-2019, 01:14 PM #15302Senior Member


- Join Date
- Feb 2015
- Location
- Duluth, GA - Atlanta OTP North
- Posts
- 2,546
- Blog Entries
- 1
Thanked: 315
-
01-25-2019, 01:57 PM #15303

I wanted to keep as much of the steel as possible on the tip so round seemed the best idea. I just eye-balled it. Thought a bit of a french tip look would be nice so the spine is a little shorter than the edge. After cutting it with a dremmal cut-off wheel it was a matter of a lot of sanding to get all the cut marks off.
Thanks Mike for the rehidrating idea. I hadnt thought ahead that far yet.It's just Sharpening, right?
Jerry...
-
01-25-2019, 03:30 PM #15304

Thanks Jerry, I forgot how long a progression of grits takes.
Actually I think I forget about that every time! Then I end up thinking what did I get myself into. Working on 1k scratches with 2k paper and realizing you gotta go back to 1200-1500 grit again.. Or just go with a different finish.
Yep I searched my house and couldn't find anything better but did find the paddle bit, pliers, picture hanging nail, and a piece of 2x6 wood.
I had previously started on the front blade face. But will not be able to remove the pits without damaging the stamp.
As far as the question of whether to remove length or width in the repair of the "mole notch", I'm leaning toward keeping the width. I don't mind the centering of the stamp as much as I appreciate a good 8/8 Celebrated W&B. And the idea of a big shorty like that is a cool idea, probably will shave well.“You must unlearn what you have learned.”
– Yoda
-
01-25-2019, 09:33 PM #15305

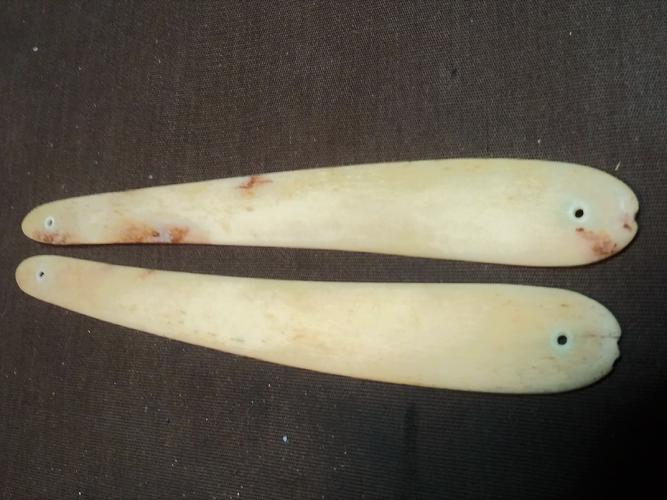
Here is the set of Bone Scales I don't think I will be re-using. The rust has penetrated all the way thru the scales. Plus they are .050 thick. Super thin and warped too. A small crack in one scale at the pivot hole. I will keep them but not sure I will ever use them. Maybe someday I can dye them and put a liner on them.


The other two sets of bone scales are now much cleaner. A nice thickness and are soaking in some neetfoot oil now as I was out of Minerail oil. Wont do anything with them until next week anyways.Last edited by Gasman; 01-25-2019 at 09:42 PM.
It's just Sharpening, right?
Jerry...
-
01-25-2019, 09:44 PM #15306

I haven't tried putting liners or laminating warped bone or horn to wood, but have wanted to put those materials together at some point.
If you glue it to some dark wood, then carve the bone so that you get to the dark wood at various places, could give a cool look and feel.
Looking forward to seeing the other ones finished.Last edited by MikeT; 01-25-2019 at 11:27 PM.
“You must unlearn what you have learned.”
– Yoda
-
01-25-2019, 10:18 PM #15307
-
01-25-2019, 11:03 PM #15308

I like .07 to .08 for most all scale thickness. But that's just my opinion. .05 is very thin.
I have Ivory scales that are .065 and that is super thin but standard for Ivory I think.It's just Sharpening, right?
Jerry...
-
The Following User Says Thank You to Gasman For This Useful Post:
Johntoad57 (01-26-2019)
-
01-25-2019, 11:36 PM #15309

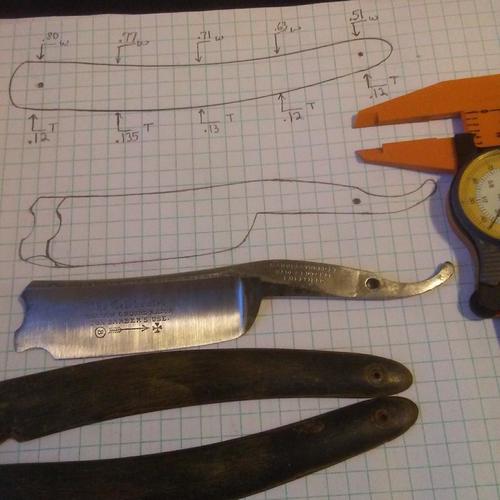
Traced the scales and took measurements of thicknesses and widths at various points just in case I need to reproduce them at some point. I really like the shape of these scales, but it's also good to do on other scales as a reference later on, for future scales.
I like to make a complete tracing, and make copies from a master copy like this.
 “You must unlearn what you have learned.”
– Yoda
-
01-25-2019, 11:42 PM #15310


 91550Likes
 LinkBack URL
 About LinkBacks


 Reply With Quote

