
Results 19,721 to 19,730 of 20602
 91550Likes
Thread: What are you working on?
 LinkBack URL
 About LinkBacks
-
03-31-2022, 03:21 AM #19721Senior Member


- Join Date
- Dec 2018
- Location
- Gainesville, FL
- Posts
- 6,875
Thanked: 683
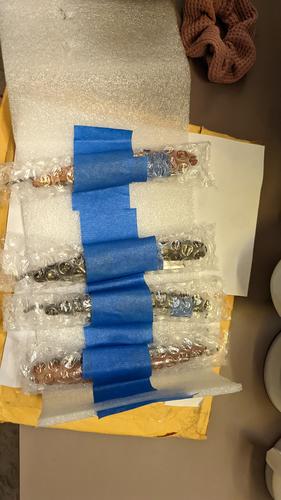
So I took in some razors to restore for our new friend Steve (SteveGib) who got the lot of mixed razors. He sent me 4 to look at.
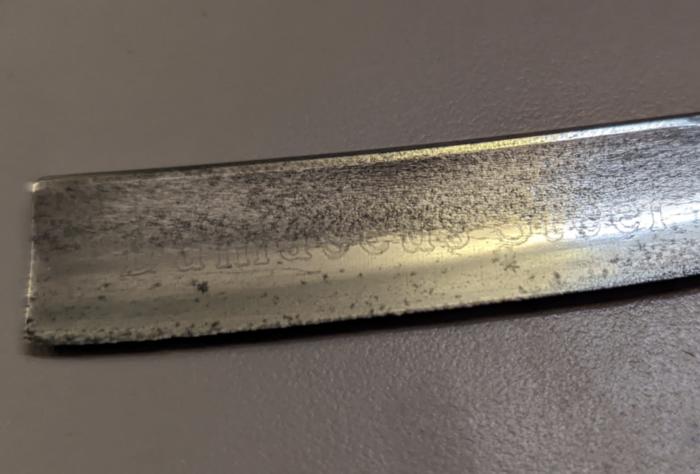
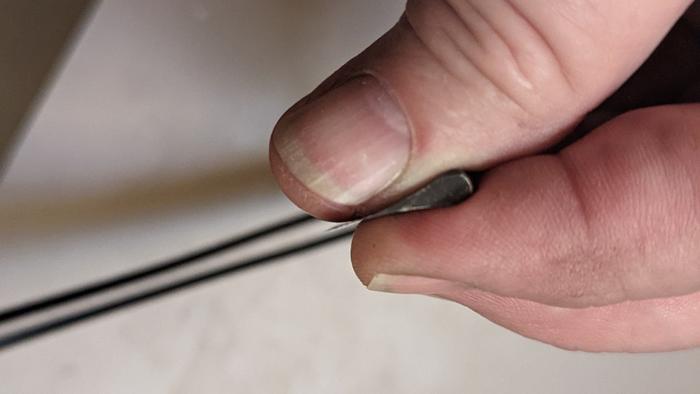
I'll post as I go but I started with the one in the worst condition, an S.B Kahnweiller with the remnants of an engraving on the blade that says Damascus Steel. Not that it actually is Damascus steel but I wanted to try and save the engraving. It wouldn't really matter what it said. It could say shama lama ding dong and I would still try to save it.
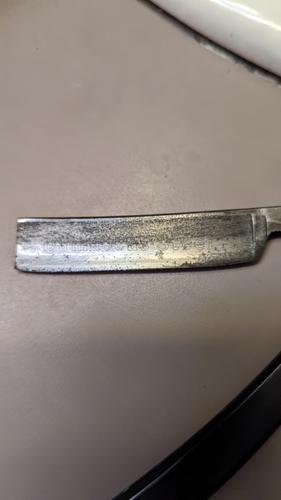
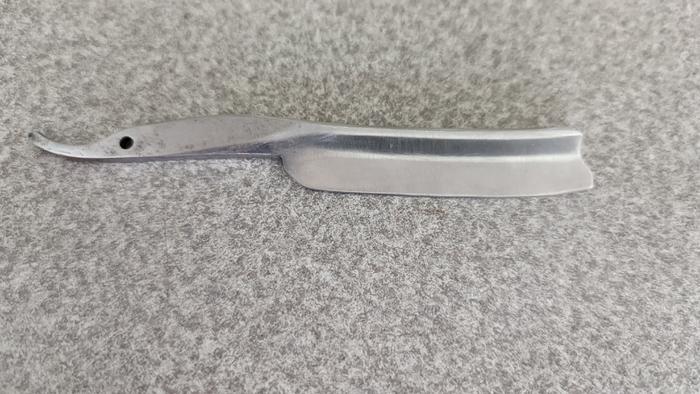
As you can see it it has a lot of pitting. So just to have a look see I pasted it with 3M and let it sit all day while I was at work.
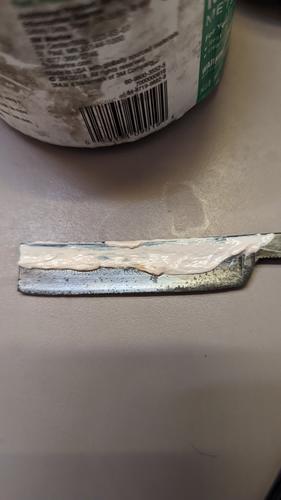
I actually covered the whole blade but I guess I didn't get pics of that. When I got home I added some 180 grit SIC powder to the paste and scrubbed with a rag to get some of the funk off and see what was below.
So, 2 things stand out. One, which I was concerned about from before I had it in hand, is that there is significant pitting at the edge. The other is it does not look like I can save that engraving.
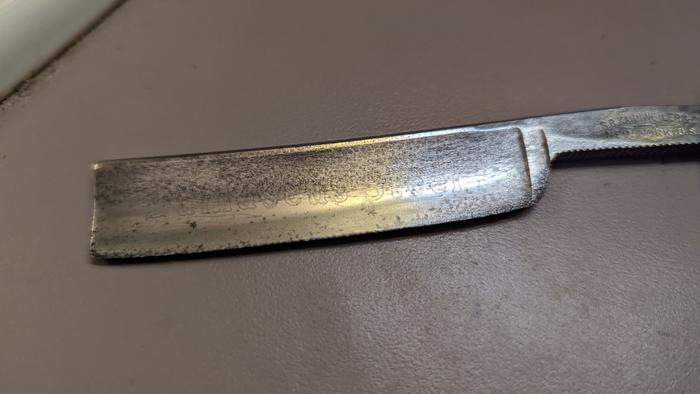
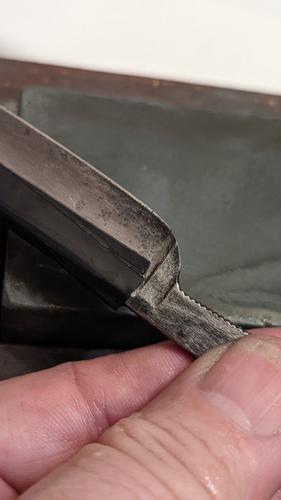
The engraving is not deep enough and the pitting is too deep but more importantly I needed to see if I can get past that pitting at the edge. So first I reshaped the heel then I put 4 layers of tape and took it to the fine side of a big carborundum stone just to cut through the swiss cheese quicker.

Still a lot of crumbly stuff at the heel so I shaped it more to move the edge more forward out of the worst of it.

So remember for later that you can see here someone had some kind of tool like a Dremel or something on it probably trying to clean up rust.
So even after more than I really thought should be necessary for a test bevel set there is still enough pitting that I am not sure that I will really get clean steel without chips.
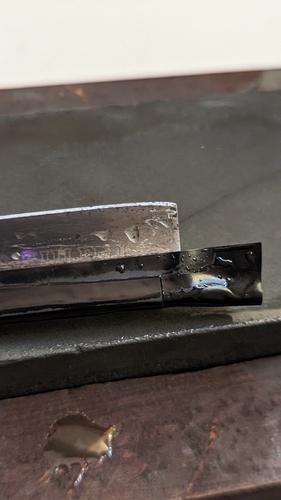
I may be able to get it to be a shaver that won't keep chipping but it is not really a restoration candidate in the strict sense. Also since there are tool marks it is possible that the temper has been compromised. Additionally, it is a bellied hollow grind but it looks like it has already been honed too close to the up slope of the belly.
So, I think this one may be best sent back to be left in the parts bin. Steve and I talked about it before he sent them and I said I'd take a look and see but I was unsure if it could be saved. Oh well, I think every lot I have bought has had at least one that was shot so it's to be expected.
More on the others in the next day or two.Iron by iron is sharpened, And a man sharpens the face of his friend. PR 27:17
-
04-03-2022, 06:03 PM #19722Senior Member
- Join Date
- Dec 2018
- Location
- Gainesville, FL
- Posts
- 6,875
Thanked: 683
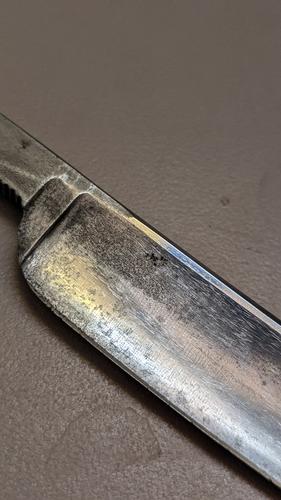
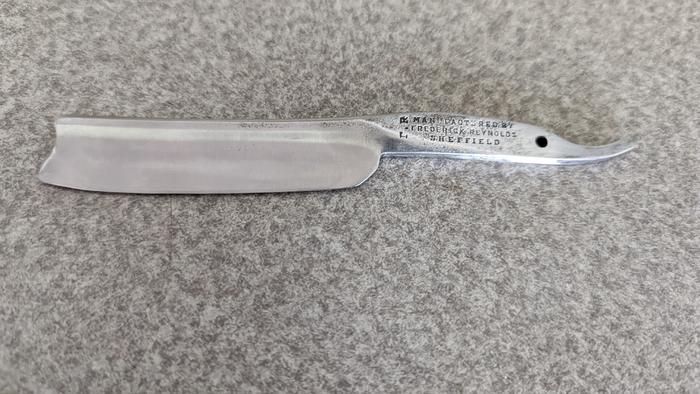
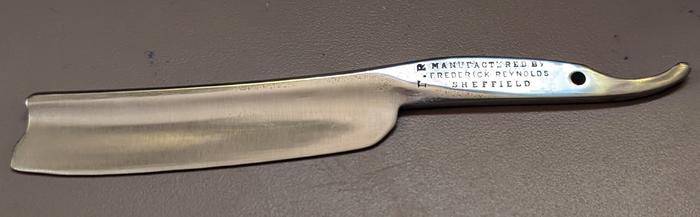
Here's the start of another one from the 4 sent for restoration. This one is a Frederick Reynolds with relatively heavy hone wear. I don't know what happened. I took more before pictures but for some reason only one from either side shows up in my cache.
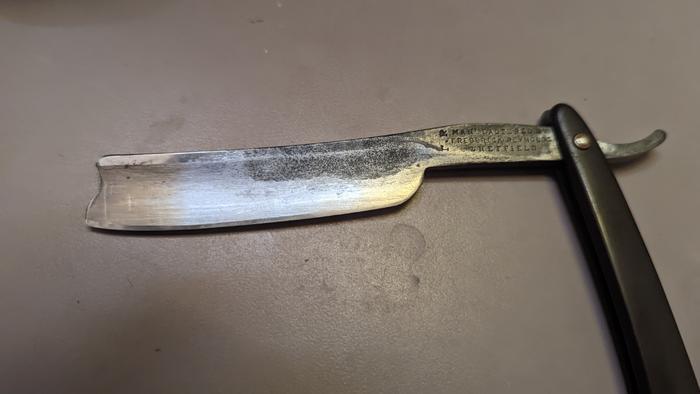
The one of the non show side is after I marked the center line of the hone wear for reference.
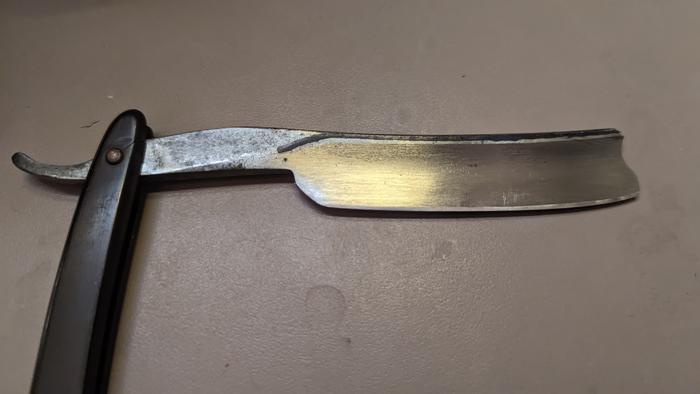
Here is the result after the initial regrind.
I didn't notice the crack in the scale until after I center punched the pin but I don't know if I cracked it or if I just noticed it then. Anyway, whichever it was this is what happened once I got the pin drilled.
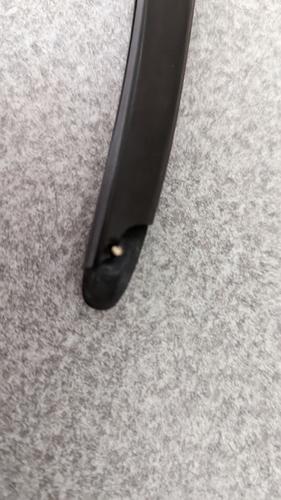
Oh well. Just as well as I will probably put it in some horn or maybe bone. See the rust on this one? Three of the four of them had a similar pattern outside the scales. I wonder if they were kept in with one that had cell rot.
Much more work to do on it. I haven't even begun the hand sanding yet. I think this one will turn out really nicely. More to come.Last edited by PaulFLUS; 04-03-2022 at 06:25 PM.
Iron by iron is sharpened, And a man sharpens the face of his friend. PR 27:17
-
04-05-2022, 02:54 AM #19723Senior Member
- Join Date
- Dec 2018
- Location
- Gainesville, FL
- Posts
- 6,875
Thanked: 683
Did a little hand sanding tonight.

I think I might reshape the toe a little. I checked the bevel angle today since there was a lot of hone wear before hand and then some grinding and sanding. It came out to be 17.34° so that's good. I'm still trying to decide about the scales. I feel like horn is the way but some bone would also look nice. I just always think of notched blades as having horn. Thoughts are welcome.Iron by iron is sharpened, And a man sharpens the face of his friend. PR 27:17
-
04-05-2022, 02:06 PM #19724Senior Member


- Join Date
- Feb 2013
- Location
- Haida Gwaii, British Columbia, Canada
- Posts
- 14,457
Thanked: 4830
The more common old razors were in horn, this did come to you in horn. The however the upscale old razors were in bone.
It's not what you know, it's who you take fishing!
-
The Following User Says Thank You to RezDog For This Useful Post:
PaulFLUS (04-05-2022)
-
04-05-2022, 04:15 PM #19725Senior Member
- Join Date
- Dec 2018
- Location
- Gainesville, FL
- Posts
- 6,875
Thanked: 683
Actually it was in celluloid...I'm pretty sure it's celluloid but it could be bakelite. It's definitely not horn.
Iron by iron is sharpened, And a man sharpens the face of his friend. PR 27:17
-
04-05-2022, 07:20 PM #19726Senior Member
- Join Date
- Feb 2018
- Location
- Manotick, Ontario, Canada
- Posts
- 2,819
Thanked: 563
Love the form of that razor.
PaulFLUS likes this.David
Shared sorrow is lessened, shared joy is increased
― Spider Robinson, Callahan's Crosstime Saloon
-
04-06-2022, 02:27 PM #19727Senior Member
- Join Date
- Feb 2013
- Location
- Haida Gwaii, British Columbia, Canada
- Posts
- 14,457
Thanked: 4830
I would definitely go with horn or bone. Originally Posted by PaulFLUS
 engine46 likes this.It's not what you know, it's who you take fishing!
-
04-06-2022, 09:16 PM #19728Razor Vulture

- Join Date
- Oct 2010
- Location
- Lone Star State
- Posts
- 26,208
Thanked: 8626
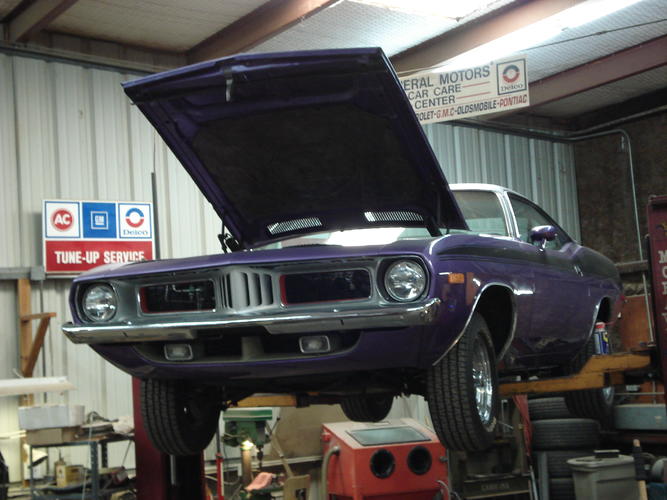
Well, just when I was doing a bit of razor work, I have been pulled-off.
The purple people-eater is suspended to install torque boxes on all 4 corners and then some subframe connectors. Pre-fabbed but grind-to fit of course!
Lotsa digging out old undercoating and prep. Lots of different abrasive things and some weld-through primer at the ready.
Got my welder set up with .024 wire and new tip,holder, shroud setup. Figure to do what I can on the boxes with it in the air and down level on some stands for the connectors. Then all the way down for carpet/seats out and back up to tie into the floor.
I will also do some simple gussets and boxing here and there.
Might stiffen this twisty, rattly thing up. Gonna take forever I suppose..


-
04-07-2022, 12:08 AM #19729Skeptical Member


- Join Date
- Nov 2016
- Location
- Colorado Springs
- Posts
- 10,559
Thanked: 2197
That sounds like a big job, Tom. I used to weld but its been 20 years. Good luck. Hope it all goes well.
It's just Sharpening, right?
Jerry...
-
The Following User Says Thank You to Gasman For This Useful Post:
sharptonn (04-07-2022)
-
04-07-2022, 02:49 AM #19730Razor Vulture
- Join Date
- Oct 2010
- Location
- Lone Star State
- Posts
- 26,208
Thanked: 8626
Yeah Jerry, It seems my plans are many. It is something I inherited from a Great Friend who passed and was obsessed with what looked good and not correcting the structure. We had a few tiffs over this as the March pulley system (un-needed) costs the same as doing this after all said and done. Car rattles and LF fender gyrates as you drive. I know it is a Penn car. Not rusted out, but the pinch welds and spot welds are getting weak as the salt never comes out of the tight spots.
Is what it is.
An exoskeleton under will help. Tying it into the floors may prove to be difficult. May be too thin to weld.
I am thinking angle tabs made and welded to the new stuff and topped with a continuous flat-bar partay on top of the floor with 5/16 bolts and locktited nuts underneath to the tabs and cranked-down hard, will be best. Any good tacks and small welds will also be welcome there.
Also ideas to fill in an open area near the cowl to inner fender and subframe will gain rigidity. A bar across the subframe connectors will really help. Making it up as I go!


 Reply With Quote