
Results 2,771 to 2,780 of 20574
 91475Likes
Thread: What are you working on?
 LinkBack URL
 About LinkBacks
-
04-04-2016, 01:08 AM #2771Senior Member


- Join Date
- Mar 2015
- Location
- Akron, Ohio
- Posts
- 12,111
Thanked: 4314
I have before, but no. That's my work surface, instead of the countertop itself. One side has emery on it ,another has iron oxide, the other is metal polish. All from the dremmel and hand.
engine46 and ultrasoundguy2003 like this.Mike
-
04-06-2016, 01:46 AM #2772Matt

- Join Date
- Dec 2015
- Location
- Albany, NY
- Posts
- 971
Thanked: 260
Some of you guys might remember a thread I started about 2 months ago regarding 'The Admiral' straight razor. The vendor wanted $85 for it at the time, which was too much. Well i went back a few weeks later and through the use of a jewelers loupe accompanied by sounds of utter disappointment while inspecting the blade..I got her to come down to $40. For that price this razor was worth it, to me anyway. Well that was a few weeks ago and i finally got around to working on it a bit tonight.
There was alot of stringy rust on the goldwash.
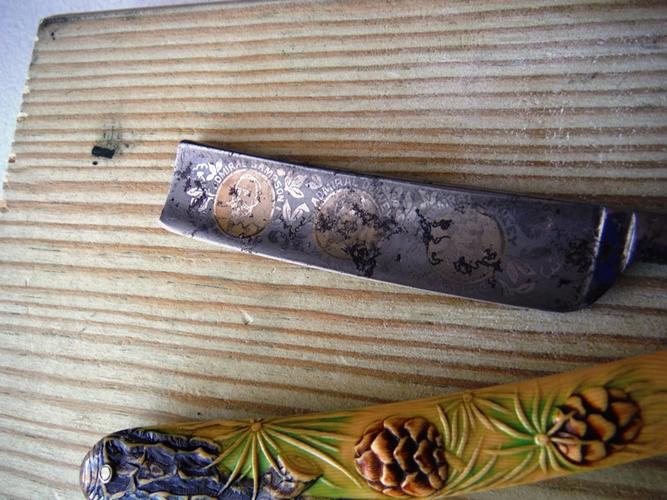
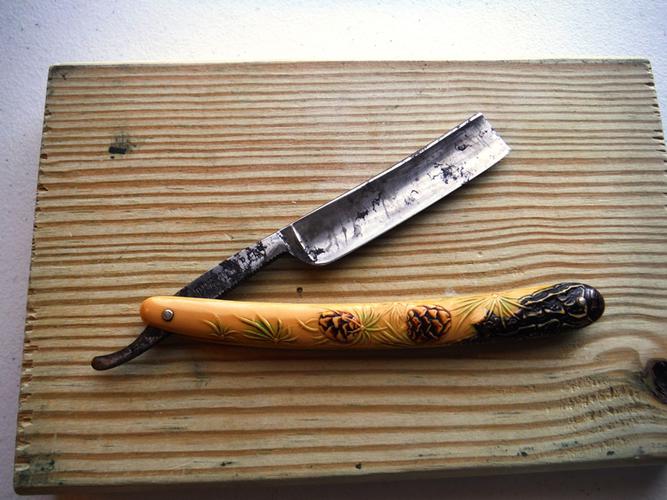
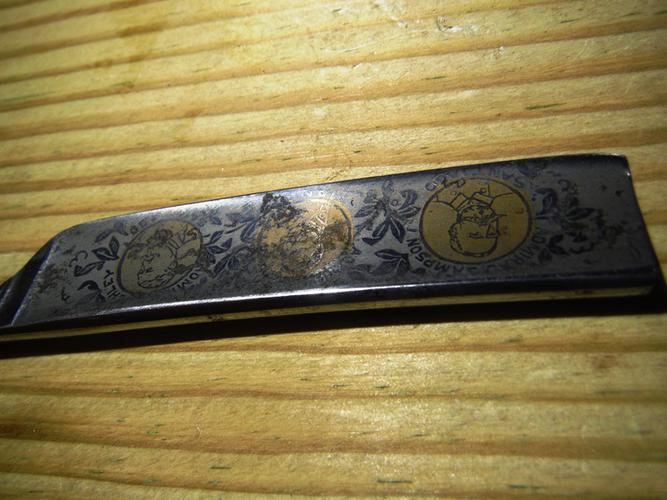
Back side as well.. I love the scales on this thing. I really do.
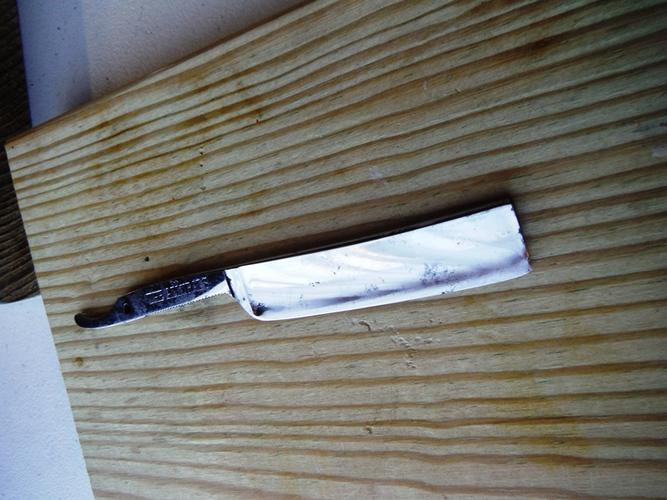
I gave her a 'dirty polish' with some Crox and a felt wheel.. No sanding for this one. You can see some pitting.
I had a crazy plan in my head to apply microscopic amounts of naval jelly to the rust on the gold wash over a period of several weeks, chemically etching the rust off of the blade.. yeah right. I tried that for about 5 minutes and realized it was a dumb idea.. so I took an exacto razor with a chisel tip and scraped the rust right off. Not perfect by any means.. but it didnt scratch the gentlemans faces up. Theres some discoloration and pitting but that's it. Im done messin with it. Im gonna polish the rest of the blade with Mass.. re pin and hone.
-
04-06-2016, 02:05 AM #2773Razor Vulture

- Join Date
- Oct 2010
- Location
- Lone Star State
- Posts
- 26,169
Thanked: 8618
About all I have found is a pencil-point here and there, some Eagle1 Nano Polish. Stuff will bring out the gold a bit as well.
Very light polish."Don't be stubborn. You are missing out."
I rest my case.
-
The Following User Says Thank You to sharptonn For This Useful Post:
MW76 (04-06-2016)
-
04-06-2016, 02:09 AM #2774Razor Vulture
- Join Date
- Oct 2010
- Location
- Lone Star State
- Posts
- 26,169
Thanked: 8618
I have been honing........A LOT!

 "Don't be stubborn. You are missing out."
I rest my case.
-
04-06-2016, 02:18 AM #2775I love Burls....... and Acrylic

- Join Date
- Mar 2012
- Location
- Baden, Ontario
- Posts
- 5,475
Thanked: 2284
Ya , that's a nice looking blade for sure. I think what you've done so far is really good. Looking forward to seeing it back together and complete. Originally Posted by MW76
 Burls, Girls, and all things that Swirl....
-
The Following User Says Thank You to HARRYWALLY For This Useful Post:
MW76 (04-06-2016)
-
04-06-2016, 02:45 AM #2776Senior Member
- Join Date
- Mar 2015
- Location
- Akron, Ohio
- Posts
- 12,111
Thanked: 4314
Matt.. I really dig those scales man. Originally Posted by MW76
And the blade is lookin good. [emoji106]MikeB52 likes this.Mike
-
The Following User Says Thank You to outback For This Useful Post:
MW76 (04-06-2016)
-
04-06-2016, 02:57 AM #2777'with that said'


- Join Date
- Aug 2010
- Location
- Walla Walla in WA State USA
- Posts
- 11,254
Thanked: 4238
Last year I stumbled upon something that could be of use for straight razors. See Here;
http://straightrazorpalace.com/works...ht-razors.html
Well today I decided to see how this trick would work for filling sloppy pivot holes. There are no pictures as between my abilities and my camera you couldn't see what was taking place. Sorry.
I soaked the pivot end in acetone to remove any oil then I cut two 1/8" wide by 4-5" long strips of a 'medium' emery roll then folded them with the grit side out in half. After removing the shank from the solvent I then used the emery strips to rough up the hole. I then placed the pivot back in the acetone for a few minutes then repeated roughing up the hole.
I placed painters tape on one side of the shank to contain the baking soda then tapped on the shank with my pinning hammer to try to settle the soda into the hole.
When I went to apply the super glue it became real apparent real quick that the 'liquid' super glue sold in local stores isn't the same viscosity that was shown in the video as it was hard to work with and didn't 'Wick' into the hole. However it did work. Kind of. After letting the mixture sit for 5 minutes I turned the blade over and removed the tape and found that the soda hadn't fully reached the bottom so I reapplied and topped off with the super glue.
After letting that sit for about a half an hour I drilled out a new pivot hole and that went well. I then used a 1/16" punch to try to break the mixture loose within the hole. No I didn't WRENCH on it, just simple moving around and it held nicely.
However straight razors live in a 'wet' environment so I placed the shank in water for an hour and then retested.
The mixture didn't hold up, it took a bit but it really broke out easily.
So while I'm sure that the trick will work on certain things, it doesn't work on filling a pivot hole. Well it might but how long it would hold up I don't know so I can't recommend it.
And it sounded so promising. OH WELL!Our house is as Neil left it- an Aladdins cave of 'stuff'.
Kim X
-
04-06-2016, 03:02 AM #2778Senior Member
- Join Date
- Mar 2015
- Location
- Akron, Ohio
- Posts
- 12,111
Thanked: 4314
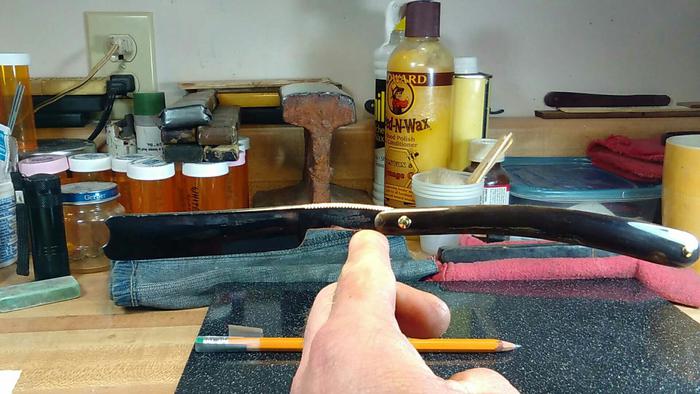
Put the Mappin & Webb together with the streaked horn tonight. Scales still shows their age, as doe's the blade.
But it'll hone up to shave again.
The blade before
Attachment 233675Attachment 233676
After
Attachment 233677Attachment 233678
Scales before
Attachment 233679
After
Attachment 233680Attachment 233681
I sanded the built in wedge from the scales, and made a lead wedge to give it balance, being the blade is quite thick and heavy.
Attachment 233682
Last edited by outback; 04-06-2016 at 03:07 AM.
Mike
-
04-06-2016, 03:02 AM #2779Razor Vulture
- Join Date
- Oct 2010
- Location
- Lone Star State
- Posts
- 26,169
Thanked: 8618
Cuda! Pictures, or it didn't happen!
 outback likes this."Don't be stubborn. You are missing out."
I rest my case.
-
04-06-2016, 03:04 AM #2780Razor Vulture
- Join Date
- Oct 2010
- Location
- Lone Star State
- Posts
- 26,169
Thanked: 8618
Nice work! That would be 'Mappin' outback! Get it right! Originally Posted by outback
 Looks good!
outback likes this."Don't be stubborn. You are missing out."
Looks good!
outback likes this."Don't be stubborn. You are missing out."
I rest my case.
-
The Following User Says Thank You to sharptonn For This Useful Post:
outback (04-06-2016)


 Reply With Quote