
Results 4,331 to 4,340 of 20600
 91543Likes
Thread: What are you working on?
 LinkBack URL
 About LinkBacks
-
08-21-2016, 07:00 PM #4331Senior Member


- Join Date
- Jun 2016
- Location
- NH
- Posts
- 1,924
Thanked: 1363
Thanks outback, that looks like a good way of doing things. Now I just need to play around with it and I'm sure I'll end up marking mine in a similar way. What's the best way to hold a small washer still (or bead cap, while I'm asking...) for drilling out the center hole? I've been able to do it in the past with a pin vise by holding it with a needle nose on the sides but that can mark 'em up and it still doesn't even work that well.
sharptonn likes this.
-
08-21-2016, 07:35 PM #4332Senior Member


- Join Date
- Mar 2015
- Location
- Akron, Ohio
- Posts
- 12,116
Thanked: 4315
Just a pair of pliers to hold the washer. Originally Posted by xiaotuzi

Then another trip to harbor freight, for some diamond coated dremmel bits.
Again, don't forget the coupons.
I like the bit shown in the pic. I taper the hole open, till the rod just passes through. That way when you peen, the pin comes out flush with the domes, after final clean-up.
 Mike
Mike
-
-
08-22-2016, 12:44 AM #4333Senior Member
- Join Date
- Jun 2016
- Location
- NH
- Posts
- 1,924
Thanked: 1363
Nice method outback, thanks for sharing. And I like that the hole ends up tapered to allow for a flush set pin, that's key. Yep, looks like another trip to harbor freight! Thanks for the tips!

-
The Following User Says Thank You to xiaotuzi For This Useful Post:
sharptonn (08-22-2016)
-
08-22-2016, 01:19 AM #4334Razor Vulture

- Join Date
- Oct 2010
- Location
- Lone Star State
- Posts
- 26,182
Thanked: 8620
Garwd, I am SO lacking!

-
08-22-2016, 04:38 AM #4335Senior Member

- Join Date
- Jan 2012
- Location
- Waukesha, Wisconsin
- Posts
- 1,943
Thanked: 390
I did a quick search and i think someone used hair dye... lots of colors to choose Originally Posted by MikeB52
-
08-22-2016, 10:17 PM #4336Senior Member
- Join Date
- Jun 2016
- Location
- NH
- Posts
- 1,924
Thanked: 1363
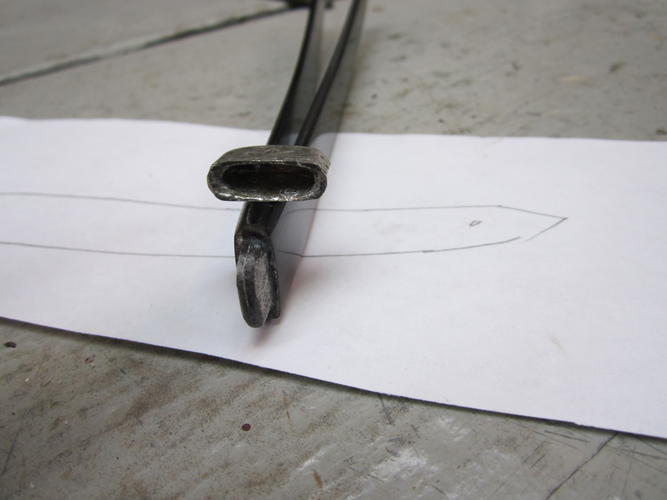
I've started working on restoring a Greaves & Sons. As you can see, it has a metal end cap and one of the scales was broken. A good candidate for a graft if I hadn't broken the scales worse messing with it.
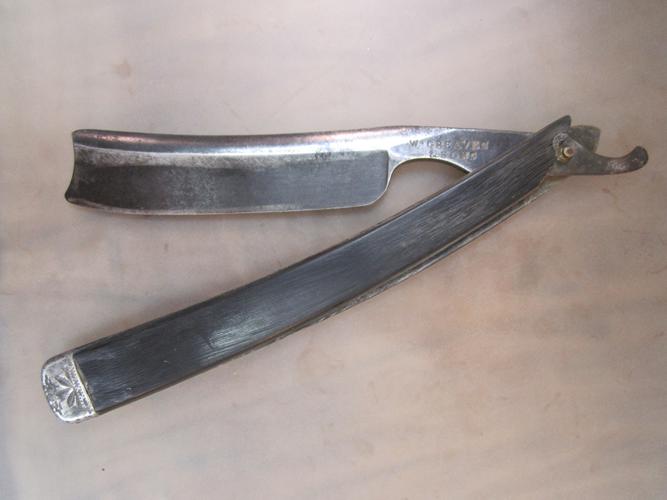
So I decided to attempt replacing the scales with new horn. I removed the end cap, dug all the bits of horn out, and this is what was inside.
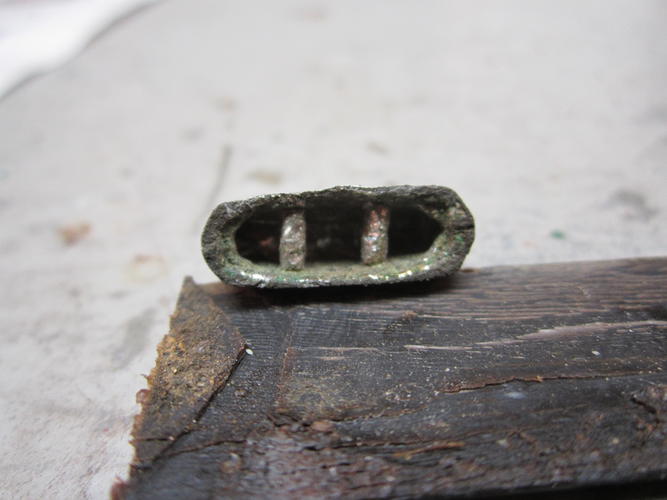
Notice the two posts inside the end cap. These are not pins they are part of the cap itself. This leads me to believe that the scales were made with holes and then somehow dipped or coated in the metal being molded around and through the scales. Next I set about cutting new scales...
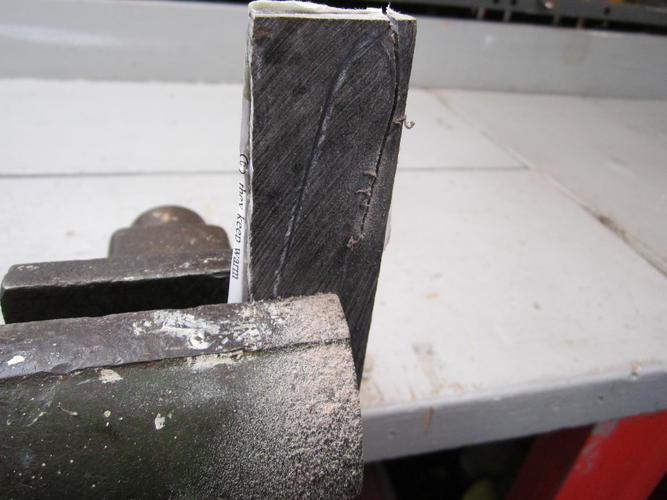
Since there is no wedge the scales need to be made with a "wedge" built in. This is the first time I attempted this and it seems to have worked pretty good in a test fit. Next I epoxied the scales together. I use a piece of 1500 sand paper inside the clip to keep it in place on the scales.
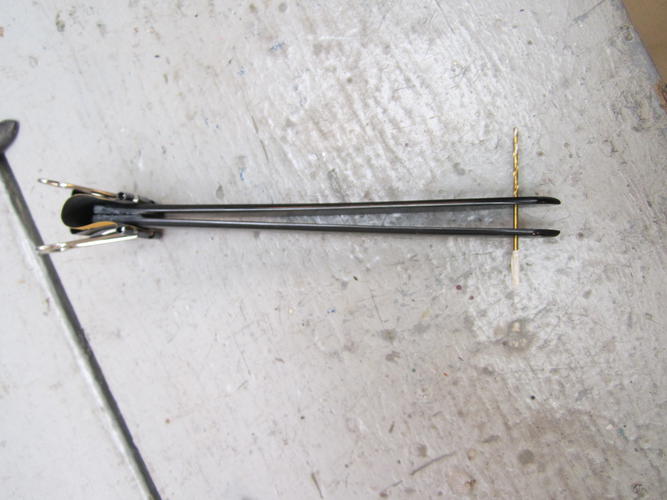
After the epoxy cured I removed the posts from the inside of the cap and shaped the end of the horn to fit.
Then I epoxied the cap in place.
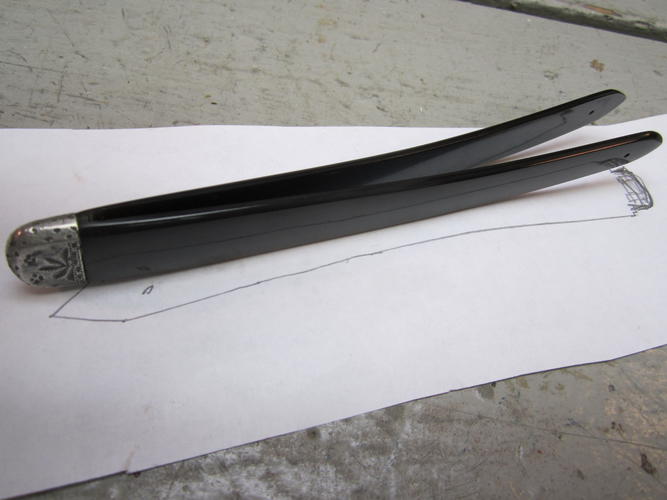
It turned out so far so good I think. At least I found out what's going on inside those end caps and got some experience working with wedge-built-in scales. Next I will turn my attention to cleaning up the blade and hope for the best when it comes time to put it together. I don't have many options for adjustments at this point!
-
-
08-22-2016, 10:20 PM #4337Matt

- Join Date
- Dec 2015
- Location
- Albany, NY
- Posts
- 971
Thanked: 260
Nice job man.
-
The Following User Says Thank You to MW76 For This Useful Post:
xiaotuzi (08-22-2016)
-
08-22-2016, 11:18 PM #4338Senior Member
- Join Date
- Sep 2015
- Posts
- 695
Thanked: 77
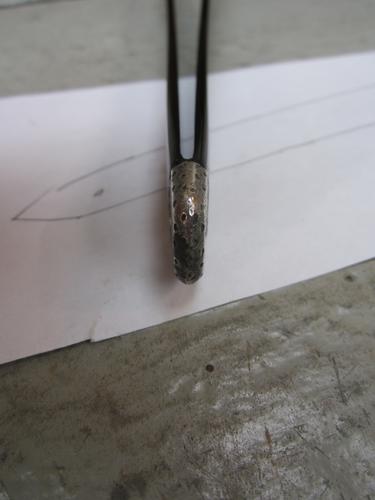
I'm working on replicating this finish on new horn


Sent from my SAMSUNG-SM-G935A using Tapatalk
-
The Following User Says Thank You to aaron1234 For This Useful Post:
sharptonn (08-23-2016)
-
08-23-2016, 12:38 AM #4339Razor Vulture
- Join Date
- Oct 2010
- Location
- Lone Star State
- Posts
- 26,182
Thanked: 8620
Awesome work, Men!

-
-
08-23-2016, 12:55 AM #4340Senior Member
- Join Date
- Sep 2015
- Posts
- 695
Thanked: 77
Thank you but I can't seem to replicate it. It's all there because of the type of horn it is or because of the age or a mixture of both but I'm starting off with steel wool to see if I can make the grain pop on some translucent Buffalo horn. Originally Posted by sharptonn
Sent from my SAMSUNG-SM-G935A using Tapatalk


 Reply With Quote