Page 767 of 2057 FirstFirst ... 26766771775776376476576676776876977077177781786712671767 ... LastLast
Results 7,661 to 7,670 of 20565
Like Tree91447Likes

Thread: What are you working on?

  1. #7661
    'with that said' cudarunner's Avatar
    Join Date
    Aug 2010
    Location
    Walla Walla in WA State USA
    Posts
    11,226
    Thanked: 4237

    Default

    Quote Originally Posted by BeJay View Post
    Cleaning up this Otto Busch "world Master". It's got some staining and lots of little rust spots. I'm hoping to get it cleaned up without any sanding or greaseless. This Dialux Vert is an awesome compound that may be up to the task. I assume it's got lots of CroOx, but I suspect there are other abrasives in it as well. It's almost as aggressive as Emory, but leaves as nice a finish as any rouge. Its not so great for scales though.
    From the Data Safety Sheet:

    Trade name:

    UnipolĀ® Dialux green

    General chemical description

    mixture of fatty acids, paraffines, abrasive polishing minerals, chromoxide

    After thinking about it I decided to have the writing on the box translated/it's pretty much you will find online:

    The Dialux Vert is especially recommended for fine brightening with polishing, special steels, very hard alloys, chromium, cobalt chromium, platinum etc.

    To be used on circular brush, felt or cotton disc.
    Last edited by cudarunner; 02-18-2017 at 02:28 AM.
    BeJay likes this.
    Our house is as Neil left it- an Aladdins cave of 'stuff'.

    Kim X

  2. The Following 3 Users Say Thank You to cudarunner For This Useful Post:

    BeJay (02-18-2017), Geezer (02-18-2017), xiaotuzi (02-19-2017)

  3. #7662
    I love Burls....... and Acrylic HARRYWALLY's Avatar
    Join Date
    Mar 2012
    Location
    Baden, Ontario
    Posts
    5,475
    Thanked: 2284

    Default

    Quote Originally Posted by BeJay View Post
    Cleaning up this Otto Busch "world Master". It's got some staining and lots of little rust spots. I'm hoping to get it cleaned up without any sanding or greaseless. This Dialux Vert is an awesome compound that may be up to the task. I assume it's got lots of CroOx, but I suspect there are other abrasives in it as well. It's almost as aggressive as Emory, but leaves as nice a finish as any rouge. Its not so great for scales though.
    Attachment 257053
    Attachment 257054
    Typical age marks, but I noticed there's hardly any hone wear. Once cleaned up, it should be a looker!
    BeJay likes this.
    Burls, Girls, and all things that Swirl....

  4. #7663
    Senior Member AlanQ's Avatar
    Join Date
    Aug 2015
    Location
    Montreal
    Posts
    853
    Thanked: 128

    Default

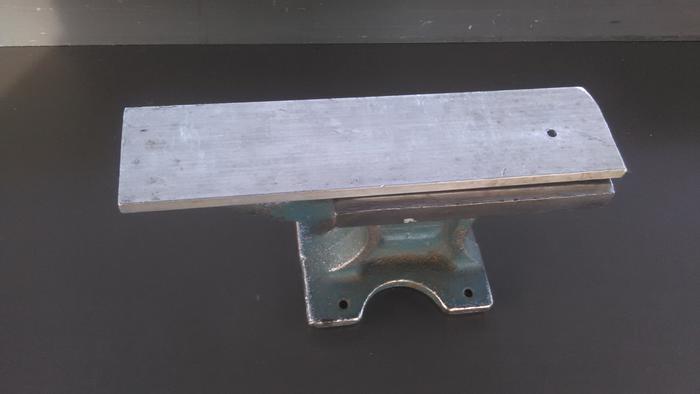
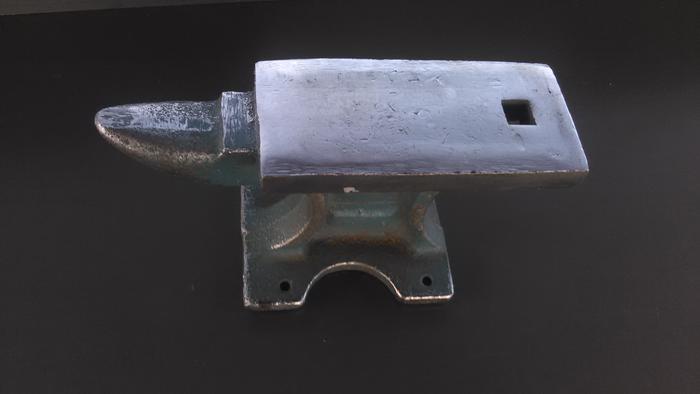
    Well I been busy lately and havent had tiem to do anything but decided to try and learn how to remoce scales without breakign them. All my early attempts were failures. So I just hacked away at it on some that already had broken scales. I used a small anvil with a hole in it but seems the hole was too big and I continued to break scales. Then decided to use a piece of aluminum with a hole just big enough for the pin to go through and I started to have some succes.
    Name:  IMG_20170217_154730.jpg
Views: 186
Size:  15.4 KBName:  IMG_20170217_154747.jpg
Views: 190
Size:  15.9 KB

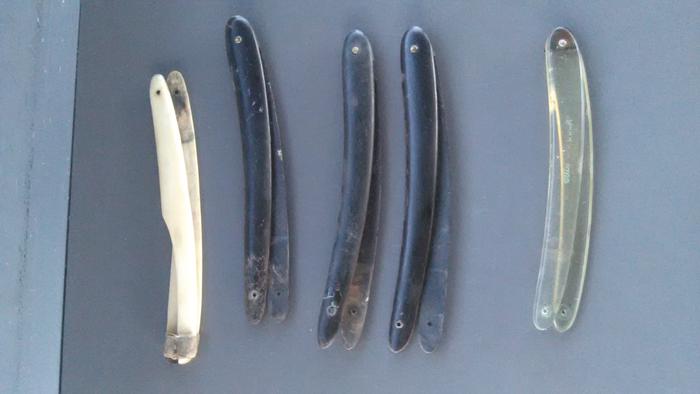
    These were all broken to some degree before I did anything
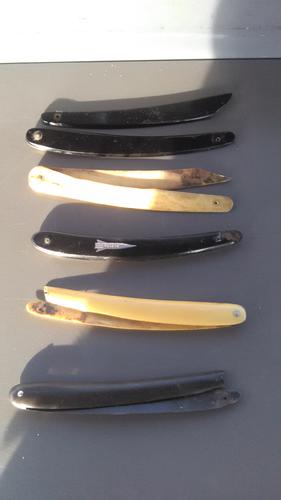
    Name:  IMG_20170217_154613.jpg
Views: 215
Size:  12.1 KB

    Then moved on to better ones. The last is a nice Dubl Duck Satin Edge set of scales that had that had an IROS KEEN blade in them. Managed to remove the blade without damaging the scales!
    Now I just have to find a dubl duck to go inside them. Either that or trade them to someone for a different set of scales.
    Name:  IMG_20170217_154708.jpg
Views: 201
Size:  22.2 KB

  5. #7664
    Razor Vulture sharptonn's Avatar
    Join Date
    Oct 2010
    Location
    Lone Star State
    Posts
    26,103
    Thanked: 8612

    Default

    I learned early on that using a punch and hammer will result in busted scales most of the time.
    JMHO
    Euclid440 likes this.

  6. #7665
    Senior Member AlanQ's Avatar
    Join Date
    Aug 2015
    Location
    Montreal
    Posts
    853
    Thanked: 128

    Default

    Quote Originally Posted by sharptonn View Post
    I learned early on that using a punch and hammer will result in busted scales most of the time.
    JMHO
    How do you do remove pins?

  7. #7666
    Senior Member BeJay's Avatar
    Join Date
    Jan 2013
    Location
    Communist State of California
    Posts
    1,461
    Thanked: 463

    Default

    The Busch cleaned up pretty well. The perfectionist in me wants to go back and do some sanding but it really is pretty nice as is.
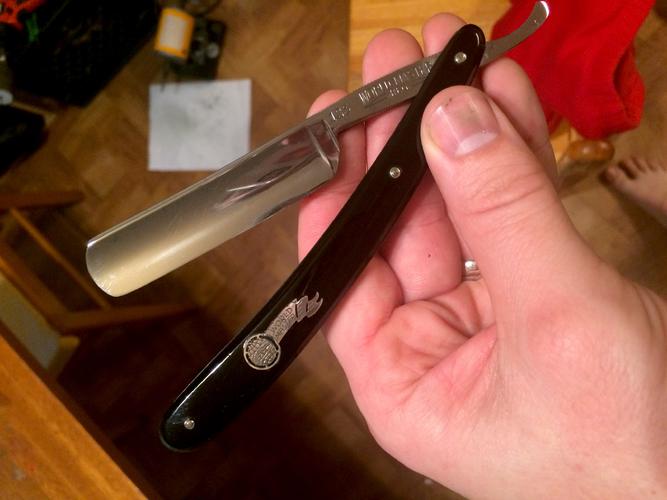
    Name:  IMG_5291.jpg
Views: 216
Size:  34.3 KB

    The wedge is a little piece of tubing. I've seen this on other razors and always assumed the it was added by someone that didn't have a spacer handy. These are obviously the original scale though and the factory style pins all match. Either way, it's serving its purpose and will stay in there.
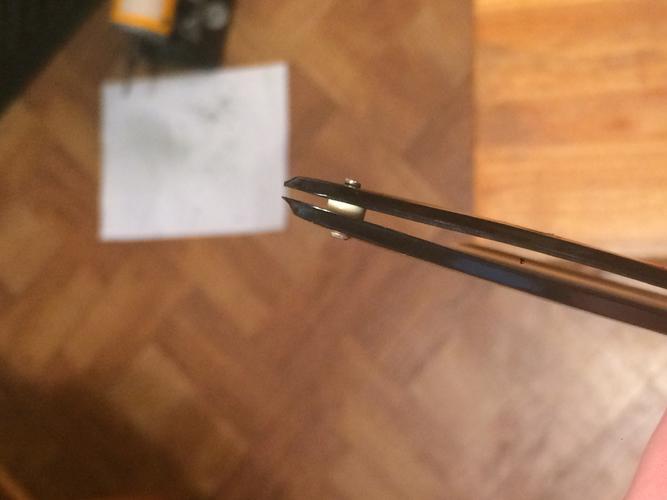
    Name:  IMG_5292.jpg
Views: 196
Size:  21.4 KB
    Geezer, sharptonn, 32t and 8 others like this.
    B.J.

  8. The Following User Says Thank You to BeJay For This Useful Post:

    xiaotuzi (02-19-2017)

  9. #7667
    Razor Vulture sharptonn's Avatar
    Join Date
    Oct 2010
    Location
    Lone Star State
    Posts
    26,103
    Thanked: 8612

    Default

    Quote Originally Posted by AlanQ View Post
    How do you do remove pins?
    Best explained here beginning with post #27; http://straightrazorpalace.com/works...le-halves.html
    Dieseld likes this.

  10. The Following 2 Users Say Thank You to sharptonn For This Useful Post:

    AlanQ (02-18-2017), Dieseld (02-18-2017)

  11. #7668
    Senior Member AlanQ's Avatar
    Join Date
    Aug 2015
    Location
    Montreal
    Posts
    853
    Thanked: 128

    Default

    Quote Originally Posted by sharptonn View Post
    Best explained here beginning with post #27; http://straightrazorpalace.com/works...le-halves.html
    my original attempts at drilling out the pins all ended in failure, think if I dimpled the crown of the pin better I might be more successful
    Thanx
    sharptonn likes this.

  12. #7669
    Senior Member blabbermouth RezDog's Avatar
    Join Date
    Feb 2013
    Location
    Haida Gwaii, British Columbia, Canada
    Posts
    14,439
    Thanked: 4827

    Default

    I find if my approach is to flatten the pin, start a hole with a split point bit in a pin vise and then use a drill press with a split point bit, all goes fairly well, most of the time.
    It's not what you know, it's who you take fishing!

  13. The Following User Says Thank You to RezDog For This Useful Post:

    sharptonn (02-18-2017)

  14. #7670
    'with that said' cudarunner's Avatar
    Join Date
    Aug 2010
    Location
    Walla Walla in WA State USA
    Posts
    11,226
    Thanked: 4237

    Default

    Quote Originally Posted by AlanQ View Post
    my original attempts at drilling out the pins all ended in failure, think if I dimpled the crown of the pin better I might be more successful
    Thanx
    I use a small file to flatten and remove as much of the pin as possible and I do that on both sides as sometimes you need to 'Gently' work back and forth. I also have a pinning block that I drilled a hole completely through and then made a slight depression and that really helped!

    However I now use a product that I was turned onto by a friend who lives in the boonies of Idaho. I find it of great use. However it can stain bone, Ivory and certain light colored horn.

    While marketed as a 'penetrating oil' my friend referrers to it as a 'creeping oil' that is widely used in gunsmithing. It's great stuff!
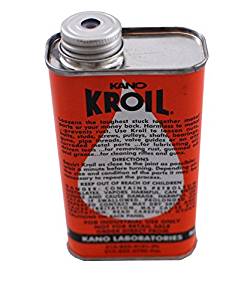
    Name:  Kroil Penetrating Oil.jpg
Views: 251
Size:  11.7 KB
    Our house is as Neil left it- an Aladdins cave of 'stuff'.

    Kim X

  15. The Following User Says Thank You to cudarunner For This Useful Post:

    Hirlau (02-20-2017)

Posting Permissions

  • You may not post new threads
  • You may not post replies
  • You may not post attachments
  • You may not edit your posts
  •