Results 2,281 to 2,290 of 4688
Thread: The Butchered Blade
-
10-27-2015, 01:20 PM #2281

If you know how...
Reinstate the smileMike
-
-
10-27-2015, 02:05 PM #2282

Allright! I have been experimenting on cell and 'inlays' made of bits of DE blades.
Nothing found so far melts the cell good enough. I have found that softening the scale bit with acetone and setting the inlay in CA I can set it down flush, but that screws up the Cell. I am going to talk with Harrywally and look into some different stuff like he uses on brush handles.
That GD is gonna look great! (coff coff) That hammer looks great!
I do most of my work on a desk pullout in my back office. I thought about taking my operation home, would miss my few machines and it is sometimes messy, stinky work.
Got to work with what we have, sometimes.
Looking forward to more pics, Gents! "Don't be stubborn. You are missing out."
I rest my case.
-
10-27-2015, 03:15 PM #2283

Boss...
Ya try the model glue yetMike
-
10-27-2015, 03:28 PM #2284Str8Faced Gent.


- Join Date
- Aug 2013
- Location
- Orangeville, Ontario
- Posts
- 8,463
- Blog Entries
- 1
Thanked: 4207
That GD save looks like a good project. I'd also go with epoxy setting the wood handle right up to the hilt. Make the wood transition into the remaining tang thickness for esthetics and maybe add some groove, knurles, or texture to it.
Very neat idea. And the hammer finish, very nice work. Is that a 4 ozs?
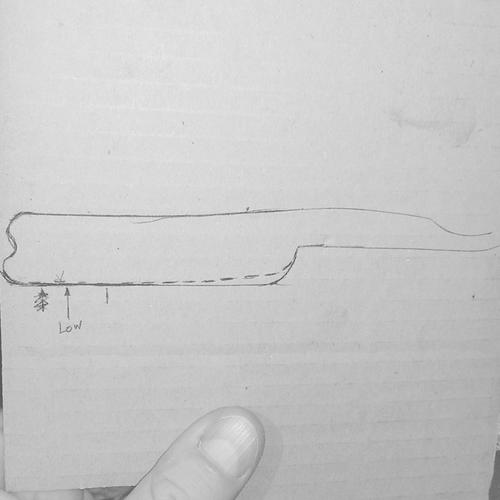
Regarding the WB, absolutely try to recover the smile, if you can. Trace out your existing profile on a cardboard or thick paper. Trace it out to original and start to draw the shape. When you have a good template, lay it back on the blade, mark it off and start to remove the metal identified.
Show us the templates, Dr Tom's a smile savant! He can steer you around the stab work if anyone can.
Good luck with it. Nice project.
 "Depression is just anger,, without the enthusiasm."
Steven Wright
https://mobro.co/michaelbolton65?mc=5
-
10-27-2015, 03:47 PM #2285

I have some model glue but it isn't the same as it used to be which is why they sell it w/o an ID. I don't know if the model glue will work but it's worth a try. Ya never know.
Well, he pled guilty. The prosecutor was definitely on my side. He said he can't stand it when someone causes a motorcycle accident. He wasn't even aware that the guy got a DWI until I told him. That's all I'll say since it does not have anything to what we do here.
I gotta leave here in a short while but I think I might do something before I do because I don't know how long I'll be gone.
I know what you mean Tom. Some things have to be out in a shop or garage but some of my things are here in the house like my anvils & other tools that I can do inside, things that won't stink!
Good luck Boss!Last edited by engine46; 10-27-2015 at 04:06 PM.
-
10-27-2015, 03:56 PM #2286

Quick comment:
Ambroid is the only model glue that is still made of acetone and a plastic material:
From an on line vendor:
"""Original Formula In Every Tube!
Virgin cellulose has replaced recycled material, which changed the color so amber dye was added. Otherwise, Ambroid's formula today remains the same as the original. """
Now for those that have made "stick" models, the result is as you remember it
~RichardBe yourself; everyone else is already taken.
- Oscar Wilde
-
-
10-27-2015, 04:26 PM #2287

Not yet. Have not had time to go find some!
Great advise! I like to work on a DMT. Breadboard the ends at an angle till you get them about right, Then a bit more, swooping till about a smooth smile. Try to leave the belly alone as much as possible by lightening up on it.
High-angle hone it on the DMT like a knife, swooping. The add 3 layers, lay it flat and swoop it more.
Remove a layer, more. Go to the 1k with slurry to begin. That one looks like at least 2 layers will be required to hone. Judge the bevel as it forms.
You must do 'rolling' strokes. Do a search. Lots on that."Don't be stubborn. You are missing out."
I rest my case.
-
-
10-27-2015, 04:44 PM #2288

That's how I get chips & uneven bevel out most of the time..................high angle hone on DMT, swooping at the same time.
Okeedokee, before I leave, I fired up the compressor & it felt good to get out in the garage again after being down all that time. The weather is nice right now. I began surgery & this is what I have so far:


-
10-27-2015, 05:01 PM #2289

Very good advice, thanks gents. Here's a layout so far and my vision of a nice smile on this one.
Not sure on that low point now, reading Tom's advice...
 As the time passes, so we learn.
-
10-27-2015, 05:20 PM #2290

Lay your blade next to your drawing and take a pic?
"Don't be stubborn. You are missing out."
I rest my case.


 13682Likes
 LinkBack URL
 About LinkBacks


 Reply With Quote


