
Results 971 to 980 of 2504
 8857Likes
Thread: 51 MG restoration.
 LinkBack URL
 About LinkBacks
-
07-22-2021, 02:54 AM #971Str8Faced Gent.


- Join Date
- Aug 2013
- Location
- Orangeville, Ontario
- Posts
- 8,456
- Blog Entries
- 1
Thanked: 4207
Will do Tom,,
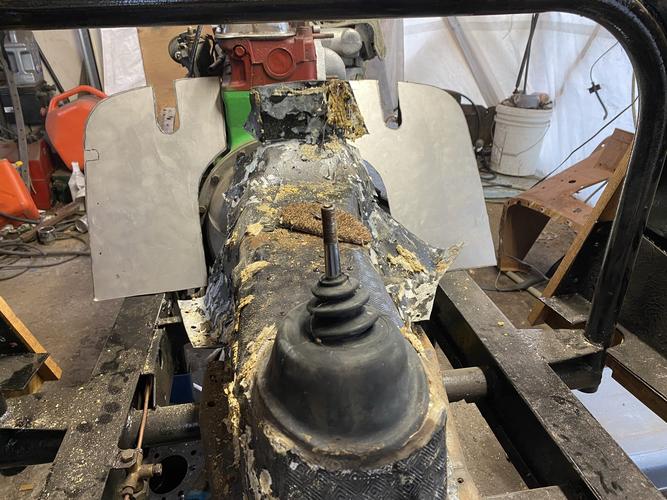
As you can see, the cover was butchered but is still under that shitty galvanized crud. And I have the rear section still that the E brake sits on but will be rolling a new cover, either full or partial.
Will probably try some silicon bronze tig braising on this, maybe wire frame if the bowl doesn’t pan out..
Really the last brain teaser on the whole project. Easy street, mentally, from here..
Last edited by MikeB52; 07-22-2021 at 02:57 AM.
"Depression is just anger,, without the enthusiasm."
Steven Wright
https://mobro.co/michaelbolton65?mc=5
-
07-22-2021, 03:00 AM #972Senior Member


- Join Date
- Dec 2018
- Location
- Gainesville, FL
- Posts
- 6,568
Thanked: 665
Hey, you could put a steering wheel in both sides and start a driving school. Originally Posted by MikeB52
 Iron by iron is sharpened, And a man sharpens the face of his friend. PR 27:17
-
07-22-2021, 03:46 AM #973Str8Faced Gent.
- Join Date
- Aug 2013
- Location
- Orangeville, Ontario
- Posts
- 8,456
- Blog Entries
- 1
Thanked: 4207
Great idea. Originally Posted by PaulFLUS
"Depression is just anger,, without the enthusiasm."
Steven Wright
https://mobro.co/michaelbolton65?mc=5
-
07-23-2021, 02:34 AM #974Str8Faced Gent.
- Join Date
- Aug 2013
- Location
- Orangeville, Ontario
- Posts
- 8,456
- Blog Entries
- 1
Thanked: 4207
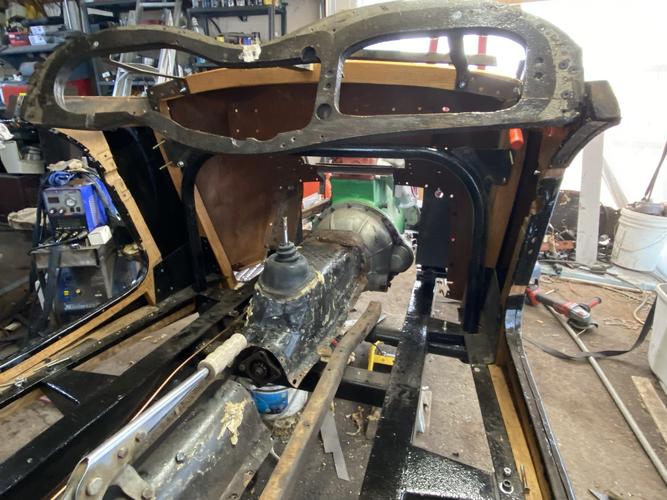
Tonight I’m working on tying the two toe plates together across the engine span.
Start with my, measured from centre, 1” angle, cut appropriately for the anticipated angles.
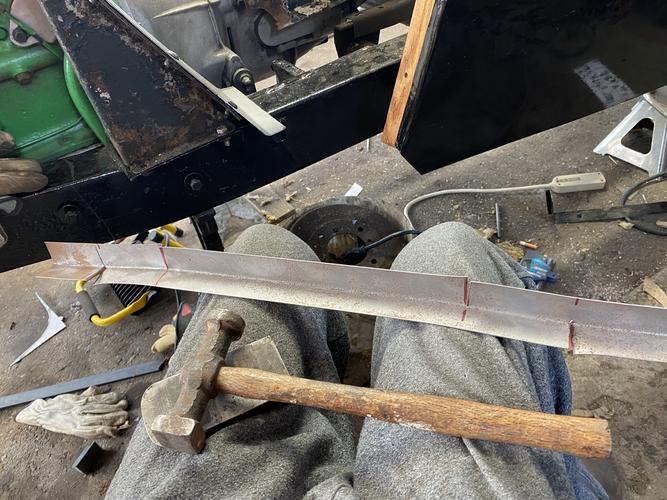
Bend bang and dolly as required to achieve the framework
Accounted for the angle of the firewall slope in my calculations, but I’m not using the cleco’s till I’m ready to weld it all together so if there is any angular offness I can bury it in the welds.
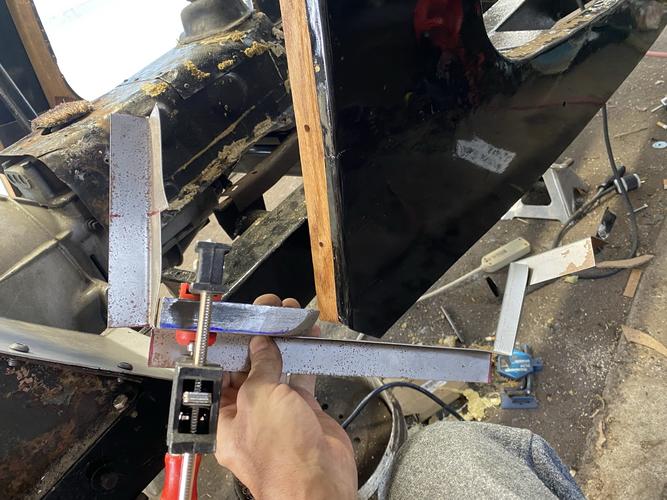
Then I continued running my attachment lips down to around the bell housing, curving them as required with the metal stretcher.
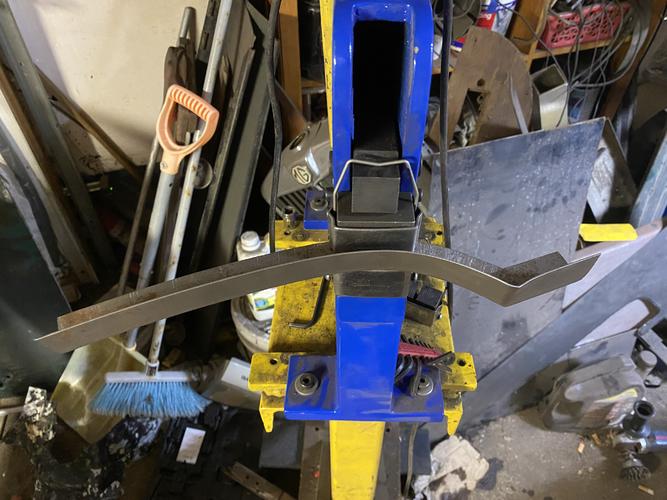
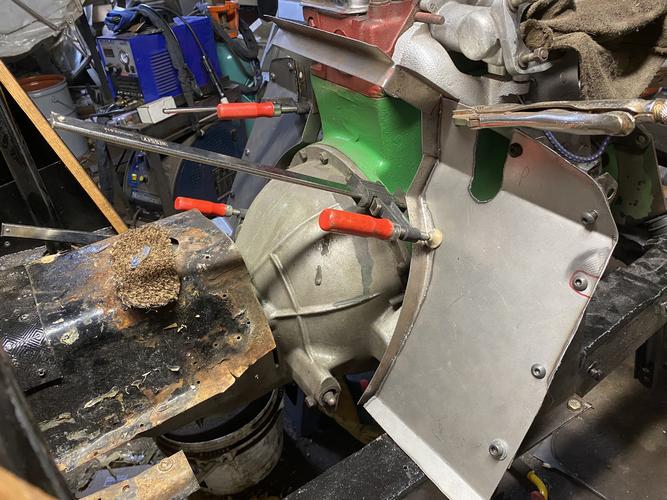
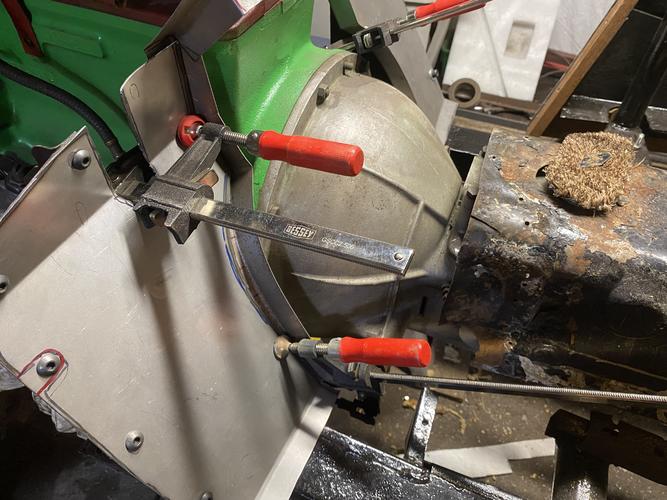
The idea is that the upper box framework will be welded to the firewall, and the lowered curves will be welded to the toe plates and bolt into the firewall. The tranny tunnel will bolt to this completed front assy via 5/16 anchor nuts. Then the floors etc all fit on top of that..
Like I said, the last of the brain teaser work I hope.
Cheer gents."Depression is just anger,, without the enthusiasm."
Steven Wright
https://mobro.co/michaelbolton65?mc=5
-
The Following User Says Thank You to MikeB52 For This Useful Post:
sharptonn (07-23-2021)
-
07-24-2021, 12:09 AM #975Str8Faced Gent.
- Join Date
- Aug 2013
- Location
- Orangeville, Ontario
- Posts
- 8,456
- Blog Entries
- 1
Thanked: 4207
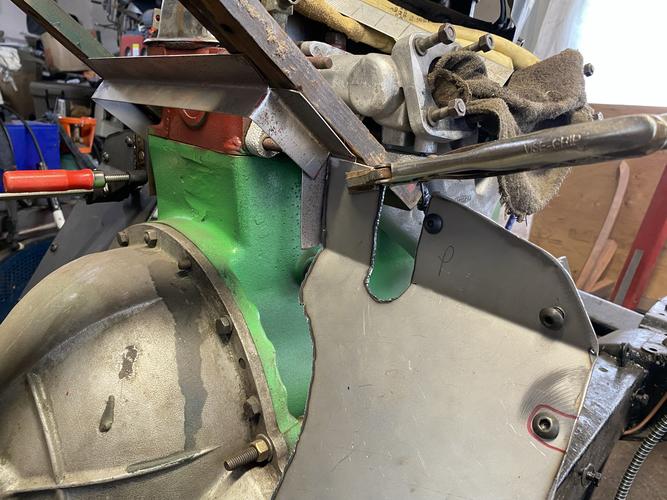
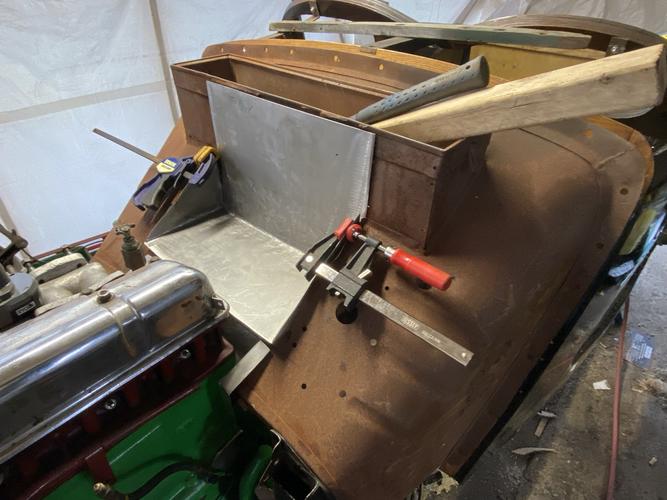
Couldnt wait, had to cut the firewall and test fit..
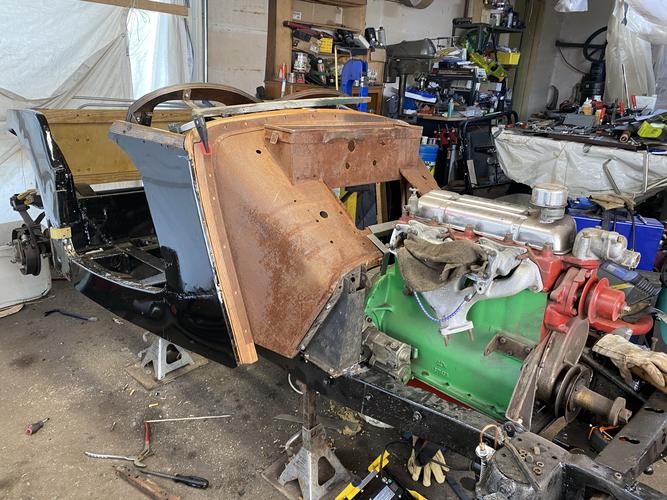
Even got the chance to test fit, for the first time, those last three pieces of oak that will tie the firewall to the car.
I will actually be able to save the tool box, and use the original battery tray! Once I build it that is..
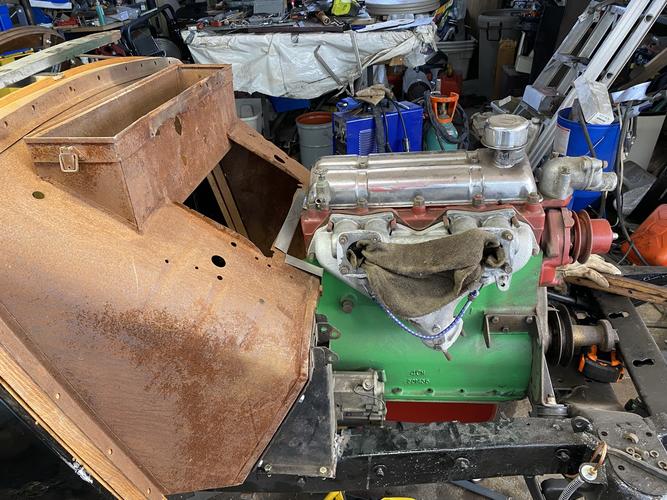
Im pretty sure thats enough room for my carbs,,, but I think I might just jump ahead to replacing gaskets and torquing down the exhaust and intake manifolds now, and install the carbs, just to make sure..
"Depression is just anger,, without the enthusiasm."
Steven Wright
https://mobro.co/michaelbolton65?mc=5
-
07-24-2021, 12:19 AM #976'with that said'


- Join Date
- Aug 2010
- Location
- Walla Walla in WA State USA
- Posts
- 11,246
Thanked: 4237
Good move to double check on the carbs rather than 'ASSUME' they would clear.
Our house is as Neil left it- an Aladdins cave of 'stuff'.
Kim X
-
07-24-2021, 02:14 AM #977Str8Faced Gent.
- Join Date
- Aug 2013
- Location
- Orangeville, Ontario
- Posts
- 8,456
- Blog Entries
- 1
Thanked: 4207
And yeah, they clear!
My new gas peddle idea should work out well with this clearance too..
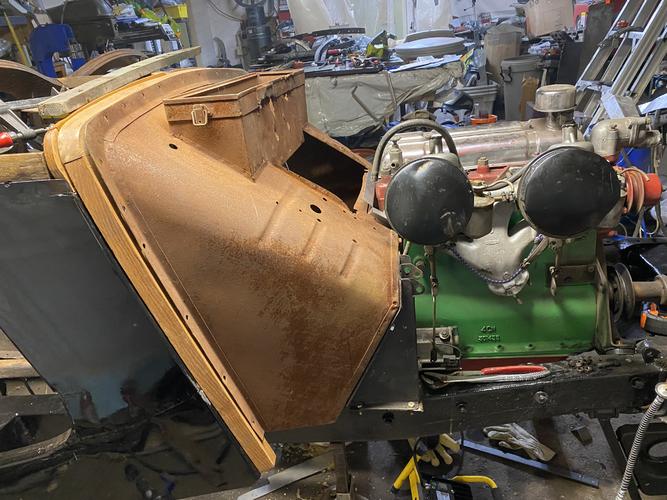
Pretty sure there will be side filter or horn protrusion, but expected that, and will run without side cowl on the passenger side until I decide the fix.
"Depression is just anger,, without the enthusiasm."
Steven Wright
https://mobro.co/michaelbolton65?mc=5
-
07-25-2021, 12:15 AM #978Str8Faced Gent.
- Join Date
- Aug 2013
- Location
- Orangeville, Ontario
- Posts
- 8,456
- Blog Entries
- 1
Thanked: 4207
Battery tray needs to be considered next.
Start with an idea based on the available space.
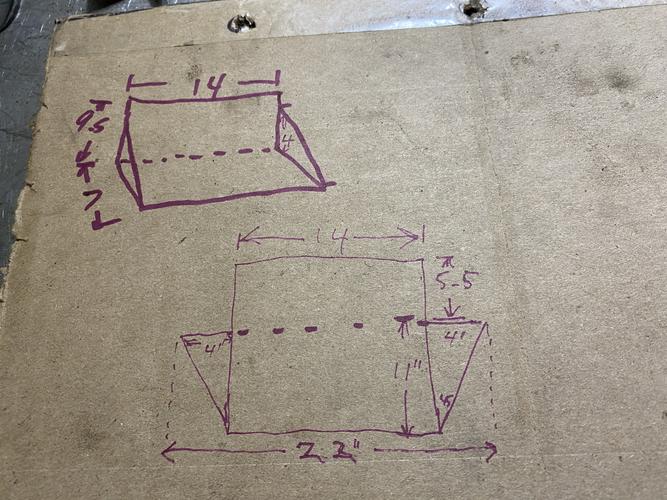
Then lay it out and figure cut end bend lines
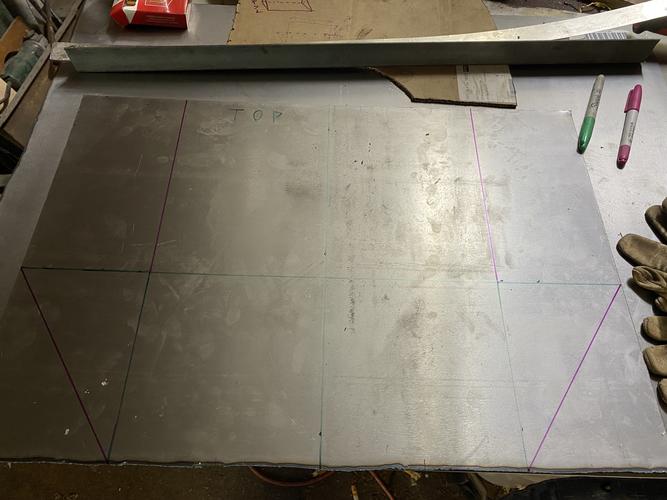
Cut and bend appropriately and test fit.
Close enough to move on to final trimming.
All these add on brackets and such will be welded with the firewall off, but its best to get all the details work figured out in position I think.
"Depression is just anger,, without the enthusiasm."
Steven Wright
https://mobro.co/michaelbolton65?mc=5
-
07-29-2021, 02:49 AM #979Str8Faced Gent.
- Join Date
- Aug 2013
- Location
- Orangeville, Ontario
- Posts
- 8,456
- Blog Entries
- 1
Thanked: 4207
I have most of my firewall work laid out now so removed it to get ready to weld it up.
Now I can nail down the cowl permanently and reweld the leading edge to the door pillars once more.
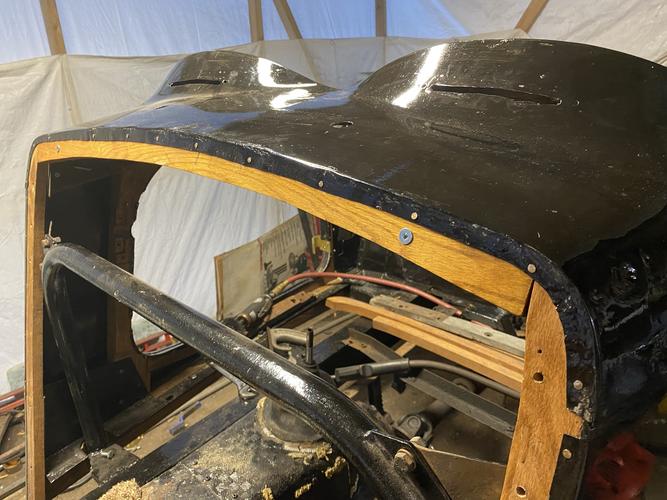
Now that thats permanent. I can measure up and do the final tweaks on the last bits of woodwork.
These three pieces will sandwich the cowl and front edge of the side panels, as well as double up the thickness, and strength of the firewall connection point.

From my tear down pictures I know that there needs to be a step here so the front cowls all fit flush when the car is assembled. And there is a rubber stepped gasket that runs the entire width of this particular assy when completed as well.
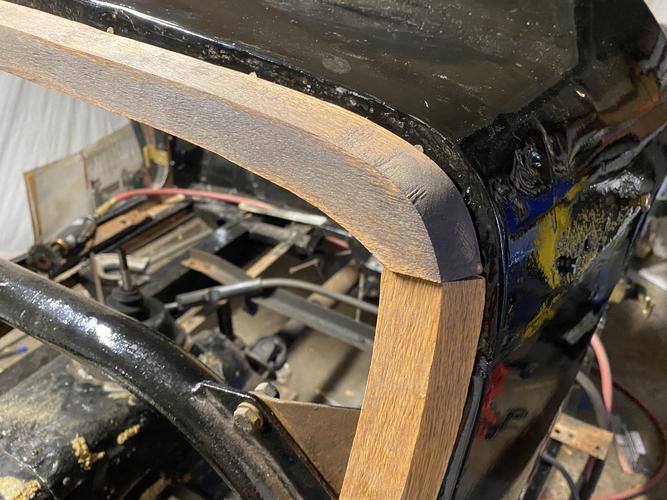
Will end up running some butyl tape between these pieces to help ensure it stays waterproof as long as it can. But you can see how it overlaps the steel edges slightly. Very cool design nuance that Im happy to have maintained.
Also added my turnbuckle hardware inside my doors. Originally there was a strap of metal that held the door in its bowed curve. I think these s.s. Turnbuckles will provide better curve retention over time and will easier to get the doors perfect than an arbitrary strip of non adjustable steel .

Just need to get my 1/8 cable and saddles, and these are done and ready to hang.
Getting there gents."Depression is just anger,, without the enthusiasm."
Steven Wright
https://mobro.co/michaelbolton65?mc=5
-
07-29-2021, 02:59 AM #980Razor Vulture

- Join Date
- Oct 2010
- Location
- Lone Star State
- Posts
- 26,128
Thanked: 8612
I am wondering if you should wait until all wiring and such are completed to hang the doors.
Some crawling around to do yet? Just curious...


 Reply With Quote