
Results 16,711 to 16,720 of 20573
 91474Likes
Thread: What are you working on?
 LinkBack URL
 About LinkBacks
-
07-18-2019, 10:53 AM #16711Senior Member


- Join Date
- Mar 2015
- Location
- Akron, Ohio
- Posts
- 12,070
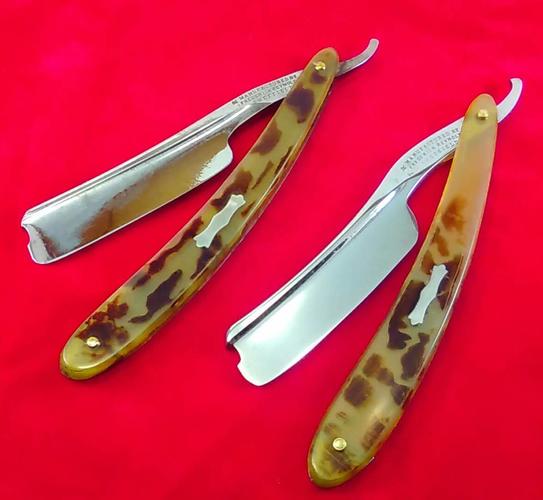
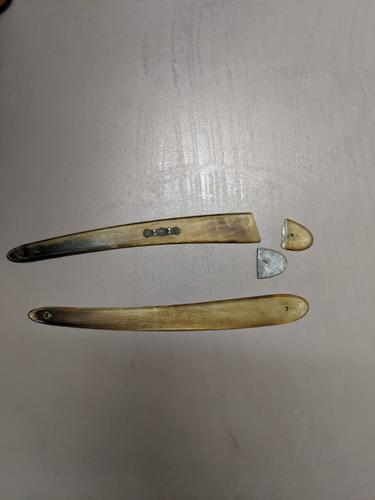
Thanked: 4312 Clean break.! U may be able to save them. A bit of CA, and brown hair dye should do it. Mock tortoise shell.
 Originally Posted by PaulFLUS

 Mike
Mike
-
07-18-2019, 11:40 AM #16712Senior Member

- Join Date
- Dec 2018
- Location
- Gainesville, FL
- Posts
- 6,539
Thanked: 663
I used 2 part epoxy. I was never a fan of super glue. Originally Posted by outback
Iron by iron is sharpened, And a man sharpens the face of his friend. PR 27:17
-
07-18-2019, 01:35 PM #16713Razor Vulture

- Join Date
- Oct 2010
- Location
- Lone Star State
- Posts
- 26,121
Thanked: 8612
Horn is keratin. CA will penetrate and stick it together better than it will stick your fingers together!

-
The Following User Says Thank You to sharptonn For This Useful Post:
randydance062449 (07-19-2019)
-
07-18-2019, 06:10 PM #16714Senior Member

- Join Date
- Feb 2015
- Location
- Duluth, GA - Atlanta OTP North
- Posts
- 2,546
- Blog Entries
- 1
Thanked: 315
How do you do the mottling with hair dye? I've been wondering how to make worn, mottled horn look better. Originally Posted by outback
ScoutHikerDad likes this.- Joshua
-
07-18-2019, 11:17 PM #16715Senior Member

- Join Date
- Oct 2010
- Location
- 50 miles west of randydance
- Posts
- 9,675
Thanked: 1354
Look aback around 750 pages I think....... Originally Posted by JP5

-
07-19-2019, 12:08 AM #16716The Great & Powerful Oz


- Join Date
- May 2008
- Location
- Bodalla, NSW
- Posts
- 15,634
Thanked: 3751
Or go old school & use toxic chemicals Originally Posted by 32t

https://sharprazorpalace.com/razors/...ml#post1137671The white gleam of swords, not the black ink of books, clears doubts and uncertainties and bleak outlooks.
-
-
07-19-2019, 01:05 AM #16717Senior Member


- Join Date
- May 2010
- Location
- Upstate South Carolina
- Posts
- 3,308
Thanked: 987
I'm still holed up in my cabin in the Smokeys until my in-laws leave, but I did bring some finishing stones to play with, a roll of my favorite shavers, and that spine-worn Wostenholm I posted about in the Honing forum to do some hand-sanding on in the evenings. Meanwhile, I'm also working on the following issues:

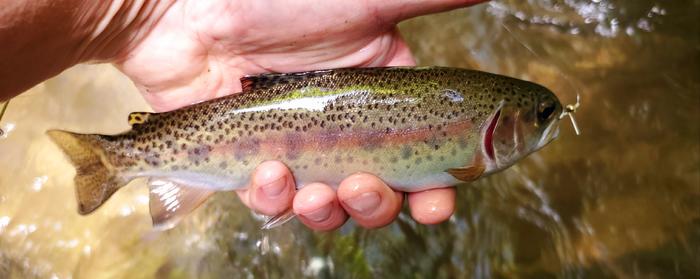

I caught a few rainbows much bigger than that one, but didn't bring a net, and the big ones don't pose for pics well lol! I'm having a blast getting back to my mountain roots.
Jerry, I love those maple scales-just ren-wax, huh? That stuff is amazing, isn't it? Paul, good luck with those scales. I have an almost identical FR rattler, and it's one of my favorite razors; you gotta love those old humpback, heavy-spined, shoulderless Sheffields, huh?There are many roads to sharp.
-
The Following User Says Thank You to ScoutHikerDad For This Useful Post:
sharptonn (07-19-2019)
-
07-19-2019, 01:53 AM #16718Skeptical Member


- Join Date
- Nov 2016
- Location
- Colorado Springs
- Posts
- 10,545
Thanked: 2194
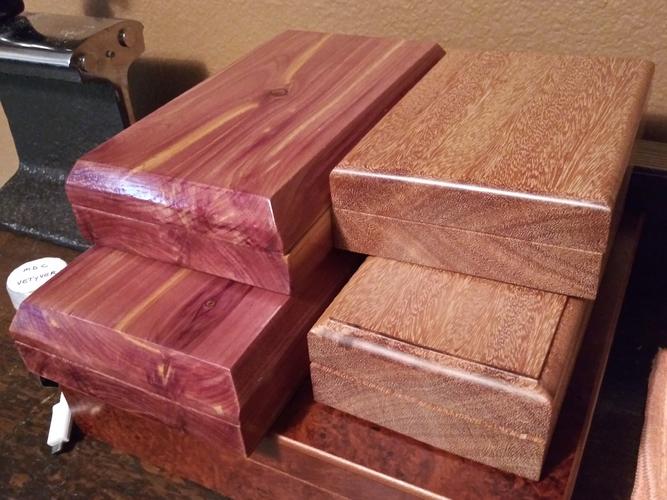
Finished the last Hone box...
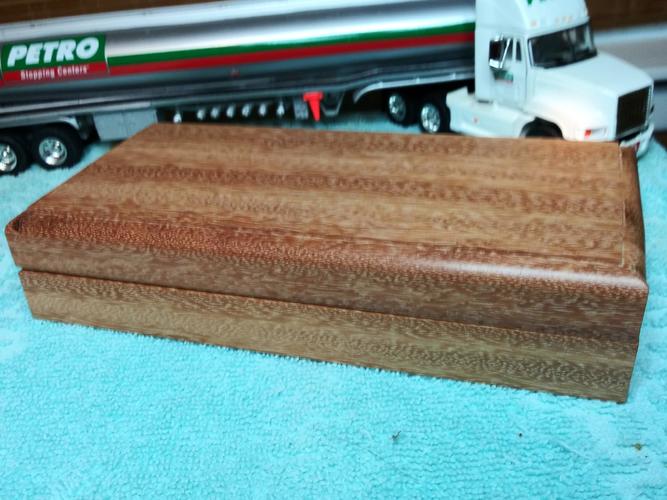
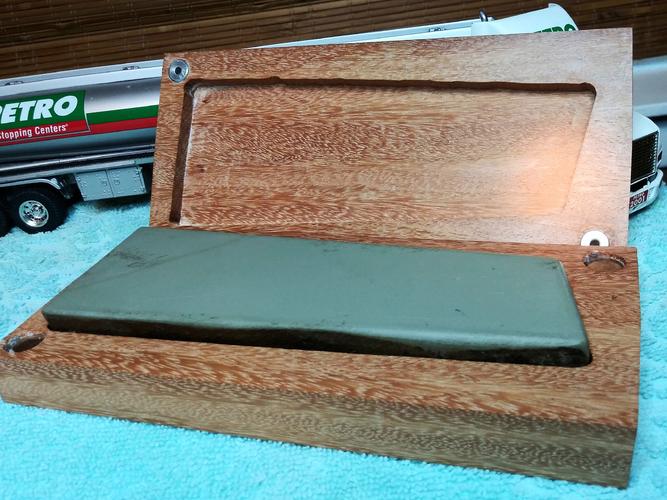
Here is all four of them. Well, I made 5 but this is the two Jnats and two Thuri's...
 It's just Sharpening, right?
Jerry...
-
07-19-2019, 02:44 AM #16719Senior Member

- Join Date
- Feb 2013
- Location
- Haida Gwaii, British Columbia, Canada
- Posts
- 14,443
Thanked: 4828
You are a box making machine.
It's not what you know, it's who you take fishing!
-
The Following User Says Thank You to RezDog For This Useful Post:
Gasman (07-19-2019)
-
07-19-2019, 03:26 AM #16720Senior Member

- Join Date
- Feb 2019
- Location
- Salida, CA
- Posts
- 600
Thanked: 94
Thanks for you encouragement and advice. Helps me enjoy my successes and put less focus on the mistakes. Originally Posted by Euclid440
O'Toole's commentary on Murphy's Law: Murphy was an optimist.


 Reply With Quote