Results 4,981 to 4,990 of 20573
Thread: What are you working on?
-
09-30-2016, 09:48 PM #4981

Well things here are starting to cool down, the rains are slowly coming and it won't be long until the cold and all is here so I'm making preparations for some Preventive Maintenance for my bike while it's in semi storage.
Shortly after getting my bike I started having some fuel problems so I ordered a new fuel filter and gasket. The only hose clamps that were locally available were the standard Worm drive and they were too big and would have a huge amount of 'tail' sticking out so I modified them and shortened them so they would look decent. However I still find them Butt Ugly!
I'm planning on replacing all of the fuel lines this winter but I hated having to use those ugly hose clamps
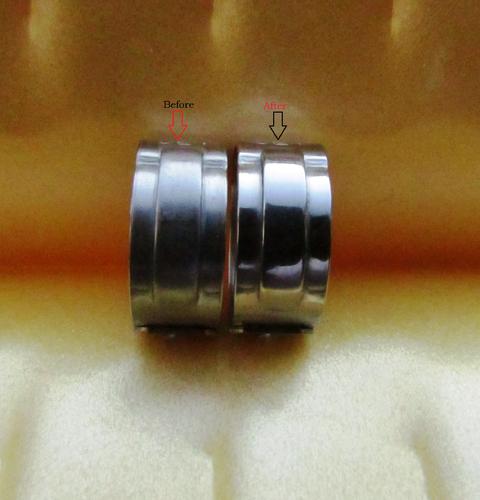
I finally found replacement style hose clamps made of Stainless Steel and the tool to install them. However as often happens I became 'anal' and decided that they needed polished up as I could see that Harley Davidson's original clamps were of a higher sheen than the ones I'd purchased.
Probably took a minute to do one on my buffer with some CrOx and then I used some Mothers Mag and Aluminum polish on an old toothbrush to get where the buffer couldn't and then that same toothbrush with some Dawn dish soap to clean it all up.
While it's not Night and Day, it is a nice subtle difference.
Yea Tc I know, I know; I should have painted them black!
 Our house is as Neil left it- an Aladdins cave of 'stuff'.
Kim X
-
10-01-2016, 01:21 AM #4982

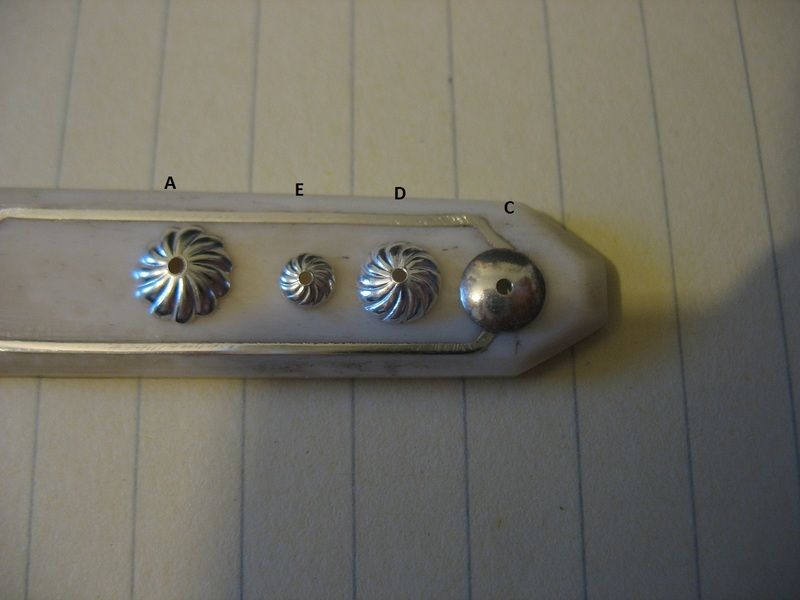
So...D and E. Bigs and littles!

-
10-01-2016, 07:28 PM #4983Senior Member

- Join Date
- Jan 2015
- Location
- United Kingdom
- Posts
- 113
Thanked: 119
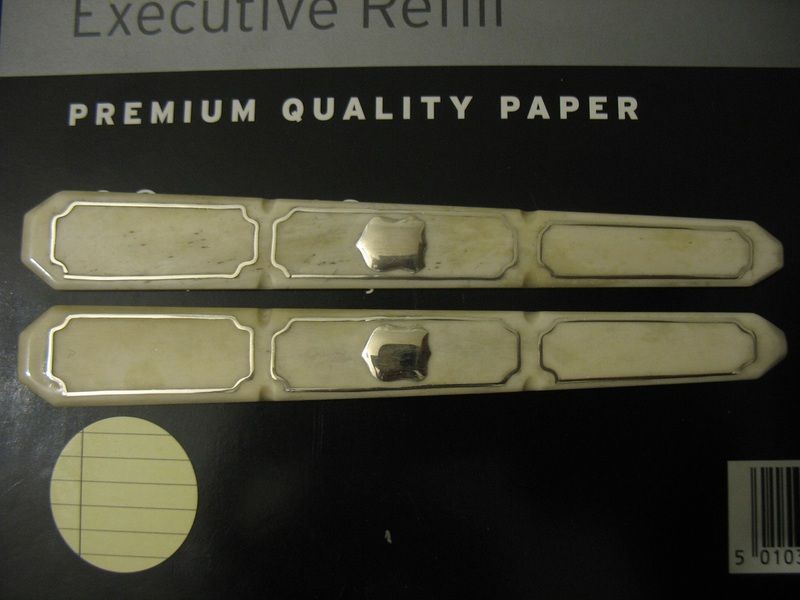
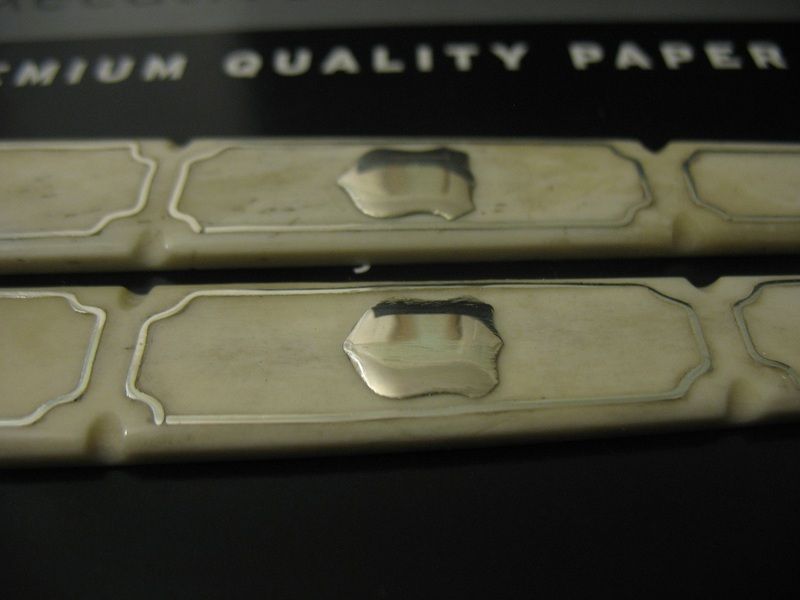
Well gents, here they are after inlaying the wire and having them polished. I thinned down the shields so they won't look as thick. Overall they aren't that great but not too bad either. However, I have a bit of dilemma and need some input: due to the shape of wire inlays, the scales turn out to have a touch of sobriety (resembling some sort of Georgian style if you want) that is quite nice and I'm afraid if I ornate the panels I end up with some sort of car crash.
I'm thinking to extend the notches onto the edge to outline 3 segments for the overall contour and go for ornate washers ("D" and "E" bead caps) that would add a touch of sophistication to the more simple ends, compensating for the middle segment that carries the shield. Sorry but I'm not very good with the artistic expressions.
-
The Following User Says Thank You to moutonrouge For This Useful Post:
sharptonn (10-01-2016)
-
10-01-2016, 09:16 PM #4984Senior Member


- Join Date
- Feb 2013
- Location
- Haida Gwaii, British Columbia, Canada
- Posts
- 14,443
Thanked: 4828
Those are looking pretty great. I would hate to take project like that too far and have it look gauche instead of elegant. Having said that gauche is subjective. A this point they are looking pretty elegant. I have no idea if going with the original design will take them too far or not. The only way to figure that out is to actually carve them and decide if they appeal to you more or less. I'm impressed at this point. I think to take them further is the artist choice. Nice work.
Last edited by RezDog; 10-01-2016 at 10:22 PM.
It's not what you know, it's who you take fishing!
-
10-01-2016, 11:23 PM #4985

The ones on the ends without the shields look empty to me. But I see your point. The first thing I think of is a monogram on the wedge end. I wonder how they would look with a drilled and inlayed wire design. Forget the proper term.
But these are my thoughts and whatever you choose will look good!
-
10-02-2016, 03:52 PM #4986Senior Member

- Join Date
- Jan 2015
- Location
- United Kingdom
- Posts
- 113
Thanked: 119
I've decided to not proceed with the carving - that will be another project.
The blade before
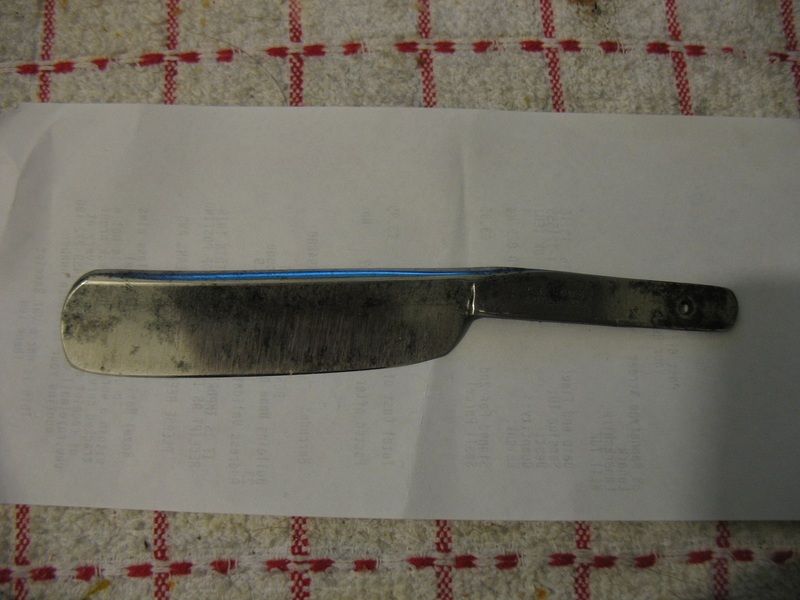

and after some cleaning, polishing and fitting a brass sleeve into the pivot hole
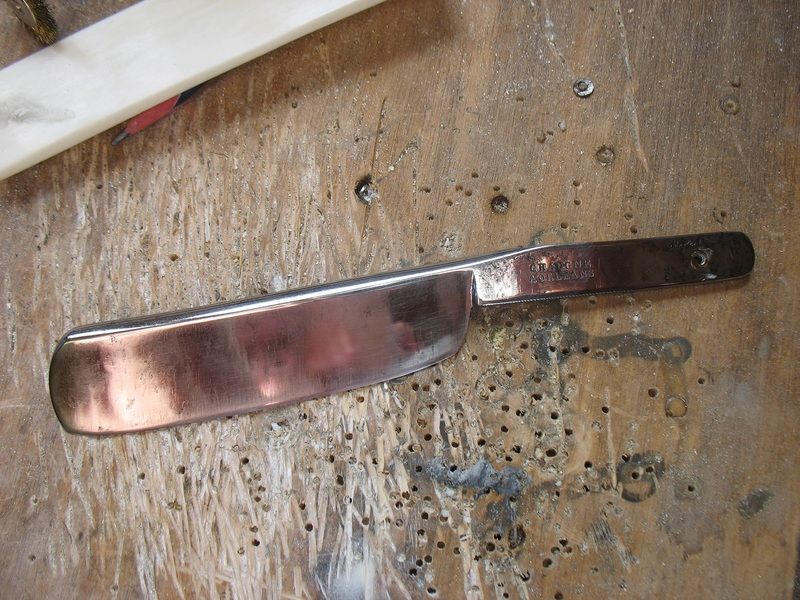
-
10-02-2016, 04:04 PM #4987Senior Member

- Join Date
- Jan 2015
- Location
- United Kingdom
- Posts
- 113
Thanked: 119
After fitting the scales (on one side the drill drifted and the washer got off the line). I couldn't use the smaller washers (too small, 4 mm, to drill efficiently 1/16 hole so used the 6 mm ones only). Due to miscalculations, the pins ended up inside the squares (obviously the location fits best outside).

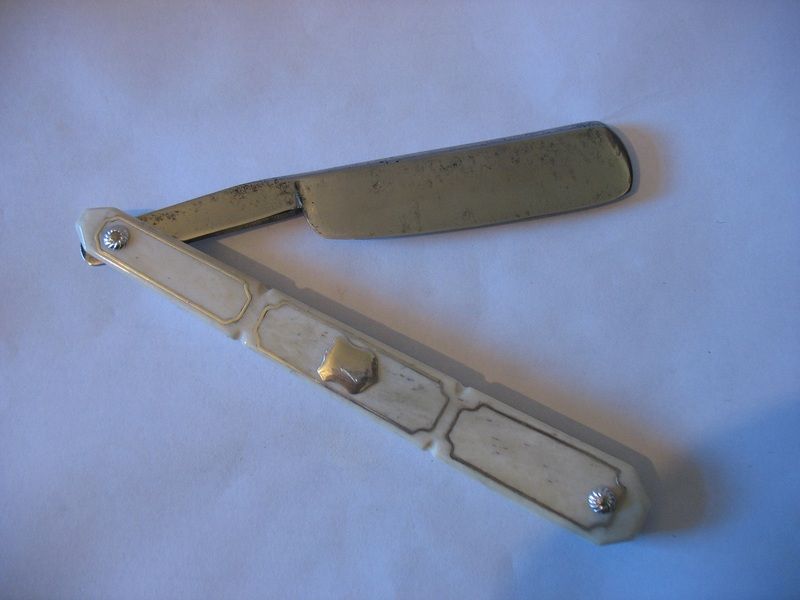
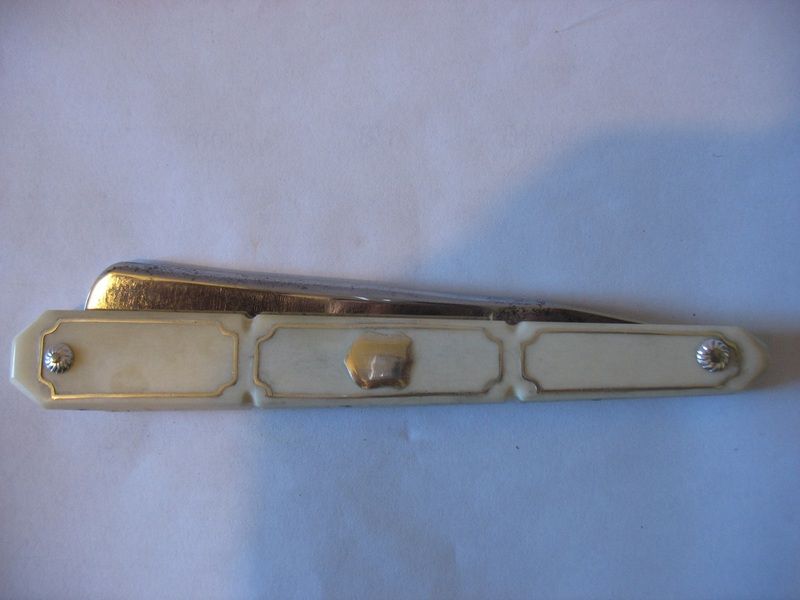
In conclusion - for a preliminary, prospective project, is not too bad. I like the idea and the overall appearance, so I got to do it again. What I'll keep in mind:
- thinner scales to avoid this chubby look
- washers outside the squares (I'll use these washers / bead caps and hey fit fine)
- I'll try to inlay the shields
- silver monogram (very good idea, thank you)
-
-
10-02-2016, 08:21 PM #4988Str8Faced Gent.


- Join Date
- Aug 2013
- Location
- Orangeville, Ontario
- Posts
- 8,456
- Blog Entries
- 1
Thanked: 4207
Looks very authentic in its attempt, and success.
Nice work chief, and adventurous to boot!"Depression is just anger,, without the enthusiasm."
Steven Wright
https://mobro.co/michaelbolton65?mc=5
-
10-02-2016, 08:32 PM #4989Senior Member


- Join Date
- Feb 2013
- Location
- Haida Gwaii, British Columbia, Canada
- Posts
- 14,443
Thanked: 4828
i think we can count that as a successful project moutonrouge. It looks pretty good.
It's not what you know, it's who you take fishing!
-
10-02-2016, 09:17 PM #4990

Rouge, excellent job with those scales. Really cool to watch the process and learn some stuff.
I got these three off the bench this weekend. A Jennings Bros., a Puritan and a Wostenholm. All awaiting a shave test. I have been referring to them as 'the three wisemen'..

All courtesy of Mr. Sharptonn! Easy clean ups. Popped the pivot pins, Croxed the blades and hand polished with Mass. All original collars. The Wosty was triple stacked..that was fun to re-pin.
God damn it.. i love straights.Last edited by MW76; 10-02-2016 at 09:18 PM. Reason: Sorry for swearing.
-
The Following User Says Thank You to MW76 For This Useful Post:
sharptonn (10-02-2016)


 91474Likes
 LinkBack URL
 About LinkBacks


 Reply With Quote