Page 612 of 2051 FirstFirst ... 11251256260260860961061161261361461561662266271211121612 ... LastLast
Results 6,111 to 6,120 of 20509
Like Tree91297Likes

Thread: What are you working on?

  1. #6111
    Razor Vulture sharptonn's Avatar
    Join Date
    Oct 2010
    Location
    Lone Star State
    Posts
    25,880
    Thanked: 8589

    Default

    BOG Dust?

    Did someone say that?
    outback likes this.

  2. #6112
    Senior Member blabbermouth outback's Avatar
    Join Date
    Mar 2015
    Location
    Akron, Ohio
    Posts
    11,951
    Thanked: 4300

    Default

    Quote Originally Posted by xiaotuzi View Post
    Making some horn scales tonight. I glue/paper/glued and clamped the blanks the other day. I traced the shape I wanted, cut pretty close with a coping saw, and then scraped to shape with half a scissors. I think it was Geezer who posted the idea of using scissors for scraping and it works great! Quick and no dust. Thanks Geezer

    Attachment 252298Attachment 252299

    I hope to get some time in the workshop this weekend to finish them. Still need to do final shaping, drill the holes and polish.
    I prefer drilling the pin holes while the two slab's are glued together, and "FLAT"!! keeps holes centered in both scales, then thin, and shape.

    If I have a blade that doesn't center. I know its not the scales.
    Mike

  3. The Following 3 Users Say Thank You to outback For This Useful Post:

    Hirlau (12-17-2016), sharptonn (12-17-2016), xiaotuzi (12-17-2016)

  4. #6113
    Senior Member xiaotuzi's Avatar
    Join Date
    Jun 2016
    Location
    NH
    Posts
    1,924
    Thanked: 1363

    Default

    Quote Originally Posted by outback View Post
    I prefer drilling the pin holes while the two slab's are glued together, and "FLAT"!! keeps holes centered in both scales, then thin, and shape.
    If I have a blade that doesn't center. I know its not the scales.
    Yep, good method. The horn blanks were just too thick and I just felt like I had to thin them down before drilling. They are still flat down the very center at this point and the next thing I do will be drill. Then I'll continue rounding from the edges in toward the center. I always drill the holes with a pin vise very slowly, and even though it take a while, I can get 'em straight and even.

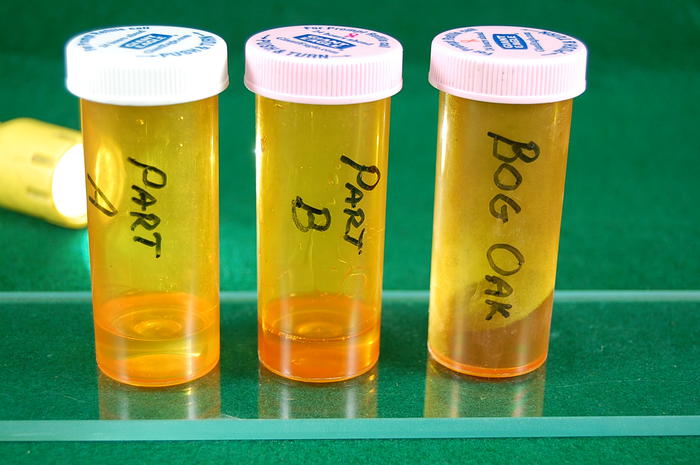
    Is that the bog oak?
    "Go easy"

  5. #6114
    Senior Member blabbermouth outback's Avatar
    Join Date
    Mar 2015
    Location
    Akron, Ohio
    Posts
    11,951
    Thanked: 4300

    Default

    Quote Originally Posted by sharptonn View Post
    Well watch stuff like alcohol, paint thinner, solvents. You will have a sticky, melting mass !
    Ask me how I know!

    What I like about the water-based is you are seeing about 6 colors applied in the ones above.
    Easy to lay down some brown and wipe it very lightly with a damp paper-towel, add some silver, yellow around it, wipe. It comes off the top, yet stays in the details.

    Black is there, a few shades of green as well.
    Green on top after it all dries and as wiping that this direction, that, the stuff under shows through.
    I suppose what I mean is I have better artistic control as artistic as I may be?
    It actually holds-up decently without coating but the clear, misted from a distance, seals it well and keeps a lot of shine down.
    Artistic...Harr!!
    You mean Autistic.
    Those corn scaled beauties, would go great with.....
    Mike

  6. #6115
    Razor Vulture sharptonn's Avatar
    Join Date
    Oct 2010
    Location
    Lone Star State
    Posts
    25,880
    Thanked: 8589

    Default

    THERE's that bog oak! Save me some magic dust, willya outback?
    outback likes this.

  7. #6116
    Senior Member Panama60's Avatar
    Join Date
    Aug 2016
    Location
    Earth
    Posts
    358
    Thanked: 98

    Default

    If my beloved grandmother taught me anything, it was to be frugal. She survived the depression and a dust bowl.
    Name:  LeftOverDust.jpg
Views: 139
Size:  48.8 KB
    Geezer, sharptonn, 32t and 3 others like this.
    Rog

  8. The Following 2 Users Say Thank You to Panama60 For This Useful Post:

    outback (12-17-2016), sharptonn (12-17-2016)

  9. #6117
    Razor Vulture sharptonn's Avatar
    Join Date
    Oct 2010
    Location
    Lone Star State
    Posts
    25,880
    Thanked: 8589

    Default

    Man! That is a LOT of Bog dust! Trade you some glitter for it?
    xiaotuzi likes this.

  10. #6118
    Senior Member Panama60's Avatar
    Join Date
    Aug 2016
    Location
    Earth
    Posts
    358
    Thanked: 98

    Default

    Quote Originally Posted by sharptonn View Post
    Man! That is a LOT of Bog dust! Trade you some glitter for it?
    Let me finish this brush and I'll see what I have left.
    sharptonn likes this.
    Rog

  11. The Following User Says Thank You to Panama60 For This Useful Post:

    sharptonn (12-17-2016)

  12. #6119
    Razor Vulture sharptonn's Avatar
    Join Date
    Oct 2010
    Location
    Lone Star State
    Posts
    25,880
    Thanked: 8589

    Default

    Just kidding! Certain to be some handy stuff......I know a guy...
    That brush will turn out great! Just let it cure good before sanding.

    OH! outback knows how to make the letters pop with white as well!
    Last edited by sharptonn; 12-17-2016 at 02:01 AM.

  13. #6120
    Senior Member blabbermouth outback's Avatar
    Join Date
    Mar 2015
    Location
    Akron, Ohio
    Posts
    11,951
    Thanked: 4300

    Default

    Quote Originally Posted by Panama60 View Post
    No and thank you again, Mike! I only mixed a small batch in case I need to mix some more tomorrow after sanding the patch.
    Whew..!! I knew I sent more than enough epoxy. But you said you had to turn it so it wouldn't sag, or run.
    So you didn't make black peanut butter.?
    That's why I asked if you mixed it all, cause it would have been too thin, and runny. But looks like its fine. [emoji106]

    Stuff's definitely black..eh. [emoji6]

    Can't wait to see it done, and back to work again.

    As Tom would say...It does a heart good, to know I could help.

    PS: remember to let it sit a few more days before use. The strength, and bond will increase over time. Some real bad ass stuff, that T-88 is.
    Geezer, sharptonn and xiaotuzi like this.
    Mike

  14. The Following User Says Thank You to outback For This Useful Post:

    sharptonn (12-17-2016)

Posting Permissions

  • You may not post new threads
  • You may not post replies
  • You may not post attachments
  • You may not edit your posts
  •