Results 7,451 to 7,460 of 20602
Thread: What are you working on?
-
02-09-2017, 01:16 AM #7451

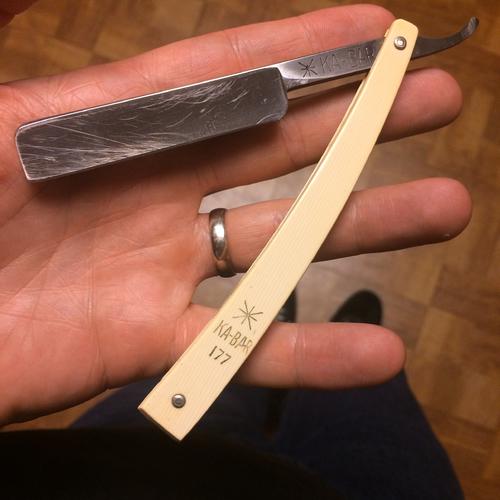
This little Ka-Bar wedge will be my next victim. Seriously... Who honed this thing?
 It should clean up well after I get those scratches out.
 B.J.
B.J.
-
02-09-2017, 01:18 AM #7452

Those are some nice razors BJ
I still have to finish cleaning and honeing mineLook sharp and smell nice for the ladies.~~~Benz
Imperfection is beauty, madness is genius and it's better to be absolutely ridiculous than absolutely boring ― Marilyn Monroe
-
02-09-2017, 01:25 AM #7453

Thanks, Guys!
After the treatments of conditioner and lots of rubbing, they must hang and dry a week til the color comes in. Waiting for that to assemble the recently finished ones.

I did manage to get a dozen assembled. Still have 6 drying and 6 to clean/condition.
Takes time...

Last edited by sharptonn; 02-09-2017 at 01:27 AM.
-
-
02-09-2017, 01:27 AM #7454


So here is 1 done. At first I tried 1200 to clean off extra paint with a hard backer. That actually took color off the scales and revealed white plastic :/ so 2000 grit and patience around where over paint was did the job.
If the lettering was all same height and solid plastic color all through it would be much simpler. Might see if something else works better on the other one that is ready for clean up.Nothing is fool proof, to a sufficiently talented fool...
-
-
02-09-2017, 01:32 AM #7455
-
02-09-2017, 01:37 AM #7456
-
The Following 3 Users Say Thank You to sharptonn For This Useful Post:
Dieseld (02-09-2017), ejmolitor37 (02-09-2017), xiaotuzi (02-09-2017)
-
02-09-2017, 01:44 AM #7457

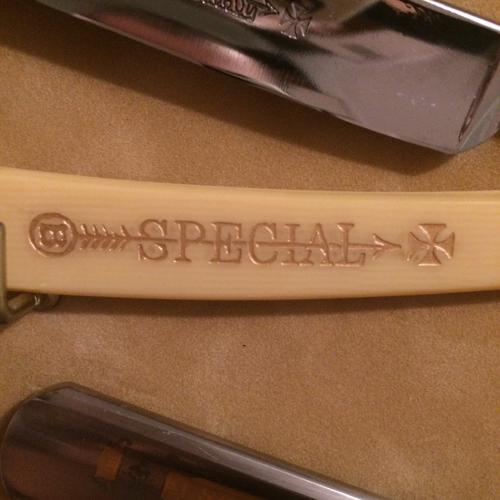
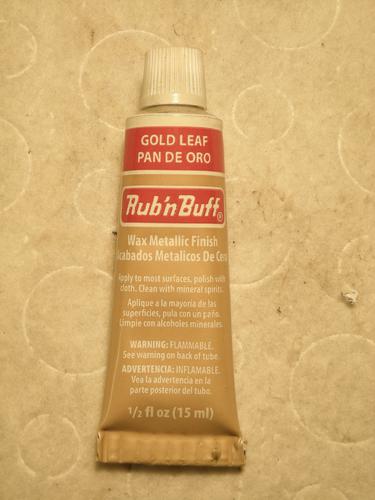
Does that rub 'n buff dry like paint in the letters then or do you need to redo it from time to time? Looking for a way to get gold color in the Hess Otto's Special logo after B52 etches it without messing up the surrounding areas.
"Go easy"
-
02-09-2017, 01:51 AM #7458


So the backbone was done with magnifying glasses and a xacto blade. Gently scraping around the edges reveals a crisper edge imo. Either way looks better than it did. I think I have another ill try something else and see.Nothing is fool proof, to a sufficiently talented fool...
-
The Following User Says Thank You to ejmolitor37 For This Useful Post:
xiaotuzi (02-09-2017)
-
02-09-2017, 02:29 AM #7459

You're doing it the hard way. Apply the paint and wipe it off the top with paper. Takes a bit of rubbing but it's way easier then what you're doing. That's how they would have been done originally.
That's how I did this one. Took 4-5 minutes.

Last edited by BeJay; 02-09-2017 at 02:33 AM.
-
The Following 4 Users Say Thank You to BeJay For This Useful Post:
Dieseld (02-09-2017), ejmolitor37 (02-09-2017), sharptonn (02-09-2017), xiaotuzi (02-09-2017)
-
02-09-2017, 02:33 AM #7460

The RubNbuff....Just like Bejay described!
-
The Following 3 Users Say Thank You to sharptonn For This Useful Post:
Dieseld (02-09-2017), ejmolitor37 (02-09-2017), xiaotuzi (02-09-2017)


 91550Likes
 LinkBack URL
 About LinkBacks


 Reply With Quote


