Results 9,781 to 9,790 of 20573
Thread: What are you working on?
-
06-24-2017, 02:32 PM #9781
-
06-24-2017, 03:08 PM #9782
-
06-24-2017, 07:54 PM #9783
-
06-25-2017, 04:17 PM #9784Senior Member


- Join Date
- Apr 2012
- Location
- Diamond Bar, CA
- Posts
- 6,553
Thanked: 3215
“Anyway, I'm sure I violated some commandments in fitting this wedge. I'm always open to suggestions on how to do things better. I'm also sort of kicking around the idea of maybe trying some easier wedge materials from the drawer-full of old wood and horn cutoff scraps I have. Thanks for looking (as well as any suggestions!). Aaron/SHD”
Arron, Nice work,
Here’s a few tips that may help you and other, making wedges that have worked for me.
More important than the wedge to tang ratio, is where you want the razor to sit in the scales, (where do you want it to stop?). Old Sheffield razors with thick tangs, in thin ivory with a skinny lead wedge, that ratio went out the window.
I know a lot of folks make the wedges and even design on the fly. I prefer to work off a template, I make a copy that get glued to the scales for shaping.
On the template, I work out the wedge and pin placement, then laying the blade on the template where I want, in relation (distance) to the wedge, then mark the pivot pin hole, and the length of the scale, 3/8 in from the pivot pin hole.
A simple way to determine wedge thickness, is to rest the blade on your template, or scale and mark the blade with a sharpie, where it will hit the top or the scale, with sufficient clearance so the edge does not come out the bottom.
Measure the thickness of the blade at that mark with a pair of calipers. This is how thick the wide side of the wedge needs to be. The narrow end should be, half that width, simple. You can buy a pair of plastic calipers for a few dollars, that are more than accurate for razor repair work.
Shaping the wedge can be done a number of ways. I typically just grind the wedge on a file or sand paper, flat on the bench, putting pressure on the thin side. Make the wedge larger than the scales and grind to final shape after it is pinned to the scales tight. Yes, you will have to refinish, but just takes a minute. If you try to make the wedge exactly the same as the scale, it never comes out right for me.
On plastics, lead or horn, it goes quickly. I have also double stick taped to my finger or to a piece of wood, (paint stir stick) and shape on a belt sander. WD40 will remove any glue.
But if you make Brass wedges, it can get hot quickly taped to your finger. A cup of water will help, I have never made Aluminum wedges, but expect the same to happen.
Laying a file on a bench and working the wedge on the file ensures a flat surface for final clean up.
The pic of your wedge looks a bit rounded, (may be that slight gap) but looks fine in the finish photo. It does look a bit thick on the thin side, (could have used a bit more taper) and looks tapered from top to bottom, but could be the photo. Tapering top to bottom, in my opinion builds in twist to the scale.
When pinned tight, the spread on the pivot side should be a ½ to ¾ of an inch. I use a ½ inch, thick white eraser between the scales to keep the scales at the proper alignment when pinning. The eraser is sticky enough to stay in place, but you can hold it with a piece of tape, if needed.
The proper wedge angle, will keep the scales in tension to lessen the chance of warping and tension on the pivot.
Drill your holes while the scales are flat, to ensure the holes are parallel to the inside of the scales. Then fit the wedge to the drilled scale holes. Also make the hole in the wedge a bit larger than the pin and even the holes in the scales, it will give you a bit of wiggle room to adjust for alignment.
Many ways to do it, this work for me.Last edited by Euclid440; 06-25-2017 at 04:21 PM.
-
The Following 8 Users Say Thank You to Euclid440 For This Useful Post:
Dieseld (06-25-2017), ejmolitor37 (06-26-2017), Gasman (06-25-2017), MikeB52 (06-29-2017), Mrchick (06-25-2017), outback (06-25-2017), ScoutHikerDad (06-25-2017), xiaotuzi (07-01-2017)
-
06-25-2017, 04:43 PM #9785Fizzy Laces Connoisseur

- Join Date
- Dec 2009
- Location
- Scotland
- Posts
- 1,562
Thanked: 227
I really need to get back on the razor work.
But for the last few weeks I've been working on this 😂
Starting to look good and composty. Had a few small bits out in little raised beds and herbs. Got some good growing going.
The majority of this though will be going into raised veg boxes so the kids and I can grow some eats.
Geek
Sent from my LG-H850 using Tapatalk
-
06-25-2017, 05:37 PM #9786

Very nice write-up Marty. I dilo very close to the same. I shoot for 3/4 to an inch in spacing at the pivot-end when wedge is held in place but im now finding this to mess with the spacing of the scales where i want the blade to rest. Will try thinner next time. And the idea of drilling the wedge hole a bit bigger, grand idea. Ive done a few razors now that i just couldnt get to center right no mater what i tried. This might help?
Thanks for sharing the way you do it.It's just Sharpening, right?
Jerry...
-
06-25-2017, 08:55 PM #9787

Yes, thanks as always for the excellent tips, Marty-your suggestions are always so precise and detailed. I'm going to print them up along with some other wedge and pinning advice I've gotten to put in the shop for my next rescale!
-
06-26-2017, 01:32 AM #9788Senior Member


- Join Date
- Apr 2012
- Location
- Diamond Bar, CA
- Posts
- 6,553
Thanked: 3215
Thanks,
I forgot to mention, to drill your holes when the scales are taped together and still flat. Shape them, (rounding the edges) after the holes are drilled. This way the holes are perfectly aligned and 90 degrees to the inside, (the bearing surface of the scales).
Bad alignment on new scales, comes from a warped blade, bent pin, (pulling to one side), the pin holes drilled crooked or from a spacer use in place of a wedge, (the scales are not under tension). But usually crooked holes are the culprit.
For vintage scales, it is usually shrinkage.
If you drill them separately or once they are rounded and no longer flat, (the outside parallel to the inside of the scale), you run the chance of the holes not being perpendicular. Just a hair off, will throw the pivot off, and push the tip to one side or if the wedge pin, can push scale into the blade tip.
If the pin holes have a little wiggle room, you can push one side over to center the blade.
This is why you want to inspect the blade as soon as you remove it from the old scales, to see if it is warped and where. And mock up with bolts before you pin, so you can experiment and adjust if you need to.
Look at the blade on a flat surface, (a stone face) to see, if it is warped, how it was ground and how you can shim to compensate.
Large, thick bearing/thrust washers can sometimes make it worst, by pushing the back of the tang away from the scale, which in turn pushes the toe in the opposite direction, towards the scale.
If you move the blade through the range of motion, while mocked up you can sometimes see where and when the surfaces make contact and affect the alignment.
The degree of taper dictates how much the scales will separate at the pivot before pinned, and how much tension the scales will be under, which can dictate pivot pin tightness, it has nothing to do with alignment, unless there is none, as in a spacer.
-
The Following User Says Thank You to Euclid440 For This Useful Post:
Geezer (06-26-2017)
-
06-26-2017, 02:13 AM #9789

I'll just add that whilst misaligned scales are bad news . The angle you drill at is not that crucial unless the pin & pivot are a tight fit.
Alignment issues are more about how the tang interacts with the inside of the scales. On a sloppy old Sheffield with a punched pivot hole you can just about drill the pivot in the scales at 45º & it can still swing true.The white gleam of swords, not the black ink of books, clears doubts and uncertainties and bleak outlooks.
-
The Following User Says Thank You to onimaru55 For This Useful Post:
cudarunner (06-26-2017)
-
06-26-2017, 02:21 AM #9790Senior Member

- Join Date
- Feb 2016
- Location
- pennsylvania
- Posts
- 302
Thanked: 66
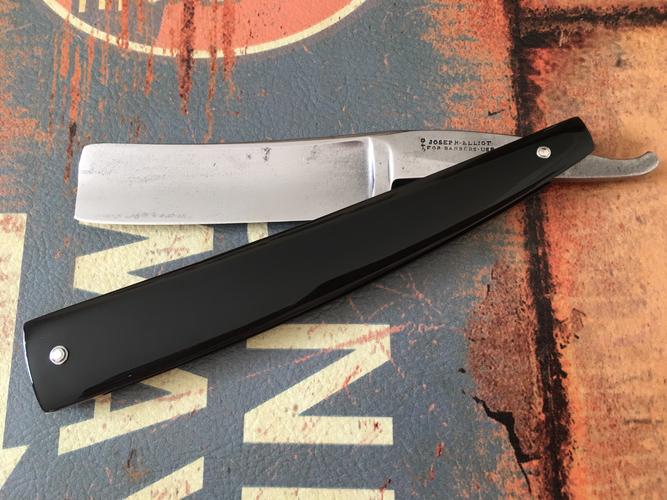
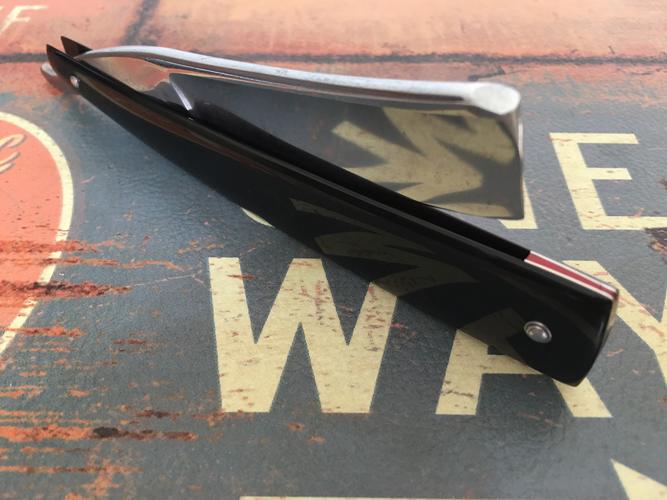
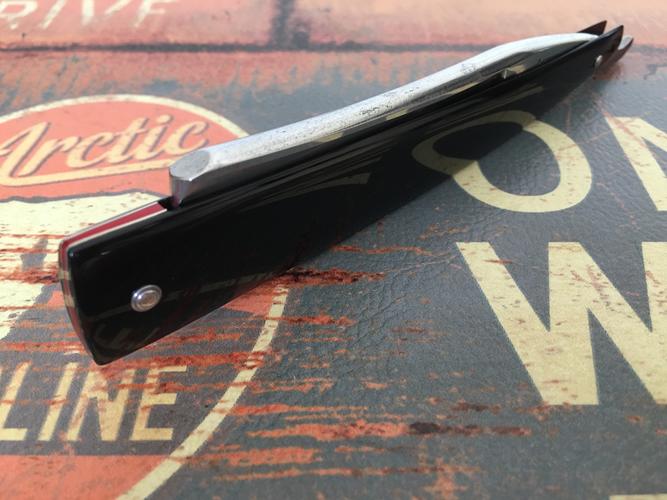
made some scales for a joseph elliot for barbers use i picked up. black buffalo horn. red acrylic wedge with nickel liners and pins.


i have a few razors that all need honing. hopefully find some time next weekend.


 91473Likes
 LinkBack URL
 About LinkBacks


 Reply With Quote


