Results 9,761 to 9,770 of 20573
Thread: What are you working on?
-
06-19-2017, 01:27 AM #9761Senior Member

- Join Date
- Feb 2016
- Location
- pennsylvania
- Posts
- 302
Thanked: 66
yup. thats the shape i was going for after seeing some pix on the web. i prefer a rounded-side scale to flat. but thats just me. first time trying a brushed wedge. had to figure out how to buff the acrylic but not the wedge. fun.
-
06-19-2017, 03:19 PM #9762

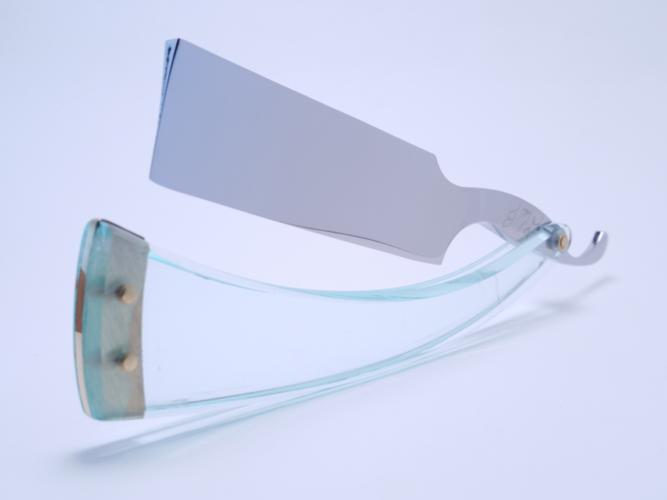
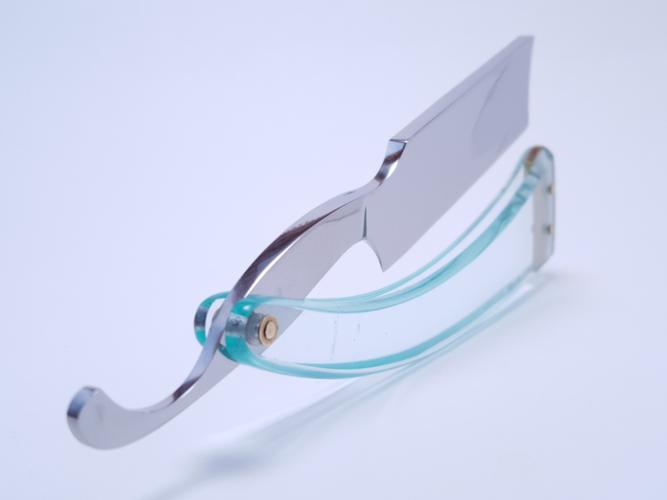
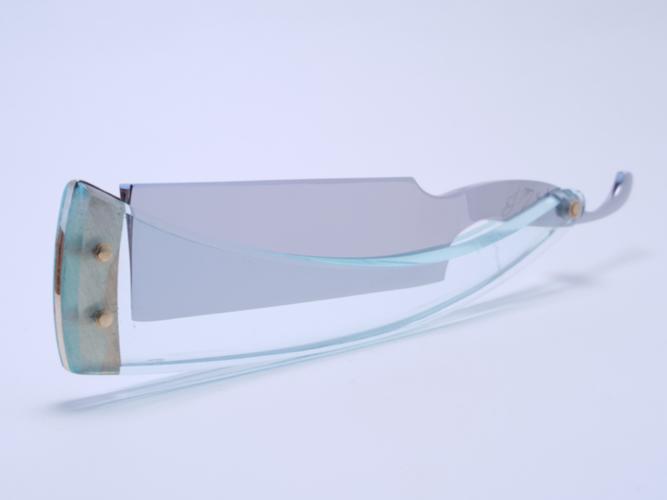
Yup, getting it all honed up and out the door. Let's see if I have some better detail pics of that one......
These are shots taken "pre-honing" - The blade is a custom order for a barber in KY. 1095 steel, brass wedge, traditional brass pins and washers. It's long at 3" in blade length and bit long in the tang too, per client request. Fun piece to make, for sure!
-
The Following User Says Thank You to JohnGlueck For This Useful Post:
RezDog (06-19-2017)
-
06-19-2017, 06:40 PM #9763
-
06-21-2017, 08:30 PM #9764

Being still in the process of nailing the perfect wedge (which seems to be my kryptonite on some rescales), I tried something a little different this time, which I sort of adapted from some techniques I've seen around here somewhere. I wanted an aluminum wedge with black horn scales. It takes a high polish, looks great with black, and is soft and easy to work, sand and shape.

*Note: I pre-drilled my holes after I had ground the scales to flat while they were taped together. I like the look of double pins on some square-ended razors, and I wanted the extra security of that 2nd pin. That bottom pin-hole is offset to match the cant of the front end.
Step 1: Check the dimensions of my little scrap of aluminum and clamp it hard with CA on the edge of my flat piece of scrap wood. I just needed a piece big enough to work with before shaping it later.
Step 2: Drill 3 holes where I knew they wouldn't interfere with pinning later.
Step 3: Gently tap in 3 small nails to flush to hold it in place.

Step 4: Carefullygrind a "flat" angled wedge on the flat platen of my grinder. I think I used a well-worn 220 belt. I popped it loose when I was close and finish sanded it by hand on the flat granite counter-top cutout on my shop bench to get both sides as close to flat as I could.

Step 5: CA glue and clamp to the back scale in a sort of cantilevered orientation as I've seen on some razors like this. Drill pin holes through pre-existing holes in scales as the wedge was pressed flat on the drill press platform.
Step 6: Do a mockup test-fit with micro-fasteners and tightened up both wedge bolts to make sure everything lined up. Almost perfect except for a hairline gap on the front end that I did my best to fill with a little CA and clamp hard.
Step 7: Final pinning with brass washers and NiAg pins on both ends, testing for alignment as I went. It ended up the tightest razor I've ever rescaled as far as everything lining up, and the pivot pin that I thought I had cut too short turned out to be the easiest, tightest pivot I've ever done (not to self on future pivot pins).
Step 8: Grind off excess aluminum and shape/polish up to an 800 grit belt.
Step 9: Hand-sand the front end up to 3000 and polish the scales and pins with Fabuluster on a loose cotton wheel.
Here's the final result:

It's far from perfect (and you might be able to make out that gap if you squint!), and yeah, the scales are a little uneven thickness-wise (I've got to start using my son's machinist calipers instead of just eye-balling them!).
On the other hand, this is a no-name blade that I got in a lot of 5 for about 50 bucks on our BST just to experiment on. There were no markings of any kind anywhere on the tang, but lots of some kind of deep black tarnish that looked as though someone had splashed something corrosive on it and just left it on (sorry no before pics. I did what I could hand-sanding the tang and spine, and just decided to leave them sort of "satinish." I didn't want to start sanding that full-hollow blade, so I just polished it up with lots of Mother's and elbow grease, leaving some character marks on this no-name working razor.

Funny, the "streaked horn" I thought I had mostly disappeared as I started sanding and contouring, but I think it still looks good as mostly black:


Anyway, I'm sure I violated some commandments in fitting this wedge. I'm always open to suggestions on how to do things better. I'm also sort of kicking around the idea of maybe trying some easier wedge materials from the drawer-full of old wood and horn cutoff scraps I have. Thanks for looking (as well as any suggestions!). Aaron/SHD
-
The Following 6 Users Say Thank You to ScoutHikerDad For This Useful Post:
Addison (06-22-2017), Dieseld (06-22-2017), Hirlau (06-21-2017), JohnGlueck (06-21-2017), MisterClean (06-21-2017), Thug (06-22-2017)
-
06-21-2017, 09:05 PM #9765

I'd just like to give a big public thank you to Roy/CudaRunner for a very detailed and helpful pm he just sent on wedges and dimensions relative to tang width, and other invaluable advice. The mentors (both official and unofficial) on this site are an amazing resource that I hope to learn a lot more from as I get much more into honing and rescales this summer. Kudos-Aaron
-
The Following 2 Users Say Thank You to ScoutHikerDad For This Useful Post:
cudarunner (06-21-2017), outback (06-23-2017)
-
06-21-2017, 09:23 PM #9766
-
The Following User Says Thank You to cudarunner For This Useful Post:
ScoutHikerDad (06-21-2017)
-
06-22-2017, 11:19 PM #9767

Got these finished this afternoon. They still need to go on the stones. Hoping to get that done tomorrow, if all goes right.
W&B in Black Horn, White Horn wedge, Silver washers and pins.
W&B in Maple, Bone Wedge, Brass pins and washers.
Lafayette Sholderless, Very light wood scales with matched wedge.
E.C. Simmons, sholderless, horn wedge, very light scales.
Dont remember what wood the very light wood is, but its the same wood as my custom Gasman Scales that Oldblades cut out for me.
These are OK in my opinion. Used polyurethane on the light wood and Tru-oil on the maple.
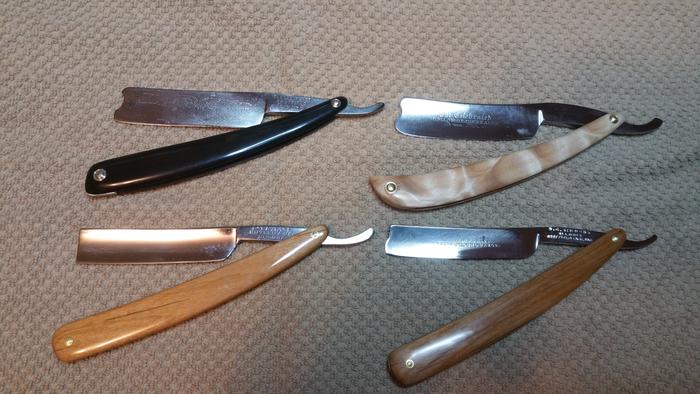
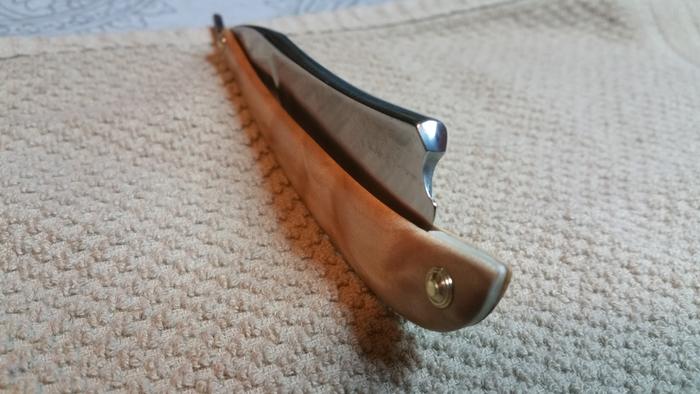
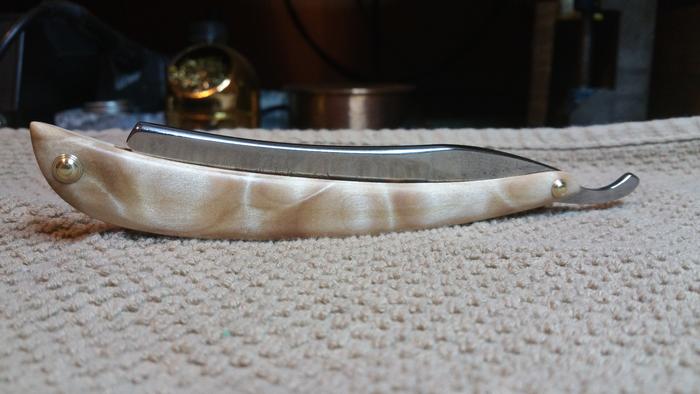
Different lighting made the maple look more white. Guess this is what I get from a Cell Phone. ha.It's just Sharpening, right?
Jerry...
-
06-23-2017, 12:09 AM #9768

Very nice job, Jerry! Did you get those collars pre-formed, or do it yourself? Just curious-I love the look of stacked and/or domed washers on some razors.
-
06-23-2017, 12:24 AM #9769

Bought the washers that way. Found them on eBay. A few others here use them too. That's how I found them. They took forever to get here from Ukraine. Or some place like that. I now found a guy in the states that does watch repair and said he could make me some next time I need them. This watch guy sold me some perfect sized washers to put between the scales and razor. Cant remember right now what you call them. Pivot Washers? I still haven't figured out how to get a nice bulb shaped pinning using these washers. My pinning is ok and better than it used to be but I still have lots of room for improvement.
BTW, Thanks.It's just Sharpening, right?
Jerry...
-
06-23-2017, 02:33 AM #9770Senior Member

- Join Date
- Jun 2017
- Location
- TN
- Posts
- 144
Thanked: 3
I just joined SRP and was asked to post on some of my recent work. I am no where near a professional as I have only wet shaving for over a year and honing for 3 months or so. Thankfully I have had alot of blades, Over 70, to hone and have learned alot just by trial and error. I have ordered a usb scope but will not be in for a couple weeks and then I can share my edge work. Untill then here is some of my clean ups.
first I am working on a Boker red Injun, she took alot of elbow grease but finally got her to shine. I will be putting red Buffalo horn scales on it.
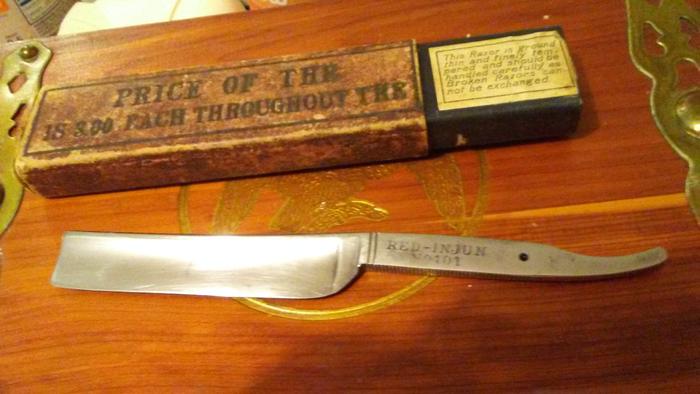
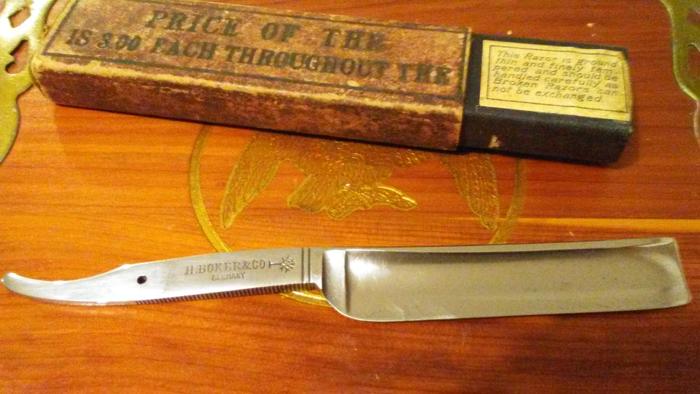
2nd I am working on a Griffon XX. Same she was dirty but some love she looks like new. Soon I will be dressing her with some custom Lava Scales.
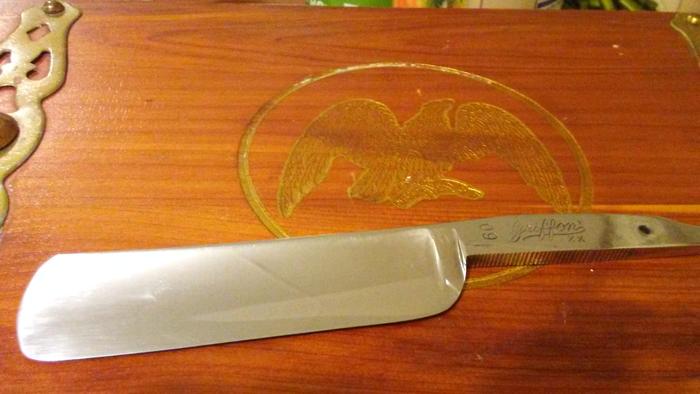
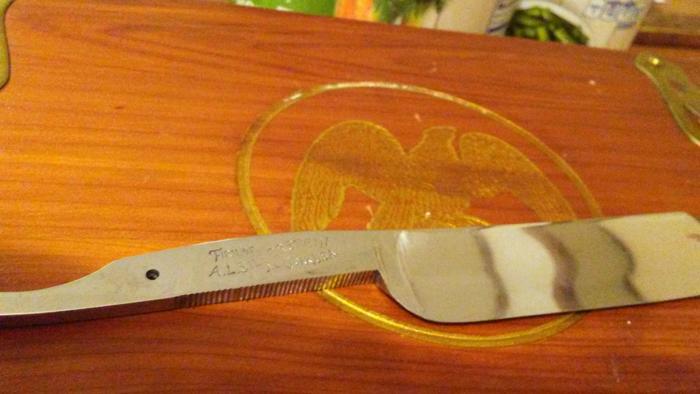
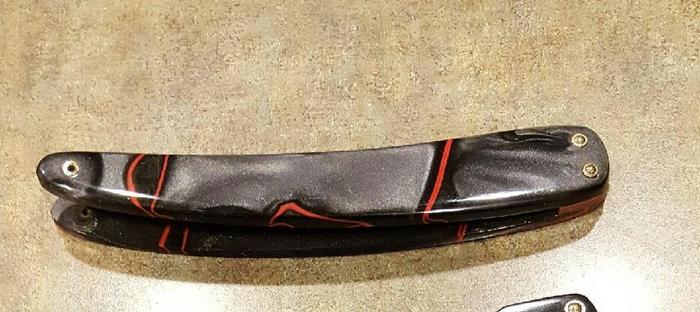
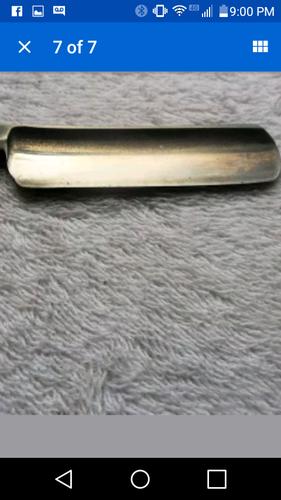
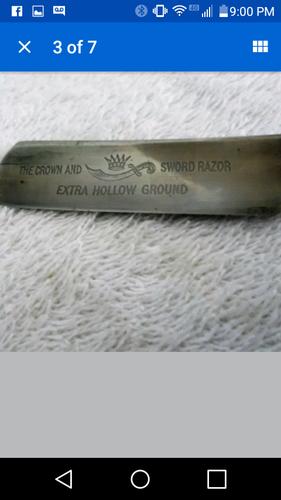
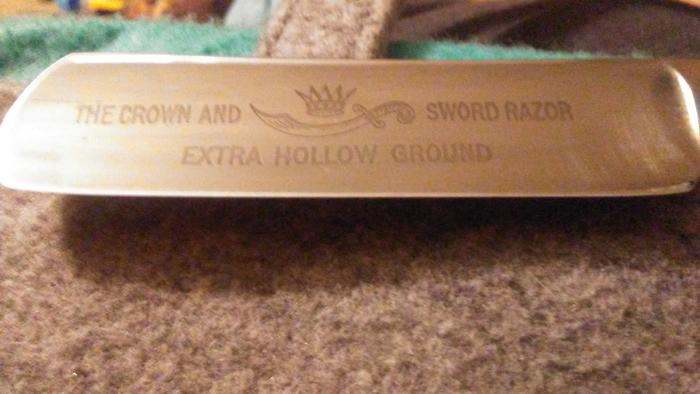
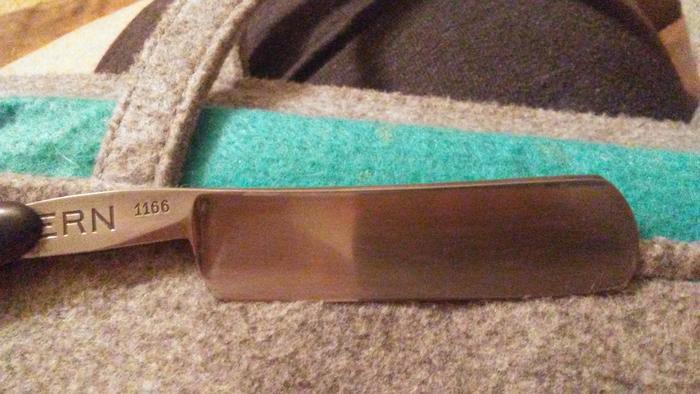
3rd I just finnished a resto on a crown and sword. My first bigger blade. I kept the original scales, just cleaned her up and ran her through a kuromaku 1K, goken Fuji 4 and 8K and finished her off with an ILR12-15K and laps of canvas and leather.
-
The Following User Says Thank You to redstraights92 For This Useful Post:
ScoutHikerDad (06-24-2017)


 91473Likes
 LinkBack URL
 About LinkBacks


 Reply With Quote


