
Results 991 to 1,000 of 4688
 13682Likes
Thread: The Butchered Blade
 LinkBack URL
 About LinkBacks
-
09-21-2015, 09:11 PM #991www.edge-dynamics.com


- Join Date
- Feb 2013
- Location
- London
- Posts
- 3,066
Thanked: 512
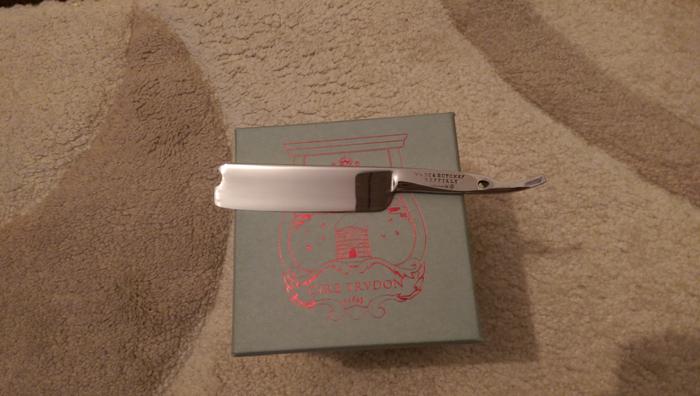
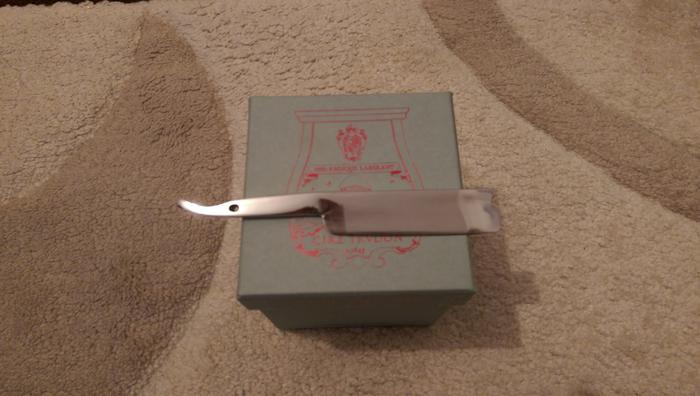
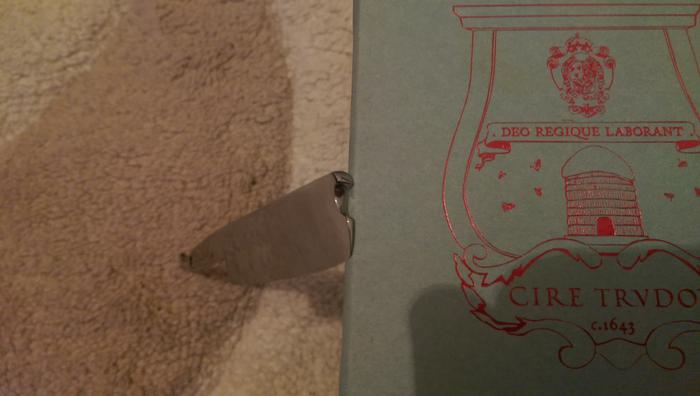
Finished sanding my 3rd W&B today.
This time I taped off the Sheffield stamp and finished the whole of the blade 400/800/240/360/400/800/1200/2500 .
Then I tackled the stamp with 1200 paper.
This one I gave 99% effort, taking all the pits away, some were deep, 2 days of sanding deep.
Tomorrow I will sort out the scales.
![Name: $_57[2].jpg
Views: 177
Size: 41.7 KB](https://sharprazorpalace.com/attachments/workshop/212944d1442869743-butchered-blade-_57-2-.jpg)

-
09-21-2015, 09:17 PM #992Razor Vulture


- Join Date
- Oct 2010
- Location
- Lone Star State
- Posts
- 26,151
Thanked: 8616
Now THAT is shiny!

(I am WAY too lazy to do that! )
"Don't be stubborn. You are missing out."
)
"Don't be stubborn. You are missing out."
I rest my case.
-
09-21-2015, 09:28 PM #993
MikeT, I thought I would give it a try but I couldn't find anything either. It was just a thought. I think if you do like Tom mentioned but if they aren't flat, use a DMT, then polish, pin & polish again when done.
 Originally Posted by MikeT

Looks really nice JOB! Job well done. Originally Posted by JOB15
-
-
09-21-2015, 10:40 PM #994Senior Member

- Join Date
- Jun 2015
- Location
- South Carolina
- Posts
- 1,838
Thanked: 516
I really like shiny blades and that one looks great. Sometimes I get frustrated when a pit or two is taking too long or should not be removed because of blade thickness restrictions.. but your ahead of the game if you have it in you to let a pit or two go. Originally Posted by JOB15
JOB15 likes this.
-
The Following User Says Thank You to MikeT For This Useful Post:
JOB15 (09-21-2015)
-
09-21-2015, 10:50 PM #995Senior Member
- Join Date
- Jun 2015
- Location
- South Carolina
- Posts
- 1,838
Thanked: 516
Okay thanks for checking. A place to look might be in knife making forums. I'll do a little research. Maybe wooden box/woodworking forums? Originally Posted by engine46
The search is on!
First person to find a comprehensive guide to embedding proper inlays gets a sterling silver inlay in mail! A free spin on the wheel of straight razors and a free vacation to Bermuda with Vanna White
Lol okay maybe not the vacation.
Geezer likes this.
-
09-21-2015, 11:20 PM #996Str8Faced Gent.


- Join Date
- Aug 2013
- Location
- Orangeville, Ontario
- Posts
- 8,456
- Blog Entries
- 1
Thanked: 4207
Not sure if Mike owes Tom, or I the silver, hehe. Just kidding, it's Tom.. Originally Posted by sharptonn
This tool, and the inlay template laid across the scale of the desired shape will do inlays. Seems to be what it was designed for.
I think the outer shape (template) is or was the key."Depression is just anger,, without the enthusiasm."
Steven Wright
https://mobro.co/michaelbolton65?mc=5
-
-
09-21-2015, 11:37 PM #997
Gents, if you just look online for "router template." Lots of information there.
search?p=router+template
Spend some time looking and you can come up with various Dremel adaptations.
Done it before and may do it again.
Pin Router
Outside template router
Inside template router
Guide bushing is needed for most of them.I
If you are at all handy with silver brazing they are not hard to make.
~RichardBe yourself; everyone else is already taken.
- Oscar Wilde
-
-
09-21-2015, 11:46 PM #998
MikeT, I did check a couple of knife makers supplies but didn't check out the forums. I was tired by then & I have had some other things going on today. Originally Posted by MikeT
Funny you said that Richard because I came across something like that last night but never mentioned it. Thanks! Originally Posted by Geezer
MikeB52 likes this.
-
The Following User Says Thank You to engine46 For This Useful Post:
MikeT (09-22-2015)
-
09-21-2015, 11:54 PM #999Razor Vulture
- Join Date
- Oct 2010
- Location
- Lone Star State
- Posts
- 26,151
Thanked: 8616
Thanks, Mike! I started to look through the thread for it and fell asleep! Originally Posted by MikeB52

Anyhoo, seems a template is definitely key!MikeT likes this."Don't be stubborn. You are missing out."
I rest my case.
-
09-22-2015, 12:05 AM #1000Senior Member
- Join Date
- Jun 2015
- Location
- South Carolina
- Posts
- 1,838
Thanked: 516
Dang just wrote a long one and got erased. :/ Originally Posted by MikeB52
I saw that article on this forum a while back. Was looking for something a little more descriptive, and modernized.. i.e.. Dremel and what attachments, making templates..
It will take some researching I'm sure. As I've got little knowledge yet.
Thanks Richard, I'll be looking into those. Gonna sit back and Google a bunch and read tonight. I'll start by first familiarizing myself with those tools and such. Originally Posted by Geezer
Got any pics of those you worked on?


 Reply With Quote


