
Results 981 to 990 of 4688
 13682Likes
Thread: The Butchered Blade
 LinkBack URL
 About LinkBacks
-
09-21-2015, 03:38 PM #981Razor Vulture


- Join Date
- Oct 2010
- Location
- Lone Star State
- Posts
- 26,151
Thanked: 8616 Drill the holes in the silver and make a small bevel at the top so it wedges in. Does not take much peening to attach. Grind smooth on the front and back.
 Originally Posted by MikeT
 "Don't be stubborn. You are missing out."
I rest my case.
-
The Following User Says Thank You to sharptonn For This Useful Post:
MikeT (09-21-2015)
-
09-21-2015, 06:20 PM #982Senior Member

- Join Date
- Jun 2015
- Location
- South Carolina
- Posts
- 1,838
Thanked: 516
Was looking but couldn't find a thread on how to do proper inlays.
I think there needs to be clarification:
Most the posts were about removing and re-attaching metallic embellishments. Most of the metallic scale additions of the 1900s do not seem to have been actual inlays. They were more often very thin metal decorations sitting on top of the scales. That to my knowledge is not an inlay. More of an embellishment? What's the word I'm looking for?
Anyway, "real" inlays were as we know put in with the help of a Roper Whitney Tool. We have a Dremel that should do as well if not better.. but I looked and can't find a good tutorial... something more than a few pics of old, and a basic description.
Removing metallic embellishments and re-attaching them is easy enough... but "real" inlays with no seem?
Anybody have the link? Knowledge and know how?
It would be real cool to see some of our razors with some proper inlays! You know, that extra little addition!!!You must unlearn what you have learned.
Yoda
-
09-21-2015, 06:41 PM #983Senior Member


- Join Date
- Feb 2013
- Location
- Haida Gwaii, British Columbia, Canada
- Posts
- 14,450
Thanked: 4829
If you do the basic cut out with a really tiny bit in a Dremel and the clean up the corners a little with a small chisel it should look pretty sharp and not be crazy time consuming. Slow and steady wins the race!
It's not what you know, it's who you take fishing!
-
The Following User Says Thank You to RezDog For This Useful Post:
MikeT (09-21-2015)
-
09-21-2015, 08:54 PM #984Razor Vulture
- Join Date
- Oct 2010
- Location
- Lone Star State
- Posts
- 26,151
Thanked: 8616
I will let you fellows delve into that fancy stuff.
 Maybe I will get MikeT to make me some fancy scales someday??
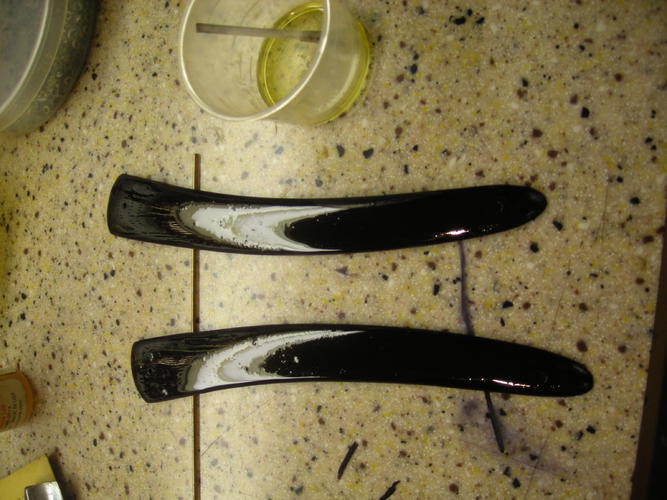
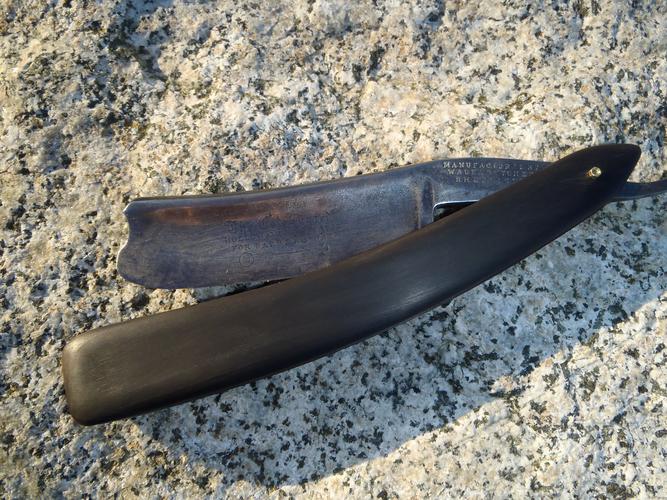
So. Being a hammer and screwdriver guy, I am keeping it simple. Rubbed my scales with a Sharpie and let that dry overnite. Then, I scuffed them with the grain of the horn with some 100 a bit, smoothed that out with fine steel wool, and slathered them with neetsfoot.
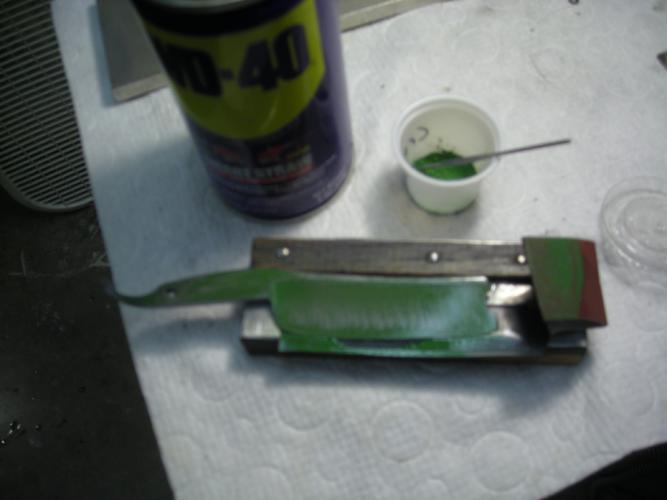
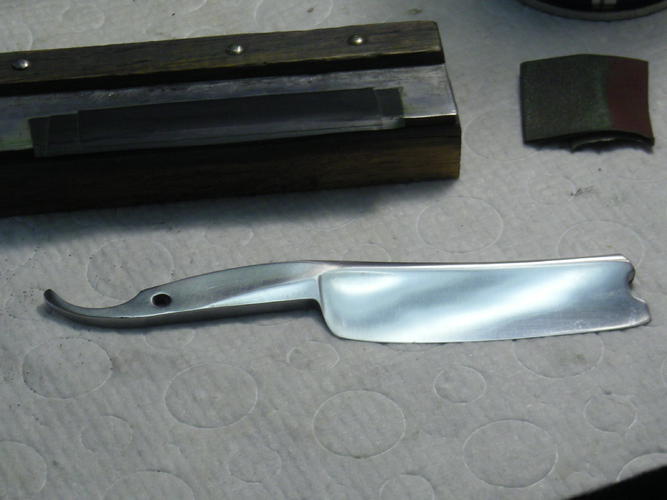
Again, not going overboard, the toe of the blade was swooped upward a bit and breadboarded/high angle honed some without scales. I hit the blade with a Dremel and Scotchbrite buffs, the medium and then the fine, after which, some CroOx powder was rubbed with a scrap of 800 crocus and WD40. Then, out to the buffer sparingly with black compound. This gives the steel an 'old' look, sort of bluish-gray instead of super chrome shiny.
I will go in this circle a few more times to get it relatively uniform while my scales soak up the oil for a day or so.
 "Don't be stubborn. You are missing out."
I rest my case.
-
-
09-21-2015, 08:59 PM #985Senior Member
- Join Date
- Feb 2013
- Location
- Haida Gwaii, British Columbia, Canada
- Posts
- 14,450
Thanked: 4829
Corian counters seem to be very popular in this thread.
Nice blade. I like the finish on it too.It's not what you know, it's who you take fishing!
-
09-21-2015, 09:04 PM #986Senior Member
- Join Date
- Jun 2015
- Location
- South Carolina
- Posts
- 1,838
Thanked: 516
Man those scales look shiny! The finish on the blade looks great! Originally Posted by sharptonn
I need to work on my blade restoring skills more. All those fancy tricks you have, the process.. I am going to have to start working with. Different finishes and such. Until that celebrate W&B, my idea of a blade finish was "just get it as shiny as possible"... I'm expanding my understanding of blade finishes.
Thanks for the tutorials, it will sink in, takes a while but I'll figure it out.You must unlearn what you have learned.
Yoda
-
09-21-2015, 09:07 PM #987Razor Vulture
- Join Date
- Oct 2010
- Location
- Lone Star State
- Posts
- 26,151
Thanked: 8616
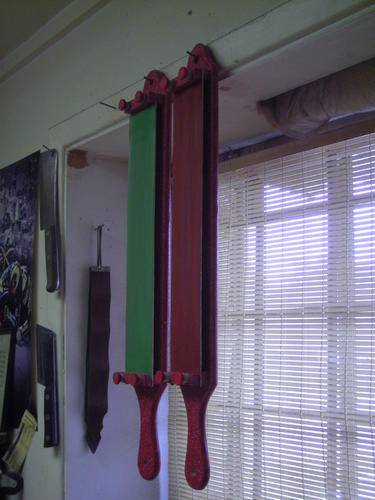
HA! There is a millwork shop behind my business, Rez! You would be appalled at how much Corian they throw away. I have a half-ton of it behind the shed at home. Great for making all sorts of things. Cutting boards, inside and out on the grill, etc.
Here are some balsa strops I made from it!
 "Don't be stubborn. You are missing out."
I rest my case.
-
09-21-2015, 09:09 PM #988Razor Vulture
- Join Date
- Oct 2010
- Location
- Lone Star State
- Posts
- 26,151
Thanked: 8616
They look shiny as they are slathered with oil, MikeT! In actuality, the finish will be quite matte as-done. Originally Posted by MikeT
Too-shiny blades look fake to me. I like to make them look 'correct' as much as I can.
My next project will be to 'tone down' a super polished turd. Should be fun!"Don't be stubborn. You are missing out."
I rest my case.
-
09-21-2015, 09:10 PM #989Str8Faced Gent.


- Join Date
- Aug 2013
- Location
- Orangeville, Ontario
- Posts
- 8,456
- Blog Entries
- 1
Thanked: 4207
So as we approach 100 pages in I just have to say,,awesome work on the beaten and bruised blades boys!
Keep it up."Depression is just anger,, without the enthusiasm."
Steven Wright
https://mobro.co/michaelbolton65?mc=5
-
The Following User Says Thank You to MikeB52 For This Useful Post:
outback (09-21-2015)
-
09-21-2015, 09:10 PM #990Senior Member
- Join Date
- Feb 2013
- Location
- Haida Gwaii, British Columbia, Canada
- Posts
- 14,450
Thanked: 4829
There are a few different ways to go with blade finishes. Here is one I did some time ago with bluing and bleach. The blade was never going to hold up to a polish of any kind and the line on the blade were already blown so I thought it was a good piece for experimentation.
I have not figured out yet how to get the scales to look very old. In time and with more experimentation I may get closer.It's not what you know, it's who you take fishing!


 Reply With Quote