
Results 2,071 to 2,080 of 4688
 13682Likes
Thread: The Butchered Blade
 LinkBack URL
 About LinkBacks
-
10-22-2015, 12:31 AM #2071
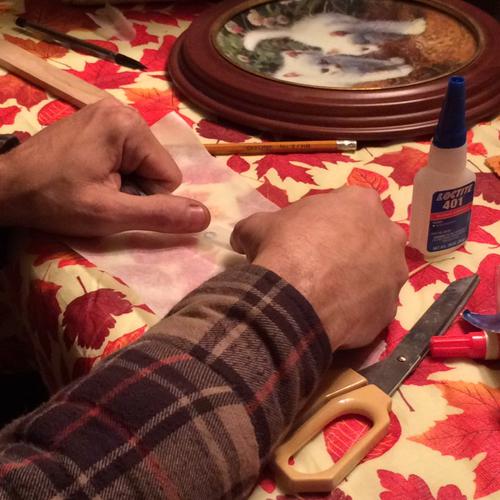
 I have used a modified electric soldering iron with a wide flat tip, like an old wax stamp, to sink the inlay into the plastic. Somewhere between 250Fº and 310Fº Takes a whole of practice with shim brass on a piece of similar acrylic. Super thin CA after that assures nothing comes up later.
 Originally Posted by sharptonn

~RichardBe yourself; everyone else is already taken.
- Oscar Wilde
-
-
10-22-2015, 12:31 AM #2072Razor Vulture


- Join Date
- Oct 2010
- Location
- Lone Star State
- Posts
- 26,152
Thanked: 8616
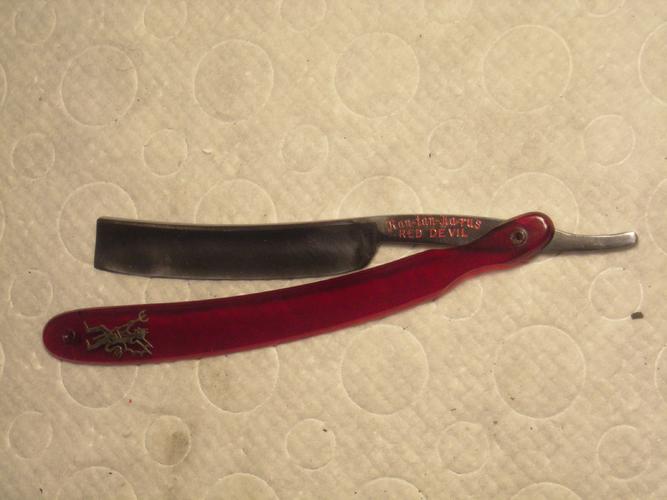
Allright. I am back
 .
.
What Ed is saying is to just do it, so I have a plan. Think I will lightly CA 1/4 of a toothpick to a larger section of the inlay near the middle for a handle to set it down with. Then, I shall experiment. Smearing some water thinly on a hard surface, setting the inlay in it, and setting it on the scale and quickly removing it to see where the water is on the scale.
Might tell me a lot. I might actually use a thin oil as well?
Enough for one day! Got the tang stamps done with an oil-based Sharpie and trimmed with a DE blade.
A mockup.....
 "Don't be stubborn. You are missing out."
I rest my case.
-
10-22-2015, 12:37 AM #2073Razor Vulture
- Join Date
- Oct 2010
- Location
- Lone Star State
- Posts
- 26,152
Thanked: 8616
Ha! Brings to mind an idea of a cookie sheet and the oven, Richard! Originally Posted by Geezer
 "Don't be stubborn. You are missing out."
I rest my case.
-
10-22-2015, 12:38 AM #2074Razor Vulture
- Join Date
- Oct 2010
- Location
- Lone Star State
- Posts
- 26,152
Thanked: 8616
Agreed, Ed. I think the inlays were definitely in the bottom of the mold on these celluloid razors. The inlays were sunken in! Originally Posted by Chevhead
"Don't be stubborn. You are missing out."
I rest my case.
-
10-22-2015, 12:40 AM #2075Razor Vulture
- Join Date
- Oct 2010
- Location
- Lone Star State
- Posts
- 26,152
Thanked: 8616
Not much happening, Bill......Just little old me providing free entertainment! Originally Posted by WW243
 "Don't be stubborn. You are missing out."
I rest my case.
-
-
10-22-2015, 12:41 AM #2076
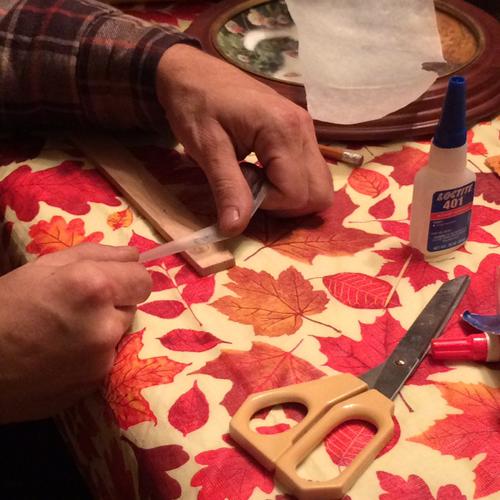
I had tried that...the scales twisted badly and shrunk a bit. I did anneal the scales after I used the heat to sink the logo into them. about four hours at 230ºF with a light weight to hold them flat. CA is much easier! Originally Posted by sharptonn
~RichardBe yourself; everyone else is already taken.
- Oscar Wilde
-
-
10-22-2015, 01:26 AM #2077Razor Vulture
- Join Date
- Oct 2010
- Location
- Lone Star State
- Posts
- 26,152
Thanked: 8616
Thanks, Mike. An Ideeer is what I need! Originally Posted by MikeB52
 "Don't be stubborn. You are missing out."
I rest my case.
-
10-22-2015, 01:46 AM #2078Str8Faced Gent.


- Join Date
- Aug 2013
- Location
- Orangeville, Ontario
- Posts
- 8,456
- Blog Entries
- 1
Thanked: 4207
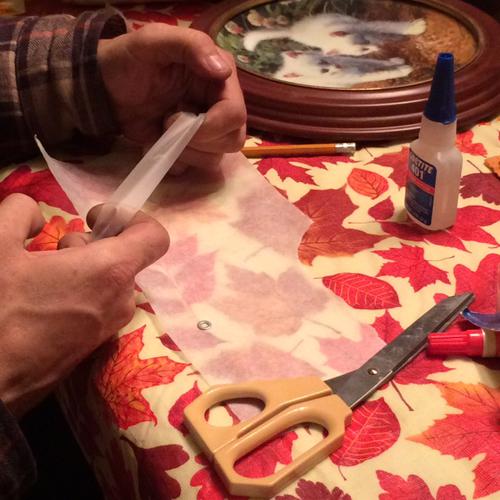
How I grab da tape
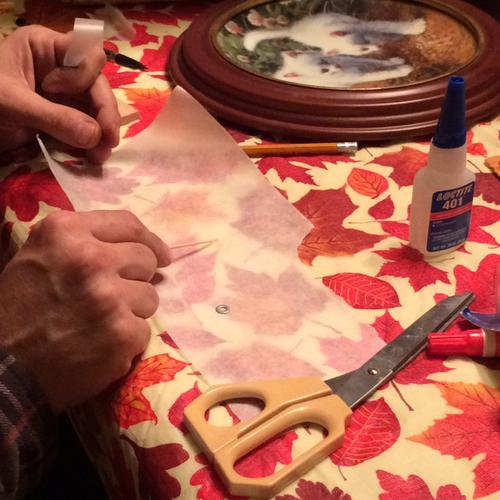
Spread the CA on some wax paper, as thin and as big a puddle to make sure the inlay is covered.
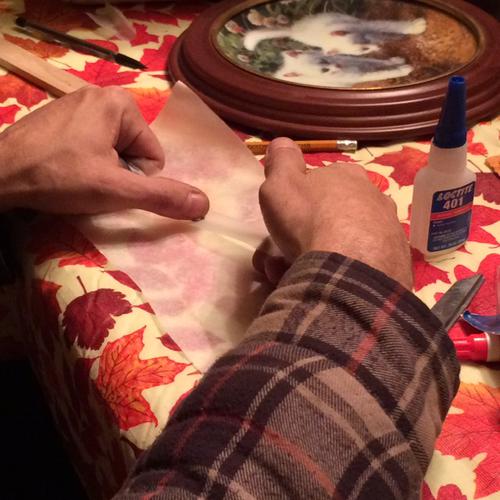
Press the tape onto the inlay
then press that straight down and back out of the ca puddle.
Transfer to scale. The cheaper cellophane tape is better, easier to see through to line it up.
Hold, or allow tape to grip the scale till ca sets up then remove and slight wipe off..
Anyway, that's my idea..
Figure you'll come up with something, or already did while I was trying to figure out how to take pics with both hands taped together, hehe."Depression is just anger,, without the enthusiasm."
Steven Wright
https://mobro.co/michaelbolton65?mc=5
-
-
10-22-2015, 02:13 AM #2079Senior Member

- Join Date
- Jun 2015
- Location
- South Carolina
- Posts
- 1,838
Thanked: 516
Mike that's a great idea! I was wondering about how to do that part. Very important step, if it's not lined up its too late.. Originally Posted by MikeB52
Good show man!You must unlearn what you have learned.
Yoda
-
-
10-22-2015, 02:21 AM #2080Razor Vulture
- Join Date
- Oct 2010
- Location
- Lone Star State
- Posts
- 26,152
Thanked: 8616
Thanks, Mike and I can see that happening with a solid inlay. Problem is any contact of the CA to the scales will lead to crazing .
This inlay is another story! If the CA is on the tape in the areas of scale contact, a mess will ensue, I think.
I see you have brought out the Fall tablecloth!
Last edited by sharptonn; 10-22-2015 at 02:27 AM.
"Don't be stubborn. You are missing out."
I rest my case.


 Reply With Quote