
Results 1,041 to 1,050 of 4688
 13682Likes
Thread: The Butchered Blade
 LinkBack URL
 About LinkBacks
-
09-22-2015, 01:33 PM #1041www.edge-dynamics.com


- Join Date
- Feb 2013
- Location
- London
- Posts
- 3,066
Thanked: 512 Great Minds
 Originally Posted by sharptonn

-
09-22-2015, 02:33 PM #1042Senior Member

- Join Date
- Jun 2015
- Location
- South Carolina
- Posts
- 1,838
Thanked: 516
Okay, wedges can be a tricky one to figure out. Just takes some trial and error. That said I'll tell you what I do. Originally Posted by JOB15
Figure out where you want your blade to sit (best done with calipers): high up then measure lower on the blade the measurement will be smaller. Sitting lower in the scales measure higher up the measurement will be greater.
Then take two measurements of the tang about equal to the length of the wedge (lets say it's half an inch).. one measurement a quarter inch in front of the pivot hole and one measurement a quarter inch behind pivot hole. This tells you your tang taper. Let's say it's a difference of 3 mm, it could be more or less depending on the blade.
This means the back of the wedge needs to be 3mm less than the front of the wedge. So when sanding, take periodic measurements often to get it right.
Next get a piece of glass. Put it on a very flat surface. Get sand paper, start with 220 and move up in grit as you get closer. Usually ending with 400 grit.
The pressure you apply is key. Put more pressure on the back end of wedge, not too much pressure. Be patient. Too much pressure will cause the surface to be not flat.
The hard surface underneath is necessary for flat surface and crisp edges.
You want the wedge to have extra space all around, and when you test fit it with a hex head nut and bolt with washers, it is then when the process of getting the edges flush begins.
Always start with a wedge of greater dimensions on every side than final product.
Edit: take care to hold the sand paper flat, masking tape works well. If the sand paper buckles or raises up then it will dull the edge of the wedge. A little ball of masking tape on top of wedge helps you hold it well.Last edited by MikeT; 09-22-2015 at 02:42 PM.
You must unlearn what you have learned.
Yoda
-
-
09-22-2015, 02:41 PM #1043Senior Member


- Join Date
- Feb 2013
- Location
- Haida Gwaii, British Columbia, Canada
- Posts
- 14,406
Thanked: 4824
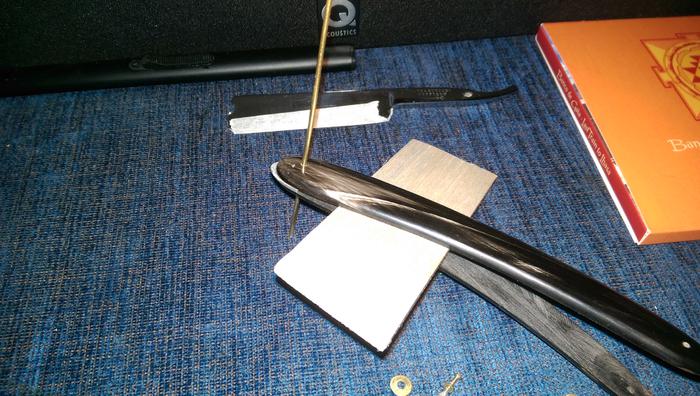
I use a similar method to MikeT, except I put my wedge to be on a small piece of wood with carpet tape. It makes it way easier to hang onto. Part of what makes sanding a wedge challenging is trying to hold it and get some even pressure.
It's not what you know, it's who you take fishing!
-
-
09-22-2015, 03:00 PM #1044Razor Vulture

- Join Date
- Oct 2010
- Location
- Lone Star State
- Posts
- 25,899
Thanked: 8591
I usually only taper one side, doublestick tape on a large tongue depressor on a disc sander. Problem with it is it seems to be all trial and error. A Pita most of the time. UNLESS I have an old one in the pile that will work. That works a treat!
 "Don't be stubborn. You are missing out."
I rest my case.
-
The Following User Says Thank You to sharptonn For This Useful Post:
JOB15 (09-22-2015)
-
09-22-2015, 03:08 PM #1045Senior Member
- Join Date
- Jun 2015
- Location
- South Carolina
- Posts
- 1,838
Thanked: 516
I tried it that way once but found it hard to take accurate measurements with my calipers, so I settled for the masking tape ball on top. That is true, holding onto it and applying the correct pressure to the side that needs it (to remove more or less) is the most challenging part. Originally Posted by RezDog
You must unlearn what you have learned.
Yoda
-
09-22-2015, 03:14 PM #1046Senior Member

- Join Date
- Apr 2013
- Location
- Rural Missouri
- Posts
- 4,981
Thanked: 972
Does anyone know how wedges were made originally? I'm guessing they were made by pouring molten lead into molds much like musket balls were cast.
-
09-22-2015, 03:17 PM #1047Razor Vulture
- Join Date
- Oct 2010
- Location
- Lone Star State
- Posts
- 25,899
Thanked: 8591
Measurements with calipers? What's that? Originally Posted by MikeT
 I am an 'eyeball' guy! HAR!
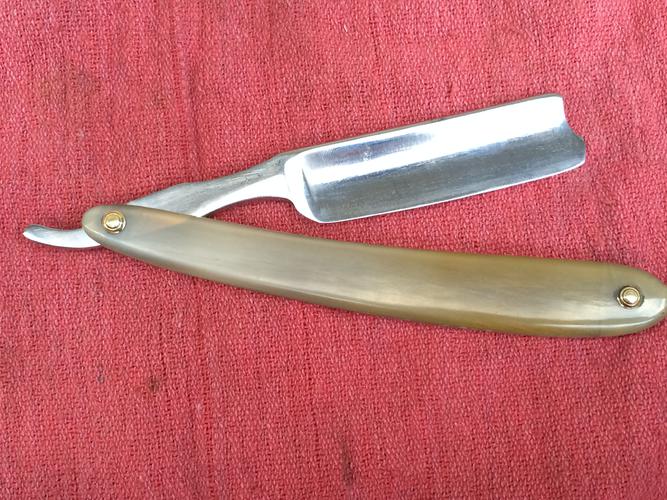
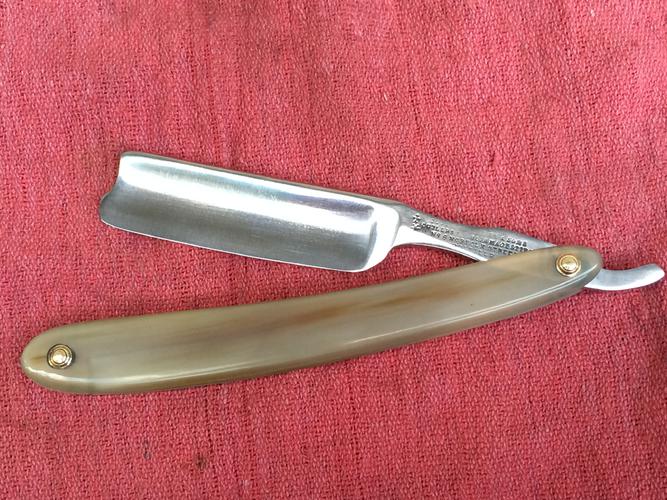
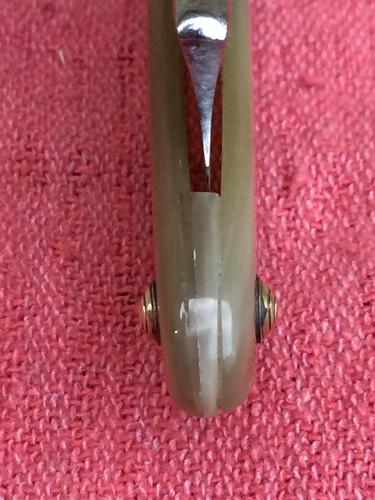
So a question for MikeB52; In using AJKenne's larger domes, I wonder if the small diameter of the inner collars he provides may allow them to sink into the horn resulting in flattening of the domes as peening? I thought about using some old inner collars of a larger size or using a thin brass spacer under them for insurance against this."Don't be stubborn. You are missing out."
I rest my case.
-
09-22-2015, 03:22 PM #1048Senior Member
- Join Date
- Feb 2013
- Location
- Haida Gwaii, British Columbia, Canada
- Posts
- 14,406
Thanked: 4824
Originally I have no idea. It is super easy to just hit lead with a hammer and make it a wedge. I do a mostly shaped with a hammer and them some minor refinement on sandpaper. It is so easy to work with it is my first choice in wedge most times. Originally Posted by Leatherstockiings
It's not what you know, it's who you take fishing!
-
09-22-2015, 03:40 PM #1049Senior Member

- Join Date
- Feb 2012
- Location
- West Midlands, UK
- Posts
- 1,263
Thanked: 360
Hope you don't mind me poking my nose in here chaps - but one thought about wedges when drilling them. If you put them on a flat surface and use a pillar drill you will not be drilling at 90 degrees. Now normally this will not create a problem but just occasionally if you have a problem blade that pulls to one side - you could also be fitting the wedge in a way that will make things worse. Originally Posted by MikeT
To avoid this I drill only when I'm happy with the wedge angle - but I drill on a wedge shaped piece of wood to get as near to 90 degrees as makes no difference.My service is good, fast and cheap. Select any two and discount the third.
-
-
09-22-2015, 04:34 PM #1050Str8Faced Gent.


- Join Date
- Aug 2013
- Location
- Orangeville, Ontario
- Posts
- 8,397
- Blog Entries
- 1
Thanked: 4200
I use the stick and tape method for wedges as well, and drill the hole true to the taper.
The smaller washers under the domes did not sink into the horn at all or negligibly. My domes stood proud on the completed works. Originally Posted by sharptonn
Please excuse the left over Mothers.. "Depression is just anger,, without the enthusiasm."
Steven Wright
https://mobro.co/michaelbolton65?mc=5
-
The Following User Says Thank You to MikeB52 For This Useful Post:
sharptonn (09-22-2015)


 Reply With Quote