
Results 1,051 to 1,060 of 4688
 13682Likes
Thread: The Butchered Blade
 LinkBack URL
 About LinkBacks
-
09-22-2015, 04:42 PM #1051Razor Vulture


- Join Date
- Oct 2010
- Location
- Lone Star State
- Posts
- 26,119
Thanked: 8612 Thanks, Rob! We welcome you and your skills here any time!
 Originally Posted by UKRob

 "Don't be stubborn. You are missing out."
I rest my case.
-
09-22-2015, 04:45 PM #1052Razor Vulture
- Join Date
- Oct 2010
- Location
- Lone Star State
- Posts
- 26,119
Thanked: 8612
Darl (Tarkus) made a big punch, slash-cut on the bottom. He says it works well for smacking a square of lead on a flat steel surface to make tapered wedges. Originally Posted by RezDog
I had thought about using a hydraulic press. Seems it could be controlled somewhat using stops or a die.
Rob has a cool setup to make wedges, I have seen it before. I think it was posted earlier on in this thread. Perhaps he will elaborate?Last edited by sharptonn; 09-22-2015 at 04:49 PM.
"Don't be stubborn. You are missing out."
I rest my case.
-
09-22-2015, 05:22 PM #1053
Yep, he does & I was the one who posted it after searching. I like it myself although there are several different ways to make one. I have used the hammer method on pieces of lead that worked out just fine. I was experimenting around the other day & thought I would try to make one flat so I got my brass piece & drilled my hole first at as close to a 90 degree angle I could. I then used a DMT diamond hone & applied pressure only on one side of it more. It seems to work out pretty good. I did it on both side since I first drilled my hole when perfectly flat. It was just an idea that popped up in my head but this was one idea of making one flat. Sandpaper on a piece of glass is pretty much the same thing or very similar. I have also done like Tom & just used my eyes to do it. MikeT seems to have the right idea of how to determine the angle of the edge. Originally Posted by sharptonn
I know I already posted this pic so I deleted it. You can see it in post 973.Last edited by engine46; 09-22-2015 at 10:06 PM.
-
The Following User Says Thank You to engine46 For This Useful Post:
MikeT (09-22-2015)
-
09-22-2015, 06:13 PM #1054www.edge-dynamics.com

- Join Date
- Feb 2013
- Location
- London
- Posts
- 3,066
Thanked: 512
Originally Posted by MikeT
Thanks for all that info.
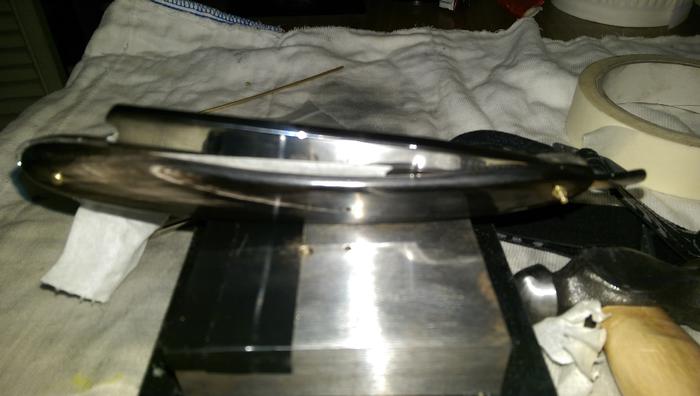
The thin wedge made it so the blade couldn't sit down as far as I wanted it to.
I will order some lead (fishing tackle) , study your post until it sinks in and then re start.
On the plus side my peening has come along.
Thanks again..
Last edited by JOB15; 09-22-2015 at 06:15 PM.
-
The Following User Says Thank You to JOB15 For This Useful Post:
MikeT (09-22-2015)
-
09-22-2015, 06:17 PM #1055Senior Member

- Join Date
- Jun 2015
- Location
- South Carolina
- Posts
- 1,838
Thanked: 516
Thank you for bringing this up. Originally Posted by UKRob
When I first joined I posted this same topic about wedge hole angle and though I explained well, it took me multiple posts to finally get someone to understand what I was talking about and grudgingly admit some merit BUT that drilling the hole bigger fixes the problem.
I admit that I do drill the hole bigger sometimes with a pin vise to not bother, but it's not ideal.
I also use a shim to drill the hole correct after the wedge taper is complete. That is a step in the process that is necessary otherwise the angle of the hole changes with sanding.
-
09-22-2015, 06:48 PM #1056Str8Faced Gent.


- Join Date
- Aug 2013
- Location
- Orangeville, Ontario
- Posts
- 8,456
- Blog Entries
- 1
Thanked: 4207
+1 to that.. All are welcome, just a few of us are quite chatty and prolific with our posts. Originally Posted by sharptonn
 "Depression is just anger,, without the enthusiasm."
Steven Wright
https://mobro.co/michaelbolton65?mc=5
-
09-22-2015, 09:20 PM #1057Senior Member

- Join Date
- Feb 2012
- Location
- West Midlands, UK
- Posts
- 1,263
Thanked: 360
I try and keep the pin hole quite snug on the wedge - the reason being that with some material that don't flex very well, the extra effort required to make sure the scales are flush against the sides of the wedge can force it back slightly if there's some play in the pin hole. This happened to me when I'd shaped the wedge with the blade mocked up with hex pins - when I did final fitting the finished wedge was short of the scales.
You know that feeling when you're not 100% satisfied - so I started with another wedge which meant unpinning etc.etc.My service is good, fast and cheap. Select any two and discount the third.
-
09-22-2015, 09:41 PM #1058Senior Member
- Join Date
- Feb 2012
- Location
- West Midlands, UK
- Posts
- 1,263
Thanked: 360
Thanks Tom. I use this Luthier's friend and door wedges depending on the angle I want - here's a couple of pictures showing the set up first and then more detail. Whichever door wedge I used for the razor wedge I then use in the pillar drill to make sure the pin hole runs at 90 degrees through the wedge. Originally Posted by sharptonn
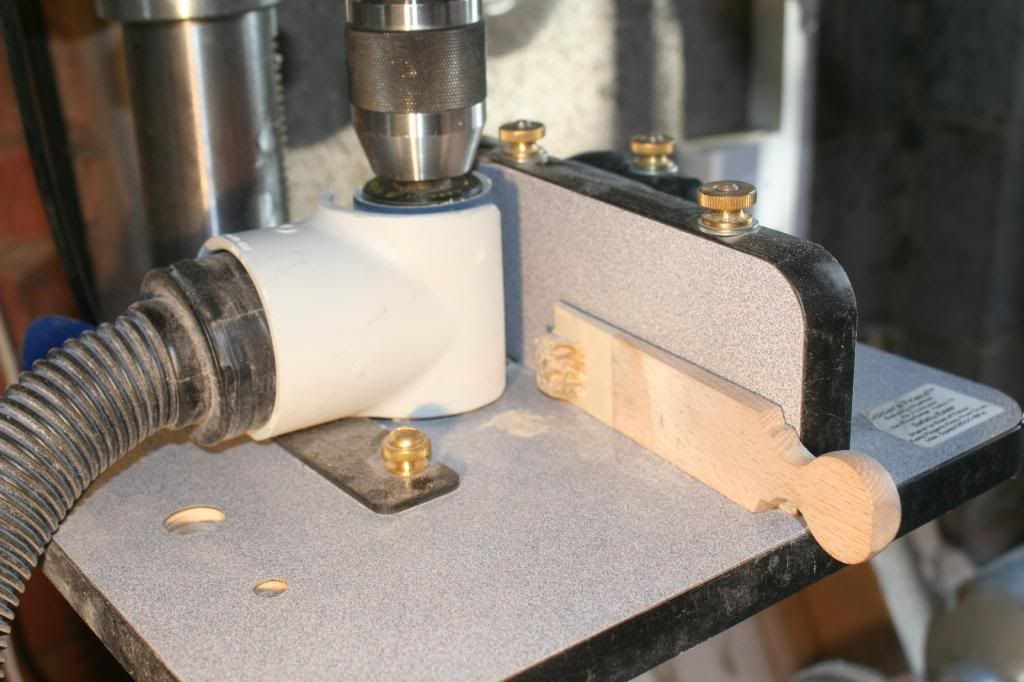
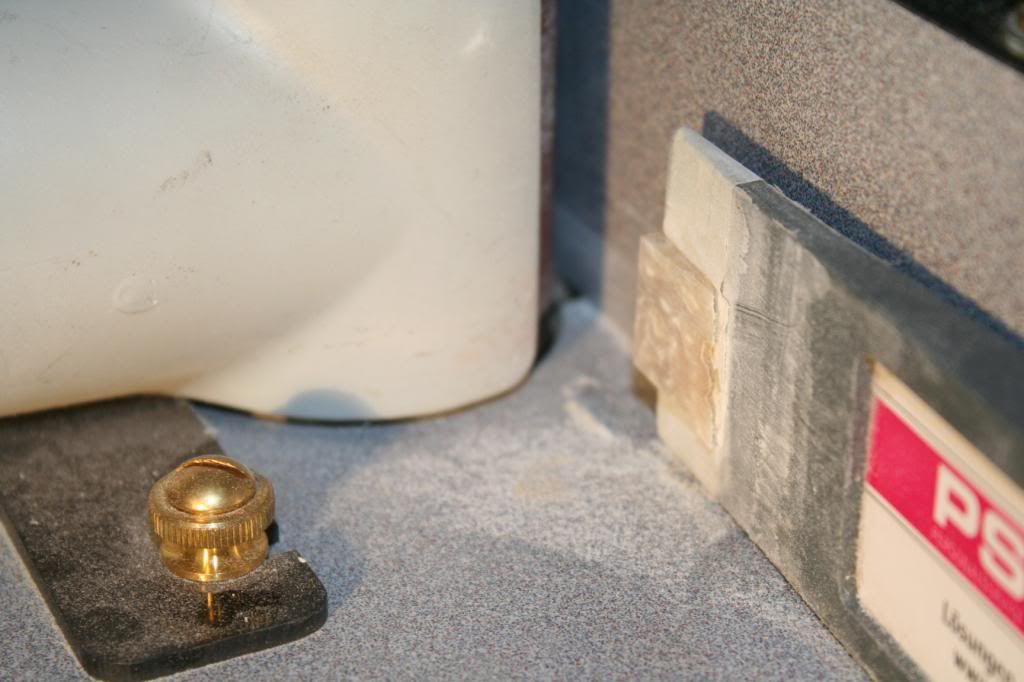 My service is good, fast and cheap. Select any two and discount the third.
-
-
09-22-2015, 09:59 PM #1059Razor Vulture
- Join Date
- Oct 2010
- Location
- Lone Star State
- Posts
- 26,119
Thanked: 8612
That looks to be a very handy attachment, Rob. It seemingly would be the real deal for making wedge ends on 'wedgeless' scales?
MikeT likes this."Don't be stubborn. You are missing out."
I rest my case.
-
09-22-2015, 10:08 PM #1060
I would thank Rob for that but I gave thanks in the post I first saw it in. Thanks again Rob! Originally Posted by sharptonn
That is a handy little attachment on his vacuum cleaner though.
EDIT: Awwwww hell, I gave him thanks again anyway. He deserves it!Last edited by engine46; 09-23-2015 at 03:52 AM.
MikeT likes this.


 Reply With Quote


