Results 13,771 to 13,780 of 20600
Thread: What are you working on?
-
08-07-2018, 01:28 AM #13771

Great work as usual Mike! I still have the pen you gave me, used up all the ink and got a replacement, had to mess with the replacement a bit because it was the wrong one but it's working well!
I'll bet those knives turn out excellent, looking forward to the finish!“You must unlearn what you have learned.”
– Yoda
-
08-07-2018, 02:04 AM #13772
-
08-09-2018, 01:48 AM #13773Str8Faced Gent.


- Join Date
- Aug 2013
- Location
- Orangeville, Ontario
- Posts
- 8,465
- Blog Entries
- 1
Thanked: 4207
Almost done. Both thumbs are bleeding, lol. Dang these are sharp. Taped up with packaging tape is NOT a good edge protector.
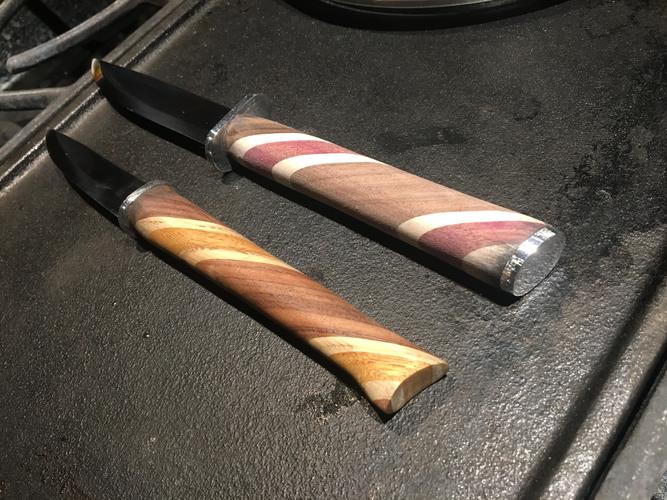
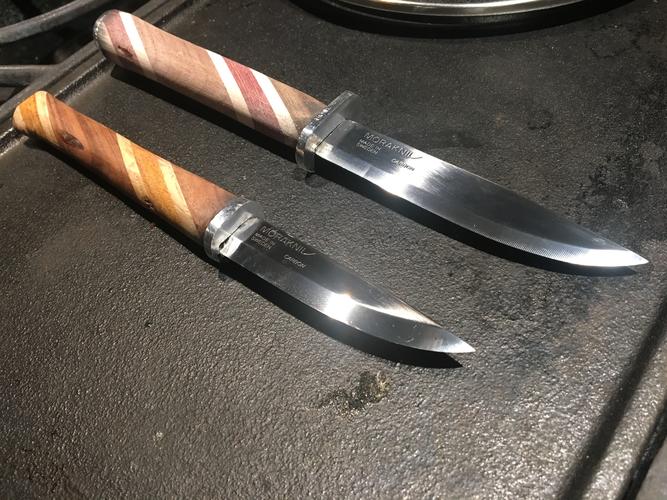
Now to try to clean the staining off them and put some finish on them..
They feel nice in the hand with just a touch of bolster edge to keep your lead finger safe..
Knife handles, not quite like scales to make....
Cheers men."Depression is just anger,, without the enthusiasm."
Steven Wright
https://mobro.co/michaelbolton65?mc=5
-
The Following User Says Thank You to MikeB52 For This Useful Post:
sharptonn (08-09-2018)
-
08-09-2018, 02:18 AM #13774

I have no idea how you did it, but the slack-belt worked a treat!
The pommel on the larger is understandable.
It's absence on the smaller one is same.
I say well-Done!
You DO still have my address?
-
08-09-2018, 02:21 AM #13775

Nice work Mike. Love the looks of those.
It's just Sharpening, right?
Jerry...
-
The Following User Says Thank You to Gasman For This Useful Post:
MikeB52 (08-09-2018)
-
08-09-2018, 02:56 AM #13776Senior Member


- Join Date
- Feb 2013
- Location
- Haida Gwaii, British Columbia, Canada
- Posts
- 14,457
Thanked: 4830
Man I miss working on stuff. The knives look good mike.
It's not what you know, it's who you take fishing!
-
-
08-09-2018, 02:58 AM #13777

Man, I am with you, Rez. All Our precious time...
-
08-09-2018, 03:34 AM #13778

Hello Pard's,
I see lots of nice work going on. I get emails from StewMac all the time & I got one of interest. They now have tinted CA. I have some coming but they have it in black, white & amber. I have tried to dye some black awhile back but it wouldn't work, even with India Ink. Here's a link to it:
https://www.stewmac.com/Materials_an...001_C_20180807
The black should be good for black horn & bakelite scales. The white should be interesting to try on ivory & bone.
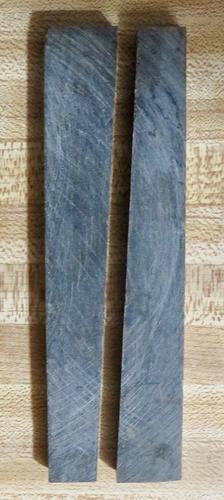
A couple weeks ago when I found that old iron in my garage, Richard asked if it would work on some scale blanks. I have some I cut out the scale shape but they are still around 3/8" thick & one of them had warped pretty good after I cut it. I tried it & to answer his question, it did work on a piece of thick scale blanks. Speaking of scale blanks, I thought i would show how I can make a set of scales out of one piece of blank. I got myself a mini table saw a short time after I got my mini drill press & it comes in really handy for cutting small things like scale blanks & other things.
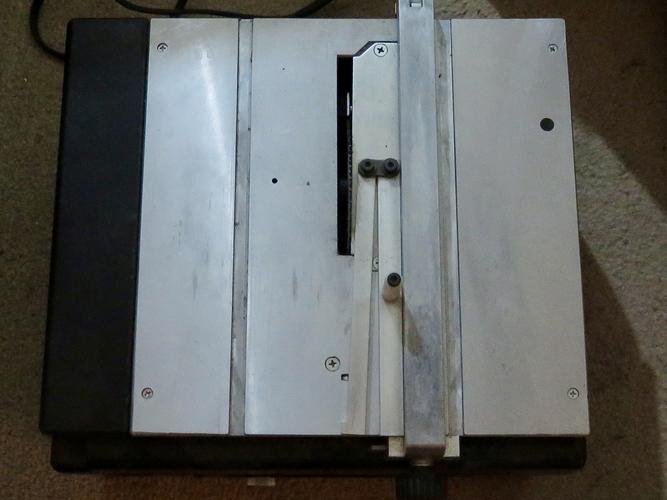
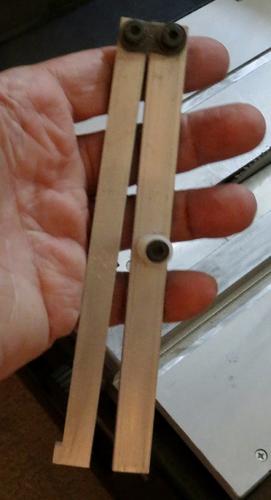
I don't cut them exactly in half but at an angle so I can still make curved scales up to a certain point, then if ya need more curve, ya have to use one whole piece per scale. The jig in my hand is for cutting the angle. It's tricky & the first scale blank I cut didn't come out even, one was bigger than the other. Just a way of not wasting horn blank material.
Notice this scale blank I cut, on the top piece, it has a high side.
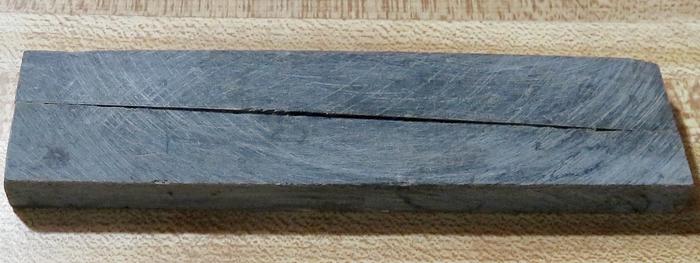
This is the same set showing how you can make a set of scales from one blank.
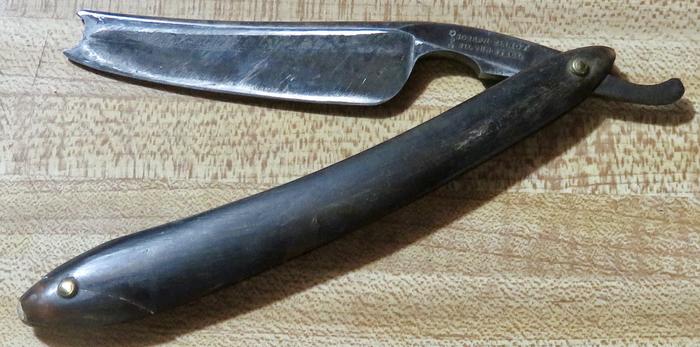
Got another tapered balde. This one is a Joseph Eliot. The guy had it for way too much but kept going down on it plus I messaged him & told him what I'd give for it & that he'd never get what he was asking. I finally got it for a good deal. Someone dropped it on the wedge end which is how I think the scales got cracked/broken. I already have it apart for repair plus that colored CA will be a test for these.
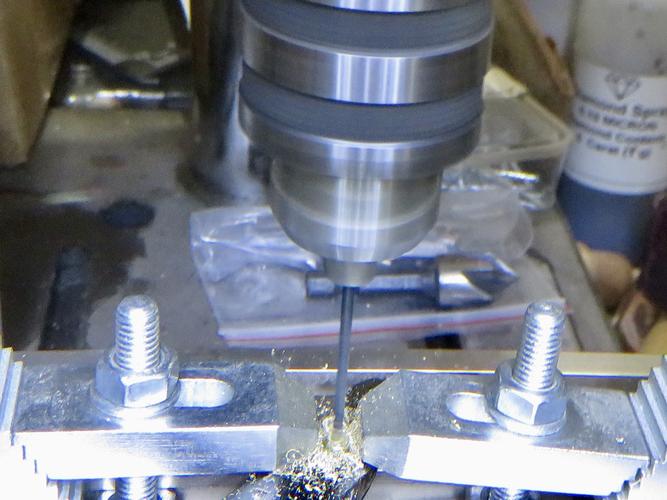
Got my trusty little drill press to do it's thing.
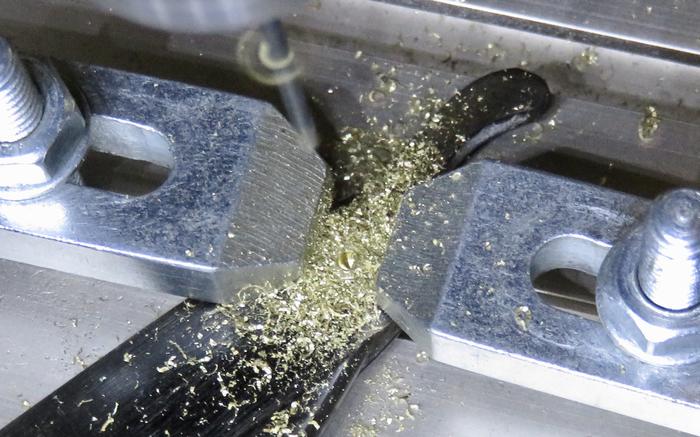
Had to edit. Two pics didn't work.Last edited by engine46; 08-09-2018 at 03:46 AM.
-
-
08-09-2018, 03:42 PM #13779

I've got a question:
When drilling out pins, what is the technique for producing the least amount of heat?
Low pressure and low rpm?
Low pressure and high rpm?
More pressure etc etc etc?
I have melted pin holes on plastic scales before..“You must unlearn what you have learned.”
– Yoda
-
08-09-2018, 06:46 PM #13780

Ive never built up that mu h heat unless i end up spinning the pin. I dont drill any other way than the lowest speed my drill press.will.go and light preasure. Always works for me.
It's just Sharpening, right?
Jerry...
-


 91543Likes
 LinkBack URL
 About LinkBacks


 Reply With Quote


