
Results 12,611 to 12,620 of 20573
 91473Likes
Thread: What are you working on?
 LinkBack URL
 About LinkBacks
-
03-25-2018, 07:37 AM #12611Senior Member

- Join Date
- Dec 2016
- Location
- Iasi RO
- Posts
- 105
Thanked: 23
Thank you.
-
03-25-2018, 06:50 PM #12612Skeptical Member


- Join Date
- Nov 2016
- Location
- Colorado Springs
- Posts
- 10,548
Thanked: 2194
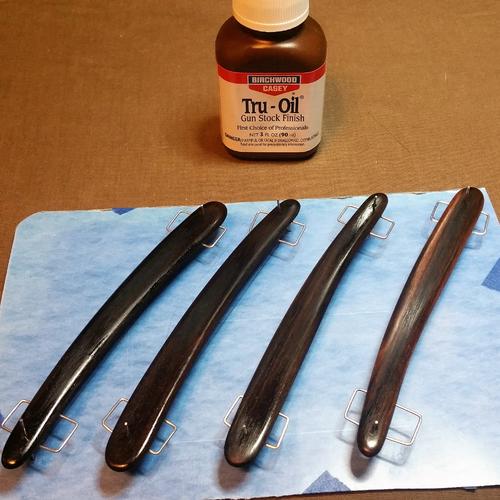
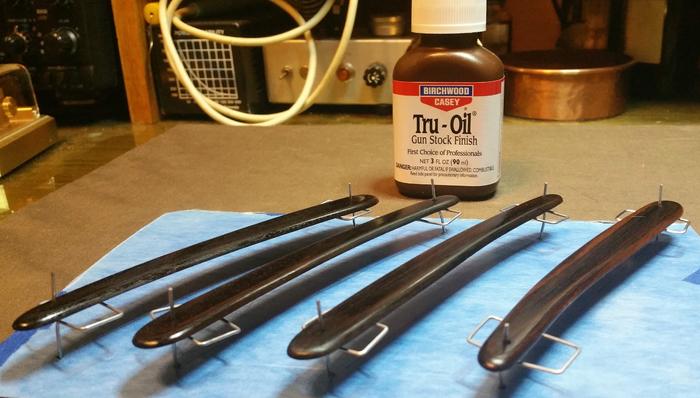
Starting the first coat on two sets of scales that will be put on the Swedish Framebacks that are on the bench. Ebony scales. One set has just a little different curve than the other set as one razor has a curved spine and the other is straight. Also made a nice little cardboard and paperclip holder for the scales while finishing. I think its going to work out great as a holder.
Thanks to Roy for the idea. I was using two-sided tape to tape them still and hold them up a little of the board. Now they can come off and be put back on.
Last edited by Gasman; 03-25-2018 at 06:52 PM.
It's just Sharpening, right?
Jerry...
-
03-25-2018, 06:54 PM #12613Senior Member

- Join Date
- Oct 2011
- Location
- Standish, Maine
- Posts
- 816
Thanked: 952
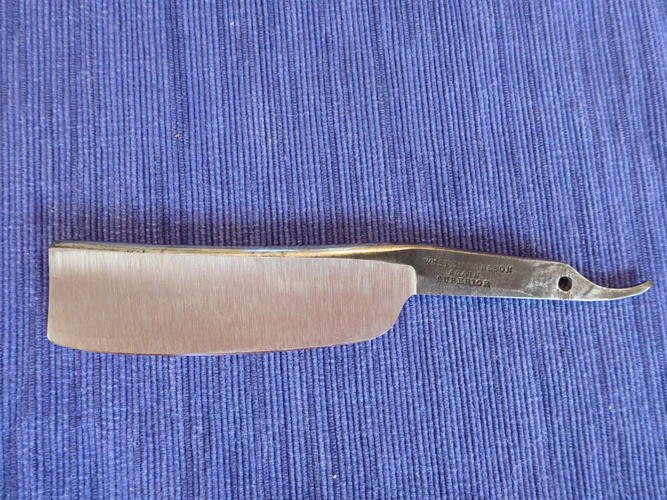
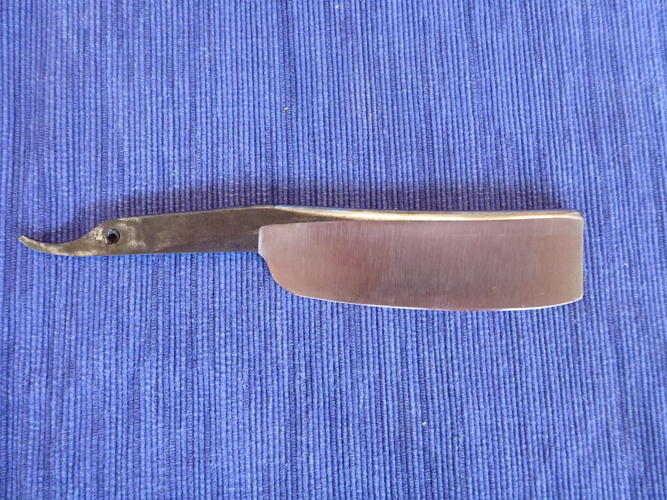
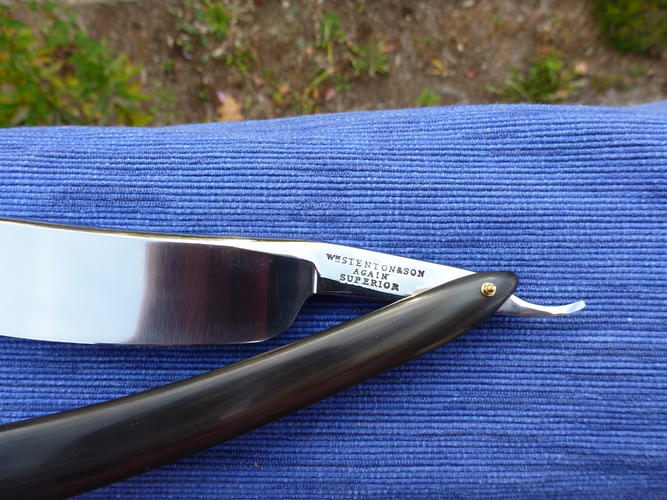
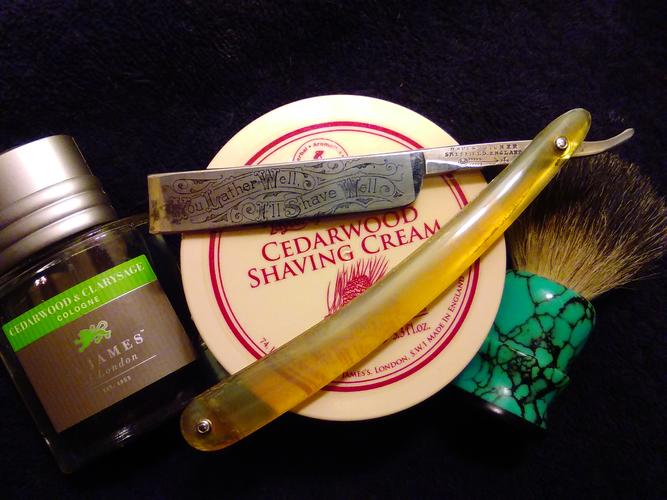
[QUOTE=RezDog;1811243]One of the truly great things about this thread is it is very motivational, other things include a lot of razor porn, skill testing questions answered, hints tips and tricks. Some time ago I starteD working on a Stenton razor. I sent it to Karl Johnson to get some rather deep marks removed. The blade was otherwise pretty nice. Karl did a bang up job on the blade. That left me with scales to work on. As it turned out the original scales were dyed black. The front one was brownish and the back one honey horn. So I made a copy of them, and was not happy with how they looked with the blade, the originals looked terrible. So I made another set, and they did not work either, so then I made a third set. The third set had issues, but I was able to modify them and make it work.
I remember that big blade. Bone scales look nice on that monster.
-
The Following User Says Thank You to karlej For This Useful Post:
Slawman (04-05-2018)
-
03-25-2018, 08:22 PM #12614Skeptical Member
- Join Date
- Nov 2016
- Location
- Colorado Springs
- Posts
- 10,548
Thanked: 2194
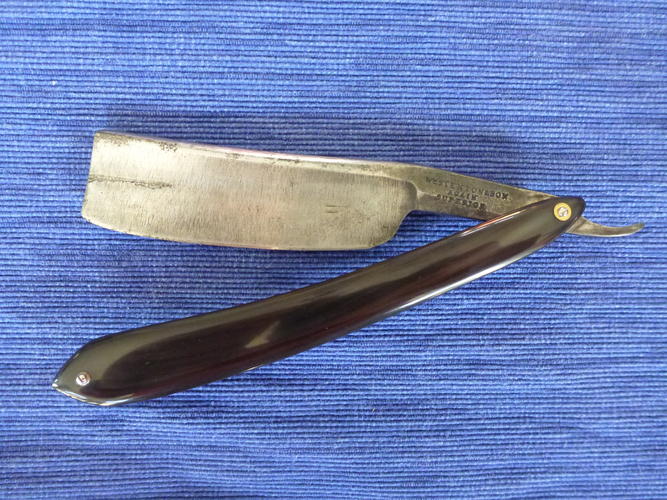
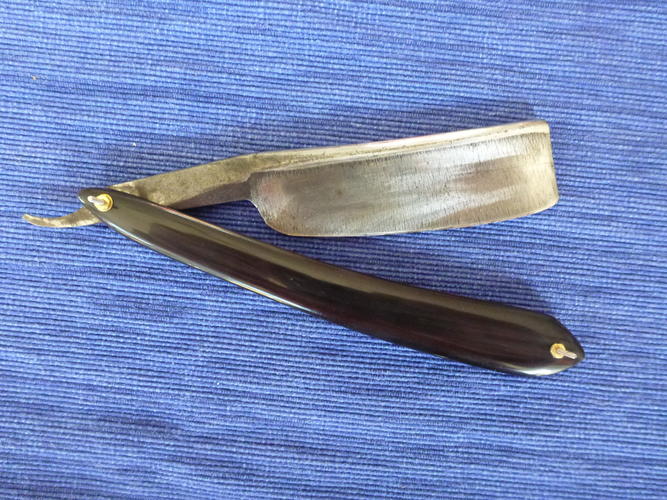
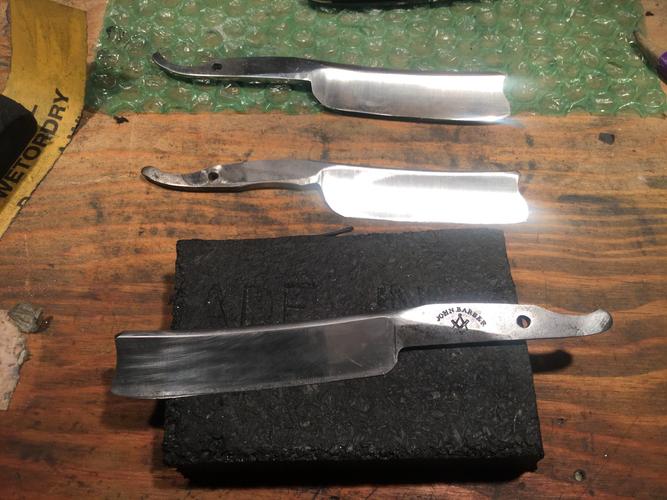
Can you tell these just came off the buffer?


Little hand work and they will be ready for new shoes!It's just Sharpening, right?
Jerry...
-
03-25-2018, 09:39 PM #12615Senior Member


- Join Date
- Feb 2015
- Location
- Duluth, GA - Atlanta OTP North
- Posts
- 2,546
- Blog Entries
- 1
Thanked: 315
Stealing the paper clip and cardboard idea for sure.
-
03-26-2018, 01:10 AM #12616Senior Member

- Join Date
- Mar 2015
- Location
- Akron, Ohio
- Posts
- 12,107
Thanked: 4313
Its been a long road, but I've reached my destination.
JP5 had a few sets of scales he wanted to try and save, so I took them on. All were honey horn, the hardest for me to repair, without noticing the repairs.
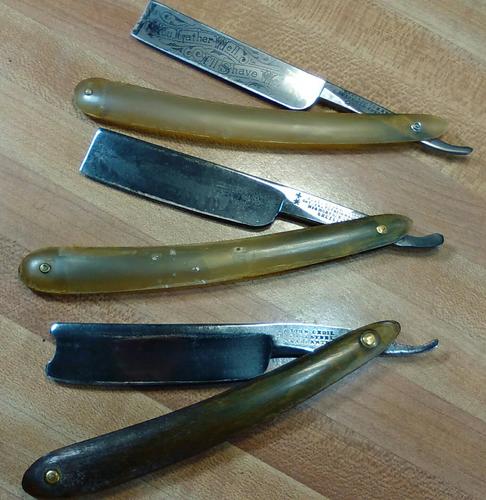
The first was a Wade & Butcher, and the easiest. A few small repairs, a soak in oil and polish, plus a honing and test shave.
The second is a John Cecil, cast steal.
I didn't think these were going to clean up, and talked with Josh about possibly going with hair dye, to save them
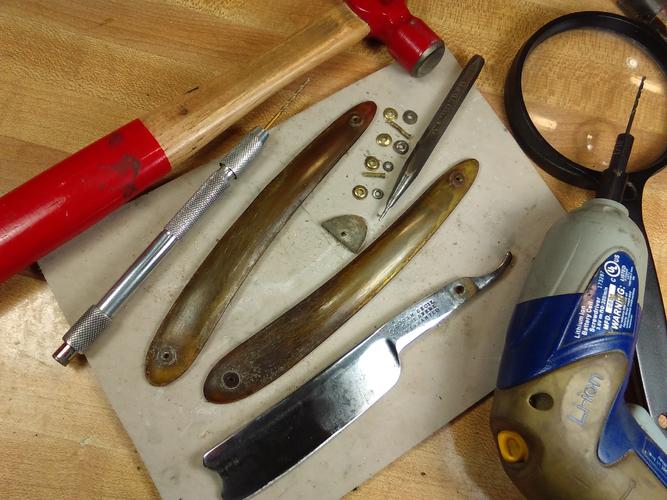
But after some sanding, grinding, filling, sanding some more, a soak in oil and polished.
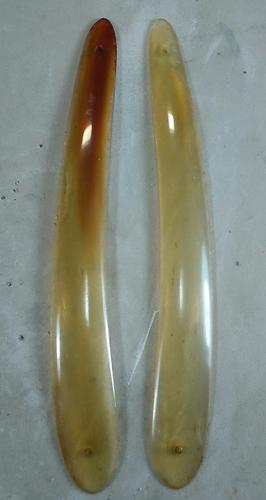
The last is a Joseph Rodgers, blade was covered in devils spit and pits, but had very good spine wear. Being a wedge, I decided to clean the blade up, as well as the scales. I couldn't get a good repair on these no matter what I tried, so I opted for the hair dye, which doesn't take to CA , but will to epoxy.
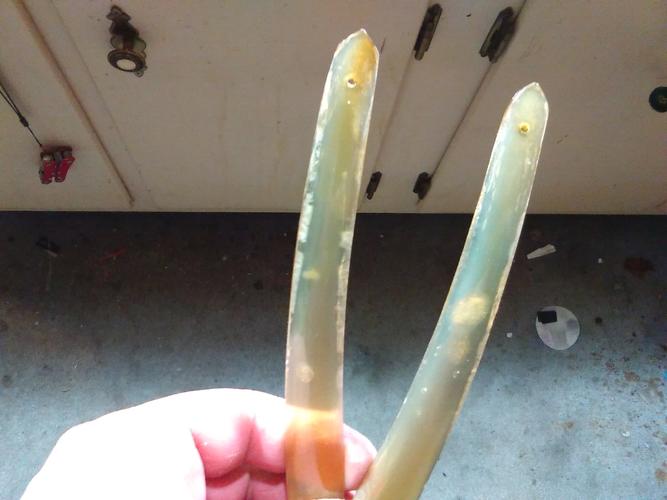
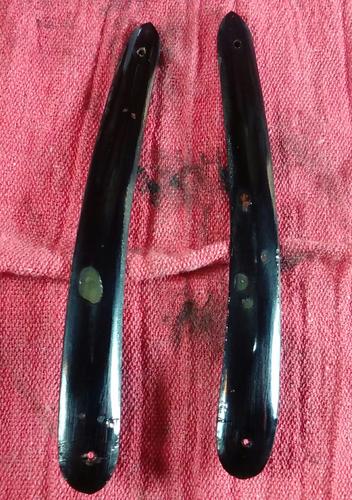
I did some more sanding, removed the CA to reveal the epoxy and put them back in hair dye.
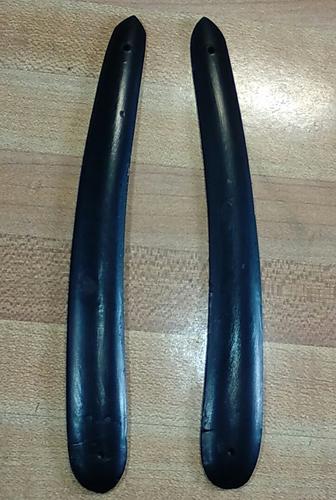
Pinned and honed last night, test shaved this morning.
 Mike
Mike
-
The Following User Says Thank You to outback For This Useful Post:
JP5 (03-26-2018)
-
03-26-2018, 01:28 AM #12617Senior Member

- Join Date
- Feb 2013
- Location
- Haida Gwaii, British Columbia, Canada
- Posts
- 14,451
Thanked: 4829
Tom sent me these blades to regrind while I was at the meet in Texas. Now comes the hand sanding portion of that job as I had only rough ground them in Texas. Next time I will look for higher grit belts and go a little further. Dave’s belt grinder has an electronic speed control and was very easy to dial down and regrind nice and slow and easy, which was very nice for a beginner.It's not what you know, it's who you take fishing!
-
03-26-2018, 01:56 AM #12618Senior Member
- Join Date
- Feb 2015
- Location
- Duluth, GA - Atlanta OTP North
- Posts
- 2,546
- Blog Entries
- 1
Thanked: 315
I was originally expecting Outback to clean them up and stabilize the horn so the damage wouldn't get worse during use. He went waaaaaaay beyond that and brought them back to life. Thank you!!!!!!!!!


-
The Following User Says Thank You to JP5 For This Useful Post:
outback (03-26-2018)
-
03-26-2018, 02:02 AM #12619Senior Member
- Join Date
- Feb 2013
- Location
- Haida Gwaii, British Columbia, Canada
- Posts
- 14,451
Thanked: 4829
Scrolling through your post Mike, I have to say good call on the hair dye, it came out nice, and the other scales are nothing short of amazing.
It's not what you know, it's who you take fishing!
-
The Following User Says Thank You to RezDog For This Useful Post:
outback (03-26-2018)
-
03-26-2018, 02:27 AM #12620Senior Member
- Join Date
- Feb 2015
- Location
- Duluth, GA - Atlanta OTP North
- Posts
- 2,546
- Blog Entries
- 1
Thanked: 315
Mike,
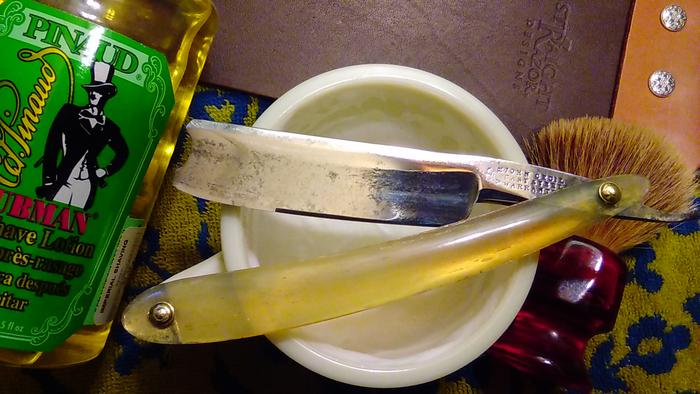
How was the epoxy work on the "Lather Well" scales? It has been a long time since I did that. Hopefully I didn't do more harm than good.


 Reply With Quote